Proctor Configured Robot Agent
Proctor enables you to create robot agent through Control Tower. Additionally, it enables you to start, stop and update the robot agent from Control Tower itself. If the Robot farm machine restarts or the Proctor Service restarts then Proctor will automatically restart the Agents running on that machine and will also restart Robots which were previously in running or idle state.
Proctor installation is part of client side installation and runs on the client side machine. Ensure that proctor is in a running state on the client machine. For more information about installation of proctor, see AE-RPA-Engage-Installation Guide.
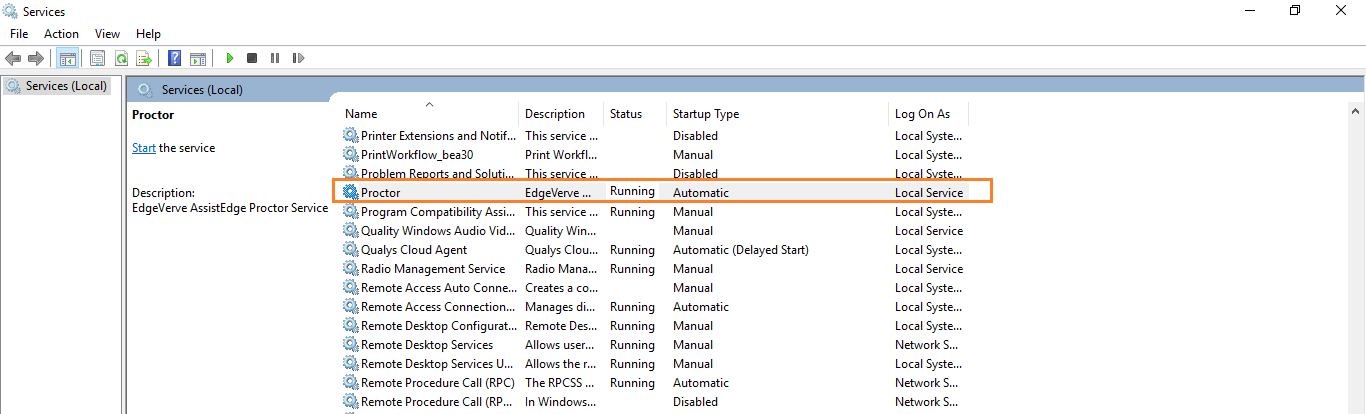
To validate whether proctor is running on the machine, navigate to Start > Administrative Tools > Services >Proctor
NOTE: |
1. Proctor should be copied and installed at a shorter path. For example, D:\Robot\Proctor. 2. Robot Agent master copy (RobotAgent folder) present at Proctor should be new and was never used to launch Agent manually from this RoboAgent folder. You can verify this by opening file \RobotAgent\Configurations\AgentConfig.xml, here AgentId should be in following format <AgentId></AgentId>. 3. Proctor allows only those security prompts where “enter” will allow remote connections. For example, during remote login a pop-up with Yes and No options are available, and default enter exits remote login then these are not supported via Proctor. 4. When Agent are created using Proctor it may take few minutes as it creates windows session, copy agent and launches it. The progress bar at the right bottom screen of control tower will disappear after 1 minute. You can check the Notification on right top of control tower for the success/ failure status. 5. If you have installed Proctor on a machine then do not create any agent via conventional way on the same machine. 6. In case, you have changed Messaging (Rabbit MQ) credentials then, you must update the credentials on proctor machine as well. For more information about updating the Messaging (Rabbit MQ), see Proctor section in the AE-RPA-Troubleshooting Guide. |
For the machine on which proctor is installed, you can perform the following actions:
Machine Level Actions - Proctor Configured Robot Agent
To perform machine level actions on which the proctor configured robot agent is installed:
1. Navigate to Machines View page.
2. Click
the  (Add
Agent) icon to add a new agent on a machine where proctor
is installed and running.
(Add
Agent) icon to add a new agent on a machine where proctor
is installed and running.
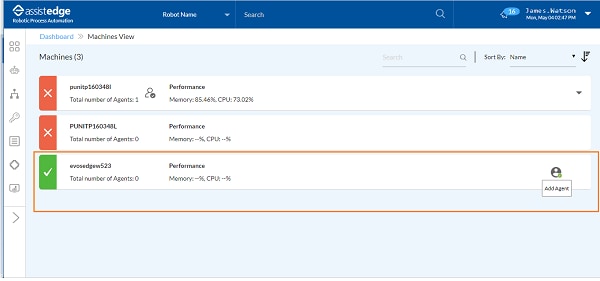
The Add Agent page is displayed. The green tick mark corresponding to any machine resembles that the machine is active and proctor is running.
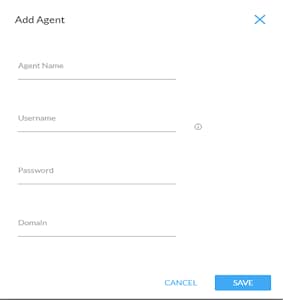
3. In the Add Agent page, enter the following details:
· Agent Name: Specify the name of Agent Name.
· Username: Specify the user details which will be used to create user session under which this robot agent will be launched.
NOTE: |
User should have remote login access to this machine. Ensure that the number of allowed user sessions on the machine are not exceeded. |
· Password: Specify the password for the above mentioned user.
· Domain: Specify the domain path.
4. Click SAVE to add the agent.
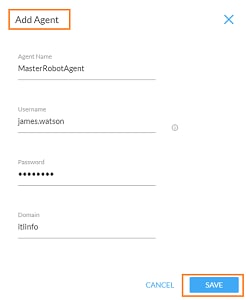
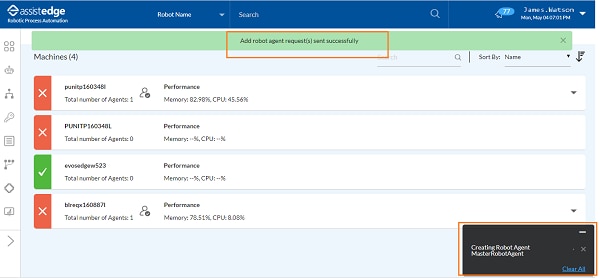
When the request is sent, a message appears as Add robot request(s) sent successfully.
NOTE: |
· Only one agent can be created under a user on a particular machine. · In case machine is restarted then proctor will automatically create the user session and will start agent under the particular user session. |
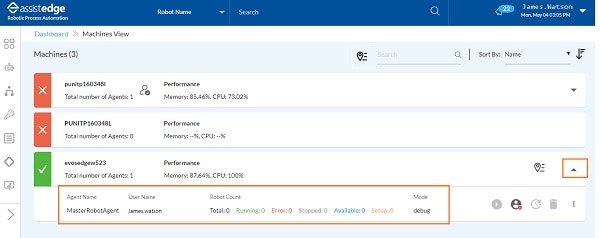
5. Once
the request is successful, proctor configured robot agent is added
to machine.  icon appears corresponding to
the machine. Click the icon to expand
and view the newly added robot agent.
icon appears corresponding to
the machine. Click the icon to expand
and view the newly added robot agent.
6. If you have enabled the machine specific attributes then, update the location specific values accordingly. For more information about configuring the machine related attributes, see Machine Specific Attributes section.
a. Click
the  (Update
Location) icon corresponding to particular machine in order
to update the machine attribute value.
(Update
Location) icon corresponding to particular machine in order
to update the machine attribute value.
§ The Update Location icon will be visible only if, you have configured the machine specific attributes. For more information about configuration related to machine specific attribute, see Machine_Specific_Attribute.
§ You can update the robot agent's location and also filter the robots as per your requirement. For more information about UPDATE_MANY_ATTRIBUTE_MACHINE.
The Update Machine Attribute window appears.
b. In the Update Machine Attribute list, select the preferred location for robot agent.
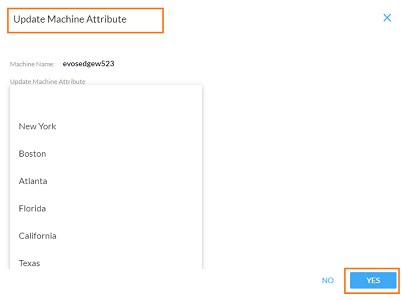
c. Click YES. The location of machine - robot agent is updated accordingly.
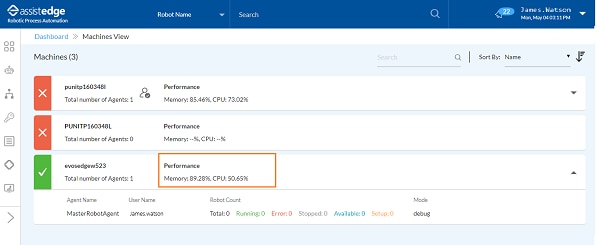
d. You can view the live snapshot for CPU utilization and Memory usage.
Agent Level Actions - Proctor Configured Robot Agent
On the proctor configured robot agent, you can perform the following agent level actions:
Starting Agent
To start an agent:
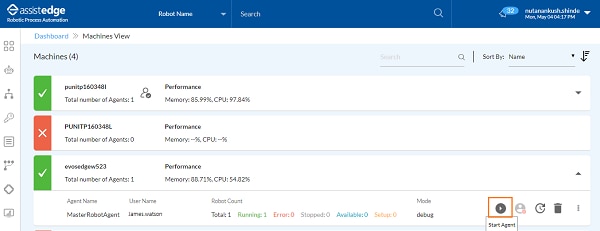
1. Navigate to Machines View page.
2. Click
the icon to expand the machine view.
NOTE: |
|
 icon corresponding to robot agent indicates
that the particular robot agent is down.
icon corresponding to robot agent indicates
that the particular robot agent is down.
3. Click
the  (Start
Agent) icon to start an agent on the machine.
(Start
Agent) icon to start an agent on the machine.
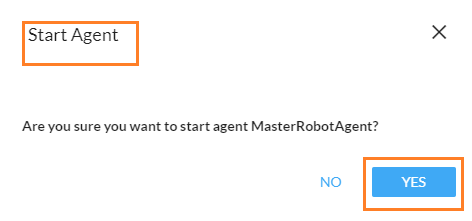
4. The Start Agent window is displayed and message as Are you sure you want to start agent <Robotname>? appears on the page. Click YES, if you want to start the agent.
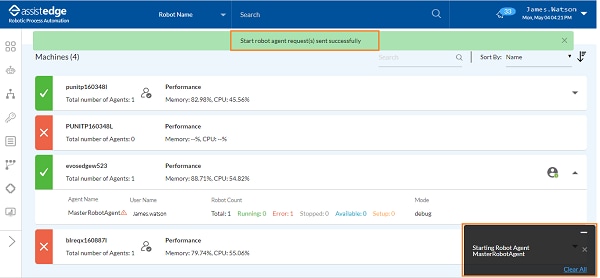
5. A request is sent and message appears as Start robot agent request (s) sent successfully.
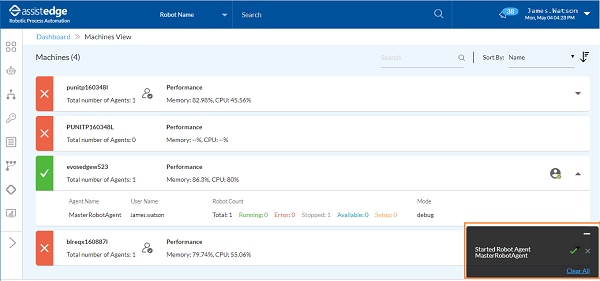
6. Once the robot agent starts successfully, a message appears as Started Robot Agent <Robot Name> on the page.
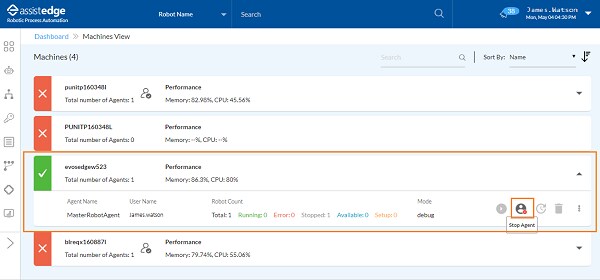
Stopping Robot Agent
To stop the robot agent:
1. Click
the  (Stop
Agent) icon to stop the running agent. Ensure that, all
robots running under the agent are stopped, before stopping the
agent.
(Stop
Agent) icon to stop the running agent. Ensure that, all
robots running under the agent are stopped, before stopping the
agent.
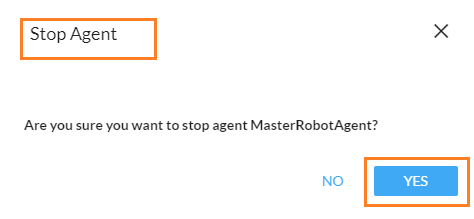
2. The Stop Agent window is displayed and message as Are you sure you want to stop agent <Robotname>? appears on the page. Click YES, if you want to stop the agent.
3. A request is sent and message appears as Stop robot agent request (s) sent successfully.
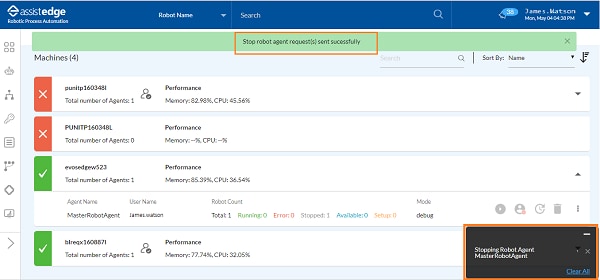
4. Once the robot agent is stopped, message appears as Stopped Robot Agent <Robot name>.

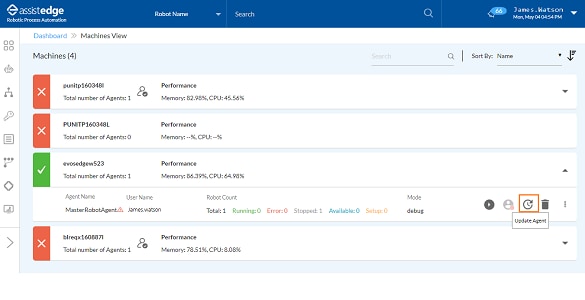
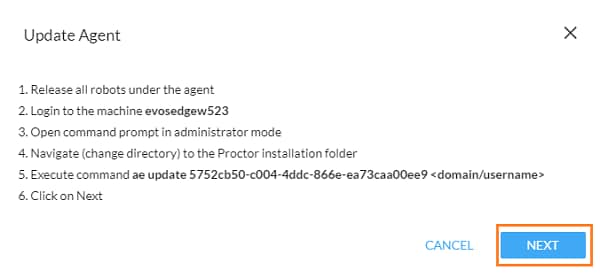
Updating Robot Agent
To update the robot agent:
1. Click
the (Update
Agent) icon to update the user credentials under which
the agent is running. Ensure that you stop the agent and all robots
running under it, before updating the agent.
(Update
Agent) icon to update the user credentials under which
the agent is running. Ensure that you stop the agent and all robots
running under it, before updating the agent.
2. The Update Agent window is displayed and prompts to perform certain actions on the machine where the proctor is installed. After performing these activities, click NEXT.
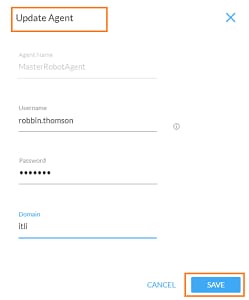
3. Then, Update Agent - user detail page appears, update the user details such as Username, Password and Domain. Click SAVE.
4. Then, a request is sent and message appears as Update robot agent request (s) sent successfully.
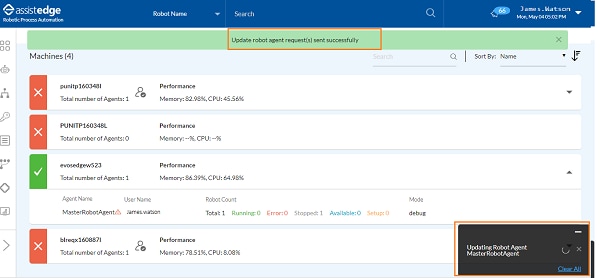
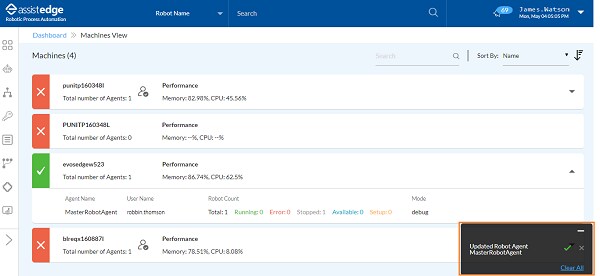
5. The robot agent is updated, and message appears as Updated Robot Agent <Name of robot agent> on the page. Once the request is successful, robot agent's username is updated and it starts running under the different (newly updated) user.
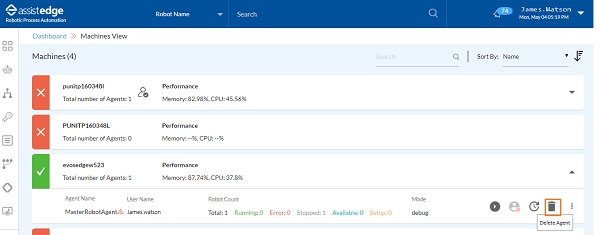
Delete Robot Agent
To delete the robot agent:
1. Click
the  (Delete
Agent) icon to delete the agent from the machine. Ensure
that you have stopped the agent and deleted all the robots running
under it, before deleting the agent.
(Delete
Agent) icon to delete the agent from the machine. Ensure
that you have stopped the agent and deleted all the robots running
under it, before deleting the agent.
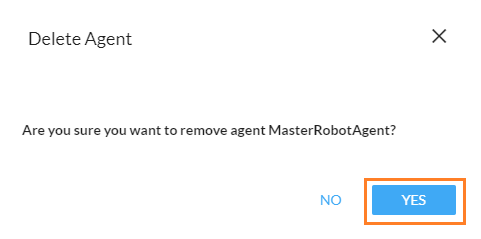
2. The Delete Agent window is displayed and message as Are you sure you want to delete agent <Robotname>? appears on the page. Click YES, if you want to delete the agent.
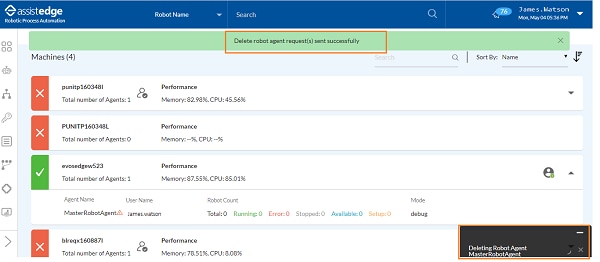
3. A request is sent and message appears as Delete robot agent request (s) sent successfully.
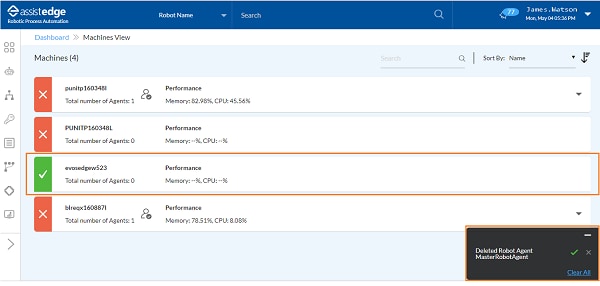
4. Once the robot agent is deleted, a message appears as Deleted Robot Agent <Robot name>.
For more information about changing the robot machine mode,
see Change Mode
section in the Machine View.
On This Page Hide
Related Topics