The User Interface
When you login to the Engage client, you can see the configured dashboard along with the options that are easy to access, understand, and facilitate different functionalities available in client.
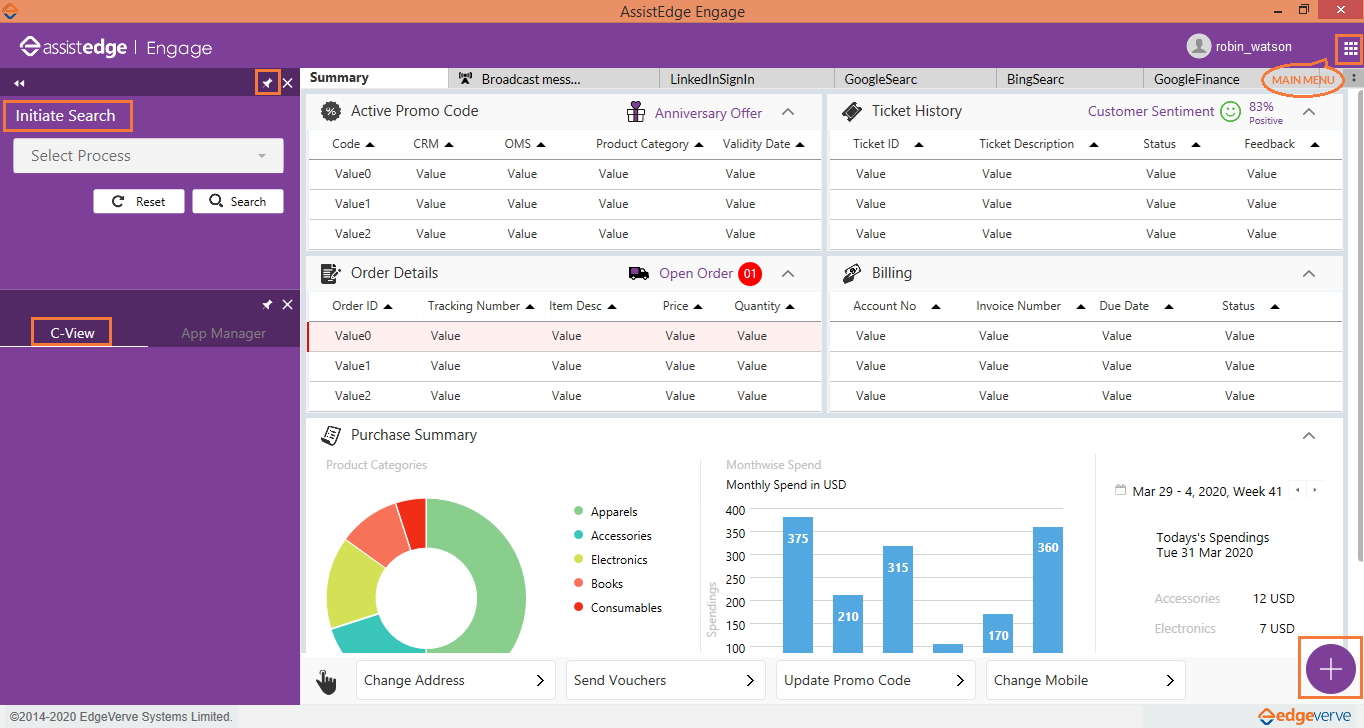
The Engage layout page is divided into following sections:
- The left panel consists of:
- The right area is the Engage usage area. It consists of:
- The icon
 at the bottom-right consist of :
- The icon at the upper-right is:
These features are explained in detail in the following sections.
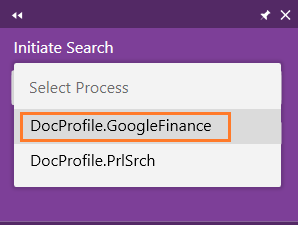
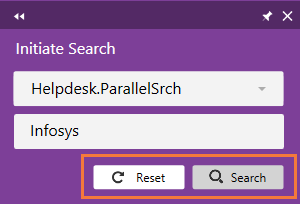
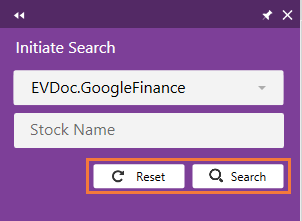
Initiate Search
The process automation can be triggered using this feature. An automation process (initiate search) searches data in the application and this data is extracted in the Customer view (C-view) section.
To initiate process automation:
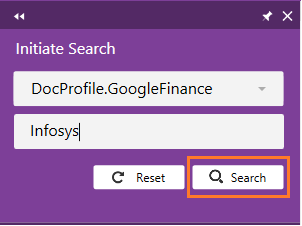
- Select the process from the Select Process list.
- Enter the inputs to the process in the text box or the search criteria for the process (For example, Stock Price), and then click Search.
Search and Reset Behaviors
This section explains the behavior for the Reset and Search button as mandatory and non- mandatory processes. You have the option to enable or disable the Search button depending on your requirement.
Enable or Disable Reset as Mandatory Process
Based on the configuration set by the administrator, you can see either of the search functionality mentioned below:
- The Search and Reset buttons are disabled when the search is in progress. Once the search is completed, the Reset button is enabled. However, the Search button is enabled only after reset is initiated, and the process completes the reset operation for all the applications.
- The Search button is disabled when the search is in progress. However, the Reset button is enabled.
As soon as the search is finished, Search button is enabled and again the primary button is the Search button. While the search is in progress, to stop the search and bring all applications to their initial stage, click Reset button.
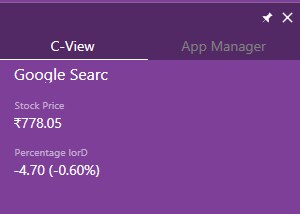
C-View (Customer View)
C-View fields are pre-configured. It displays the most frequently looked-up customer fields in one view. Once the process is selected in the Initiate Search tab and the inputs are entered, click the Search button to trigger the automation. Once the search is complete, the C-View fields are populated with the required details.
- It reduces the effort required to look up for the required customer information from across multiple applications.
- the results are displayed in the applications for which the search is performed.
- The green tick mark against an application indicates that the search is successful, and data is fetched.
![]()
|
NOTE: |
You need to click the Reset icon to be able to perform another search. This resets the state of the applications and brings them back to the initial state before the search. |
App Manager
All the applications are listed under Application Manager tab.
|
Icon |
Description |
|
Unload |
Select the application that you want to remove from the dashboard, and then click the Unload Apps icon. |
|
Reload |
Select the application that you want to launch, and then click Reload apps icon. The application opens; however, the current application data get overwritten upon reload. |
|
Restore |
Select the application that has to be restored. The Restore option resets the application and brings it back to its initial state. |


Summary
The Summary or the dashboard view gives you a 360-degree view of the customer, giving the complete customer context. It is customized to display the consolidated information of the customer across multiple applications. You have an easy access to the transaction history of the customer saving time for navigating different applications. It saves a lot of your time and hold time of a customer.
MAIN MENU
There are several options available under the MAIN MENU.
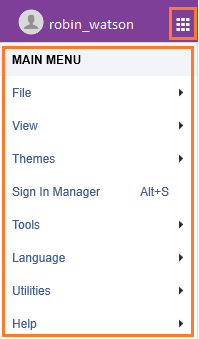
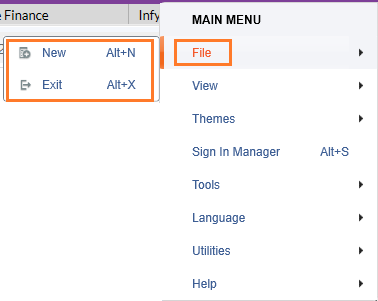
File
Navigate to MAIN MENU > File. The available options under the File menu are:
- New - Using this feature, you can have multiple instances of Engage running at the same time.
- Update the credentials or sign in with different credentials.
- Launch a new Engage window.
- Exit - Use this to exit from Engage. A confirmation message appears. Click Yes to exit the Engage client. Click No to cancel the operation.
View
Navigate to MAIN MENU > View. View option is used to dock/undock applications in the application container (Engage User Interface). The available options under the View menu are:
- Summary - dock the Summary page.
- Restore Default Layout - restores the default layout of the UI.
- <App_Name> - select the required application to dock it in the application container. This is helpful when you have a too many applications.

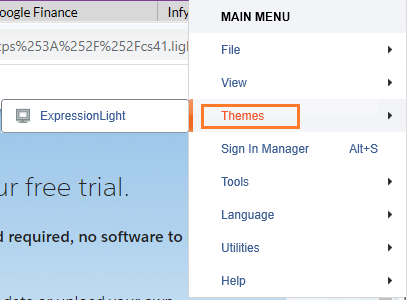
Themes
Navigate to MAIN MENU > Theme > ExpressionLight to change the settings. This option is used to personalize the Engage UI according to your choice.
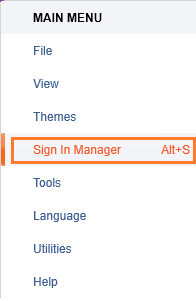
Sign in Manager
Navigate to MAIN MENU > Sign In Manager. This feature is used to manage the user credentials of an application.
- Update the Sign in credentials.
- Re-launch the applications.
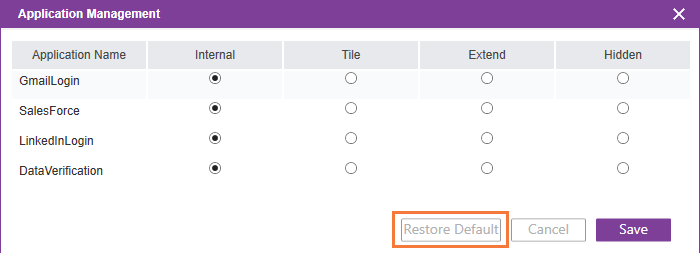
Tools - Application Management
Navigate to Tools > Application Management to personalize the application layout in the UI.
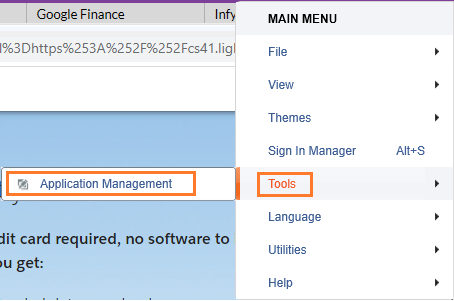
This feature is designed for a unified and simpler view of multiple applications. The system allows you to do the following:
- Internal - Internal is the default view of applications. Select the Internal option for the application to have it in its original position within the Application Container. (Engage User Interface)
- Tile - This option docks an application within the dashboard, but outside the application tabs section.
- Extend - This option is used to extend the applications from one machine to another.
Scenario: Two desktops are being used for business. The requirement is to extend the desktop applications to another desktop.
Solution: Use the Extend applications feature. Navigate to Menu > Tools > Application Management.
Alternatively, right-click the application tab, and then select Float to extend an application. The application opens in the separate window. Selected applications are displayed in new windows, which can be extended to a different monitor/desktop. - Hidden - Select this option for the application you want to hide. You can unhide the applications anytime by clearing the selection. Alternatively, you can click Restore Default to go back to the original view.
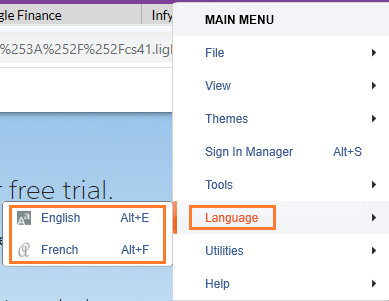
Language
Navigate to Main Menu > Language to change the language settings. Depending on the requirement of your organization, you can customize the language of your choice.
Once you select the language, a confirmation pop up message appears as The application restarts, do you want to continue?.
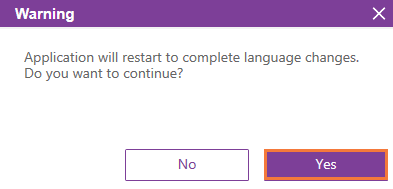
Click Yes to relaunch the application. It saves the language preference. You can switch back to English at any point in time.
Once you change the language, the available labels and buttons are automatically translated to create a localized experience. However, below is the list of labels that will not be translated. These labels/content are always displayed in English.
- Text on the splash window that comes before data privacy pop-up.
- All the numbers, for example Applications Count (Number) on Sign in manager.
- C-View fields, Application names, Profile names, Process names, Input dialog box, Message box.
- Guided Scripting Process Data.
- Any data coming from services/database.
- List of shortcuts shown when user clicks Menu > Utilities > Shortcuts. For example, Alt+S
- Copyright shown on the footer.
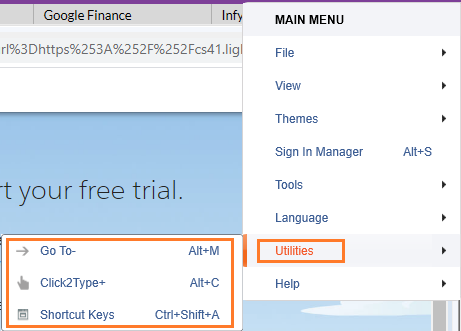
Utilities
Knowledge Base, Go To, Click2Type+ and Shortcut Keys are the out-of-the-box features of Engage and are available under the Utilities tab. You can use these features for the following:
- Access Knowledge Base
- Search a Query within AssistEdge Engage
- Click to type+
- Use the Shortcut Keys
Knowledge Base
This feature helps you to refer to documents available in the SharePoint and solve customer queries more efficiently. For more information, see Knowledge Base.
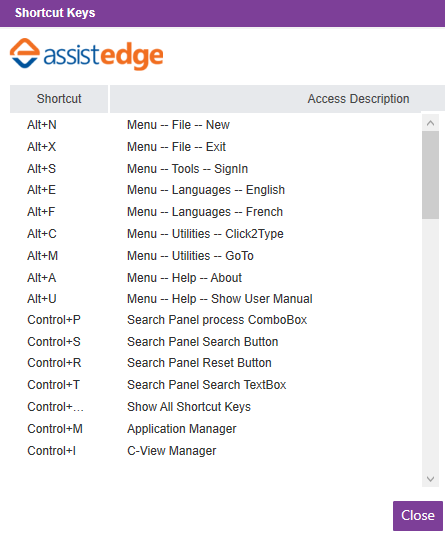
Shortcut Keys
You can use the pre-configured shortcut keys by navigating to MAIN MENU > Utilities > Shortcut Keys to access the applications or menu options in Engage. For example, Use the shortcut key Alt+C to open the Click2Type+ window.

Using shortcut keys reduces the time consumed in switching between applications. The shortcut key combinations for the applications can be customized by admin.
Alternatively, use the shortcut CTRL+SHIFT+A to open the shortcut keys table.
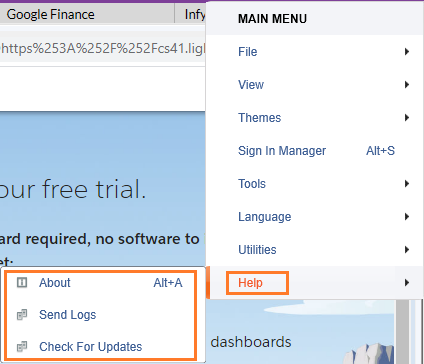
Access Help
Navigate to MAIN MENU > Help to:
- Know about the product - Click About to view the product information like product name, version and the copyright notice.
- Send logs - Click Send Logs, if there is an error. The system composes an email with the logs as an attachment and Engage client screenshot as the email body. Send it to the system administrator or the support team. They will get back to you.
- Check for updates - Click Check For Updates to see the details of latest updates/patches. If there are any patches done on the server while you are logged in, you can manually click Check For Updates and run the patches yourself. If the patches are done while you are not logged in, by default you get a prompt saying that there is a patch, if you would like to update.