The User Interface
ROI Analytics contains multiple tabs and panels for easier access to specific functionalities. Once you log in to the ROI Analytics, the home page is displayed.
The ROI Analytics interface comprises of following:
Top Bar
Top bar displays the company logo, name of screen, and user setting icon at the top right corner.
When you click on the Company Logo or Robotic Process Automation text, you are directed to the company website.
User settings
Using the  (User settings) icon available at the top right corner, you can modify the settings for ROI Analytics. Depending on the assigned role, you can change the settings as per preference.
The User Settings allows you to perform the following actions:
Language
The script for the ROI Analytics can be updated using the change language option in the user settings.
|
NOTE: |
By default, there will not be any language options available. You are required to perform configuration to get the language options. For more information about Language configurations, see language section in Control Tower. |
To apply language:
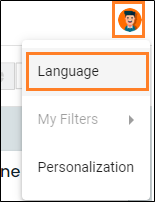
- Click the
 (User Settings) icon and then, click Language.
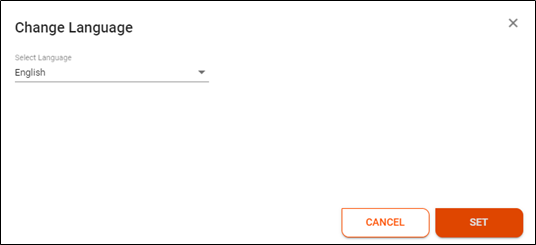
The Change Language window appears.
- From the Select Language list, select the preferred language from the available options.
- Click SET.
My Filters
My Filters show the already created filters in the preference > Filter Tab. For more information about filters or creating a new filter, see the Filters section. Click My Filters > select the preferred filter and then, the Automation program Insights appears as per the applied filter.
Personalization
The ROI Analytics can be updated using the personalization option in the user settings. Personalization window contains two tabs which include Cards and Widgets. You can enable or disable the cards or widgets as per preference. You are required to enable at least two cards and widgets each in the Automation Program Insights.
To enable Cards/Widgets:
- Click the
 icon on the top bar.
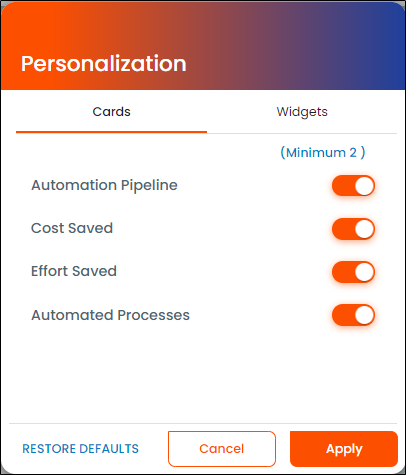
The Personalization page appears. - In the Cards/Widgets tab, select the option for which you want to apply the filter. Accordingly, move the toggle button towards ON or OFF to enable or disable the particular filter.
- Certain configurations are set to ON by default. However, you can change the configuration as per your preference.
- You must select at least two cards or widgets options.
3. Click Apply.
OR
Click RESTORE DEFAULT to restore the previous changes or retain default changes.
To apply personalization:
- Click the
 (User Settings) icon and then, click Personalization.
The Personalization window appears.
Following table explains the personalization:
| Fields | Description |
|
Cards |
|
| Automation Pipeline | Enables the automation pipeline |
| Cost Saved | Enables the cost saved option for the automation pipeline. |
| Effort Saved | Enables to save the efforts specified in the ROI analytics |
| Automated Processes | Enables the ROI analytics for the automation process |
|
Widgets |
|
| Cost Savings Distribution | Enables the cost-saving distribution in the widgets |
| Cost Savings Trend | Enables the cost-saving trend in the widgets |
| Effort Savings Distribution | Enables the effort savings distribution in the widget |
| Effort Savings Trend | Enables the effort savings trend in the widget. |
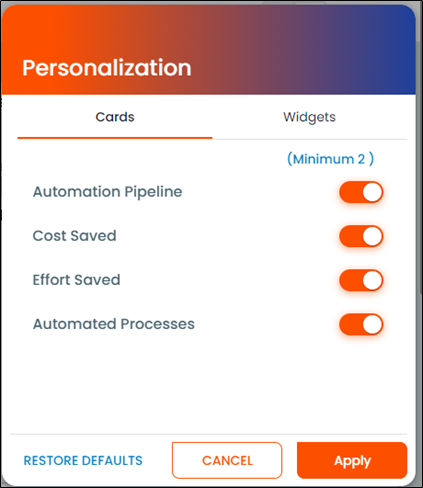
- In the Cards/Widgets tab, select the preferred option. Accordingly, select the preferred settings by moving the toggle button towards ON or OFF to enable or disable configuration.
Certain configurations are set to ON by default. However, you can change the configuration as per your preference.
|
NOTE: |
In the Cards/Widget Tab, you are required to select minimum 2 settings. |
- Click Apply to set the settings for the ROI analytics.
OR
Click RESTORE DEFAULTS, to restore the default settings.