Win Popup Handler
This is an advanced pop up handler that allows you to automate the actions you want to perform on a popup dialog window that appears in front of the web and excel application. Most of the pop ups except the ones related to security can be automated using this activity.
|
NOTE: |
|
Prerequisite: Configure Web/Excel Application
You must configure the required application in Automation Studio before you start configuring the steps of automation process workflow. This establishes the connection between the intended application and Automation Studio to perform the automation.
Below are the minimum required properties for configuring a web or the excel application. If you want to define remaining properties, refer WebApps and ExcelApps for web and excel applications respectively.
To configure web application:
- In the Admin menu, add an application of Application Type- WebApps. The mandatory fields are highlighted with red box.
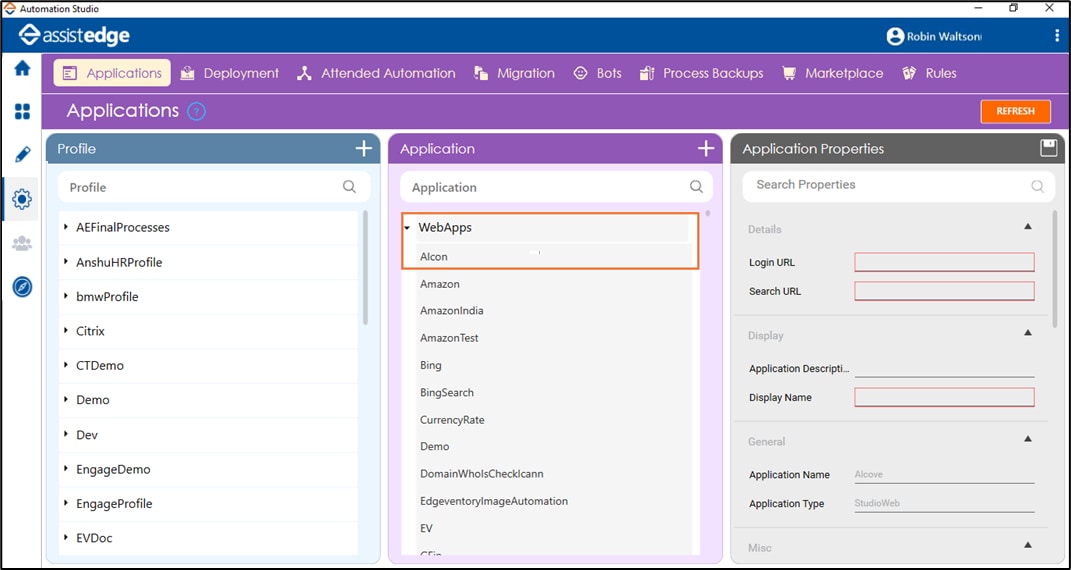
- In the Application Properties panel:
- In the Login URL field, enter the login URL of the web application you want to access.
- In the Search URL field, enter the URL of the page where you want to perform the automation post login.
- In the Display Name, enter a desired name of the web application.
- Click the
 (Save Properties) icon to save the application.
The WebApps application is configured.
To configure excel application:
- In the Admin menu, add an application of Application Type- ExcelApps. The Add Application dialog box opens.
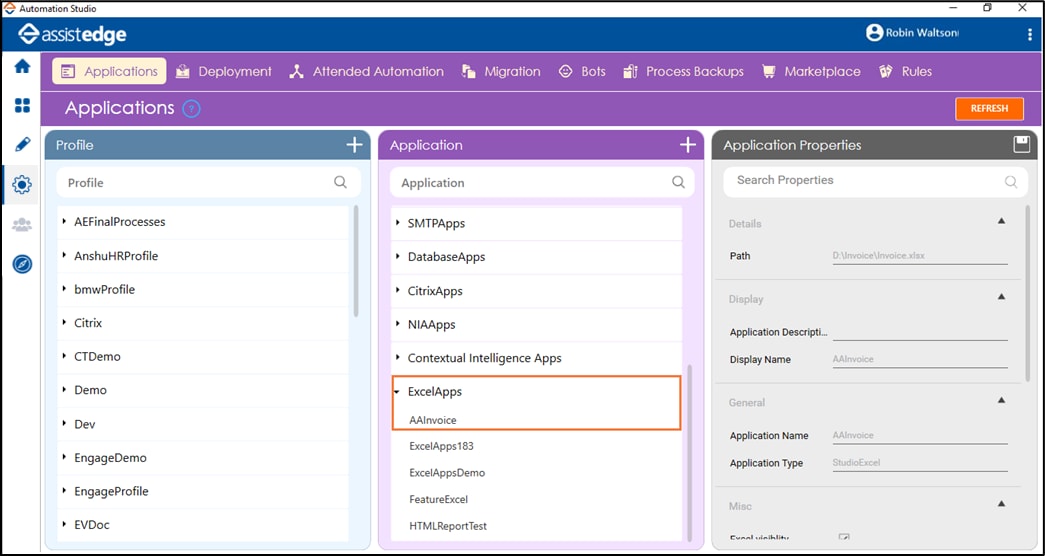
- In the Application Name field, enter a desired name of excel application you want to add. The name must not contain any special character or space.
- Click ADD and browse for the excel file you wan to configure. Click Open.
The excel application is configured.
Using Win Popup Handler Activity
- In the Canvas Tools pane, click Process Components to expand the tool and view the associated activities.
- Drag the Application activity and drop on to the Flowchart designer on the Canvas. The validation error symbol disappears when required inputs are provided.
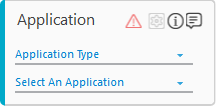
- In the Application Type list, select WebApps for a web application and ExcelApps for an excel application.
- In the Select An Application list, select the configured application that you want to automate. Alternatively, you can add a new web or an excel application at this point of time.
To add web application:- In the Select An Application list, click Add New Application. The Add New Application dialog box appears.
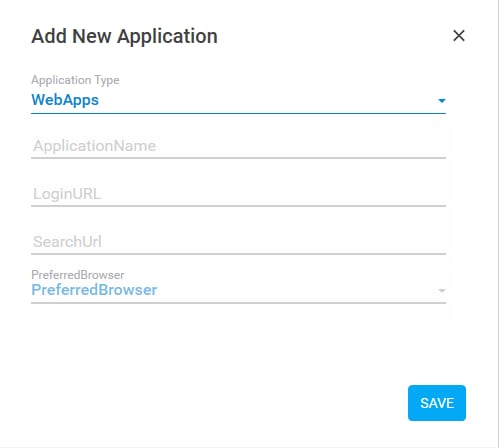
- In the Application Name field, enter a desired name of the web application.
- In the LoginURL field, enter the login URL of the web application you want to access.
- In the SearchURL field, enter the URL of the page that appears immediately post login.
- In the PreferredBrowser list, select the browser you prefer to launch the web application. By default, preference is set to InternetExplorer. Available options are:
- InternetExplorer
- FireFox
- Chrome
- InternetExplorerSelenuim
- Click SAVE. The web application is added.
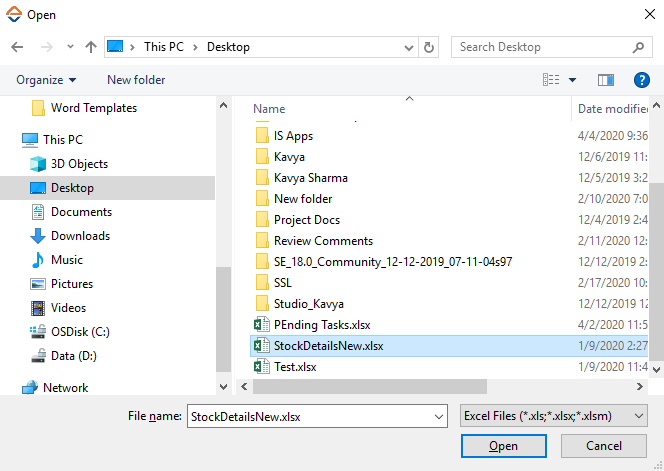
To add excel application: - In the Select An Application list, click Add New Application. The Add New Application dialog box appears.
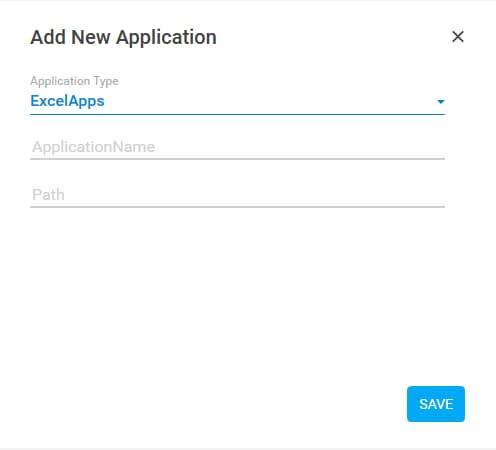
- In the Application Name field, enter a desired name of the application.
- In the Path field, enter the path of the excel file (along with the file name) available on the system.
- Click SAVE. The excel file is added.
- In the Select An Application list, click Add New Application. The Add New Application dialog box appears.
- First capture all the steps of the automation process workflow using the Multimodal Interface until the window popup appears and then add the Win Popup Handler activity.
|
NOTE: |
An instance of the application with the window popup must remain open in the configured browser to capture the automation step of handling the window popup. |
- Double click the Application activity, drag the Win Popup Handler and drop inside the Application activity. The validation error symbol disappears when required inputs are provided.
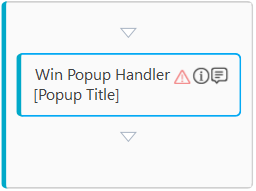
- Double click the Win Popup Handler activity.
- Click the
 (Settings) icon. The configuration dialog box of the Win Popup Handler activity appears.
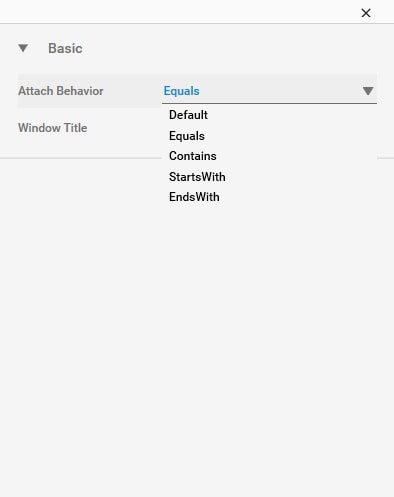
- In the Attachment Behavior list, select the identification criteria of the popup window.
- In the Window Title field, enter the title of the popup window.
- Click the X icon to save and close the configuration dialog box.
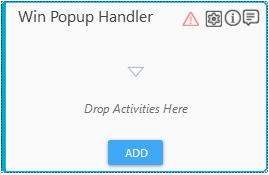
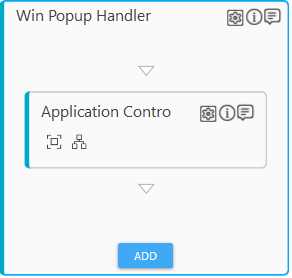
- Click ADD to add the Application Control activity. Alternatively, you can drag the Application Control activity from the Canvas Tools pane, and drop inside the Application Host activity. The Application Control activity is used to handle various fields of the popup window. It lets you configuration the UI elements in two different ways. Make sure that an instance of the application with the window popup is open in the configured browser for the Application Control activity to dock the required application window. Click any of the links below to know the details:
Field Configuration
Allows to configure the UI elements of the window popup by highlighting the area. It is useful when you only want to capture the area and there is no subsequent action taking place.
- In the Application Control activity, click the
 (Field Configuration) icon. The required undocked application along with the window popup comes into focus.
 - Press the Ctrl key, hover over the window popup and simultaneously select the UI element on the window popup as per your requirement. The UI element that you can capture gets highlighted with a red box.
- Click the highlighted area. The configuration dialog box appears. The fields that are mandatory are highlighted with red box.
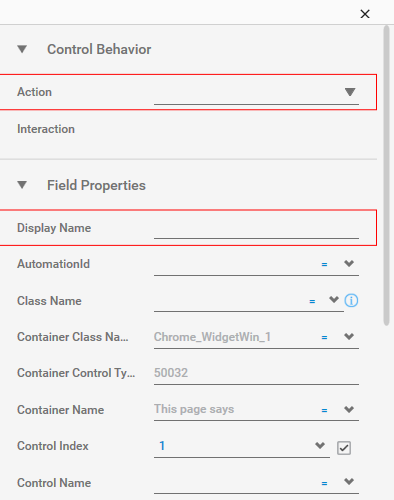
- In the Action list, select the action that you want to perform on the captured area. Other mandatory fields changes depending on the selection from the list. Enter details of all the mandatory fields and other relevant fields as per your requirement. Refer Field Properties table to know more about the available fields and their respective properties.
- Click the X icon to save and close the configuration dialog box.
The window popup configuration using the Field Configuration option is done.
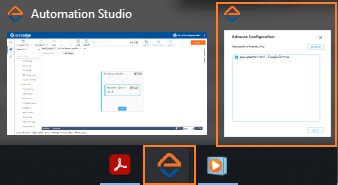
Advance Configuration
Allows to configure the UI elements of the window popup in a hierarchical manner available within an element tree. You can select the intended UI element to open the Field Properties pane without performing the subsequent action. It is also helpful the Field Configuration is not able to select the required UI element.
- In the Application Control activity, click the
 (Advanced Field Configuration) icon. The required undocked application along with the window popup gets into focus. The Advance Configuration window box opens in the Task bar of the system, available behind the automation Studio window.
- Click the Advance Configuration window to bring it in focus. It displays all the UI elements of the application under a tree structure.
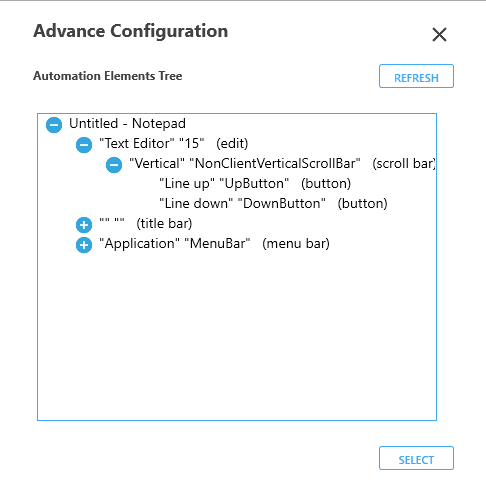
- Expand and select the element from the Automation Element Tree.
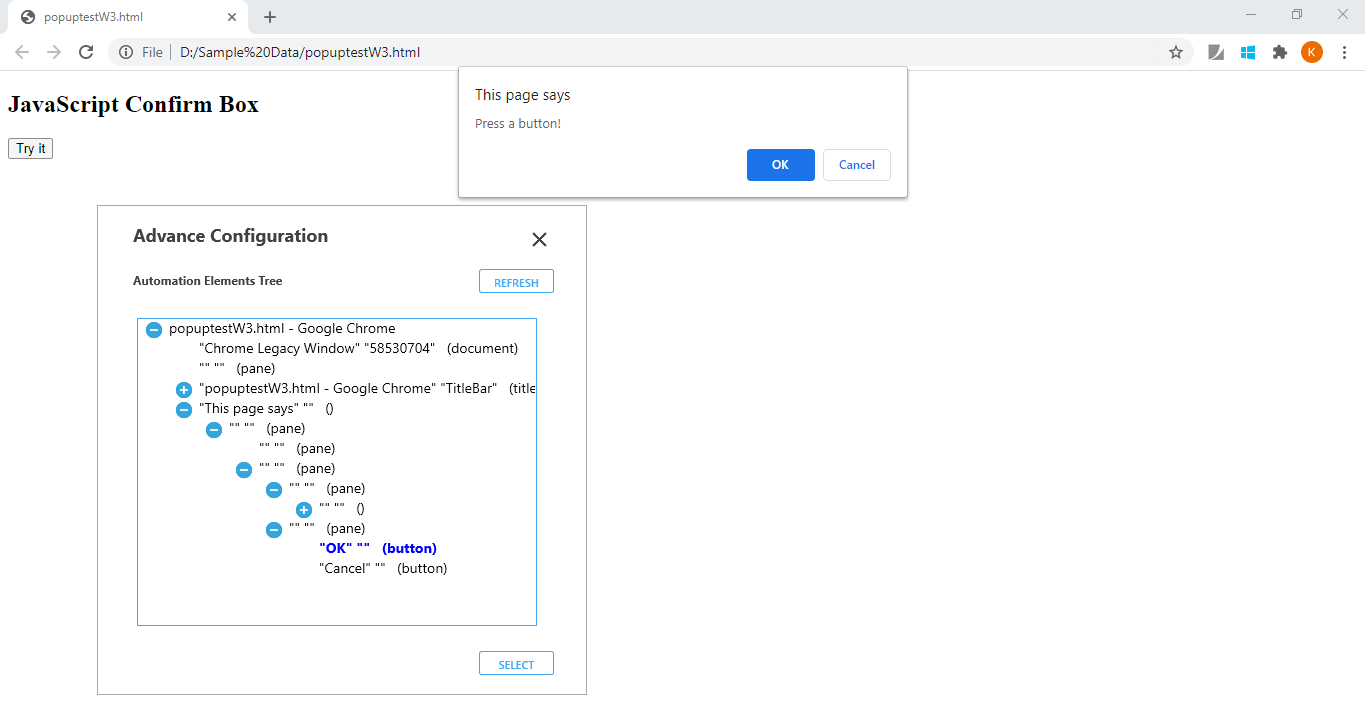
- Click SELECT. The configuration dialog box appears. The fields that are mandatory are highlighted with red box.
- In the Action list, select the action that you want to perform on the captured area. Other mandatory fields changes depending on the selection from the list. Enter details of all the mandatory fields and other relevant fields as per your requirement. Refer Field Properties table to know more about the available fields and their respective properties.
- Click the X icon to save and close the configuration dialog box.
The window popup configuration using the Advanced Field Configuration option is done.
Win Popup Handler Properties
The properties of a Win Popup Handler activity are listed in the following table and can be edited in the Properties grid on the right panel.
|
Property Name |
Usage |
|
Control Execution |
|
|
Ignore Error |
When this option is set to Yes, the application ignores any error while executing the activity. If set to NA, it bypasses the exception (if any) to let the automation flow continue; however, it marks the automation status as failure, in case of an exception. By default, this option is set to No. |
|
Delay |
|
|
Wait After |
Specify the time delay that must occur after the activity is executed. The value must be in milliseconds. |
|
Wait Before |
Specify the time delay that must occur before the activity is executed. The value must be in milliseconds. |
|
Misc |
|
|
Breakpoint |
Select this option to mark this activity as the pause point while debugging the process. At this point, the process freezes during execution allowing you to examine if the process is functioning as expected. In large or complex processes, breakpoints help in identifying the error, if any. |
|
Commented |
Select this option to mark this activity as inactive in the entire process. When an activity is commented, it is ignored during the process execution. |
|
DisplayName |
The display name of the activity in the flowchart designer. By default, the name is set as Win Popup Handler. You can change the name as required. |
|
WindowTitleDisplay |
The name of the window popup . Is same as Window Title field. |