Database Setup – SQL Server
This page helps you with the prerequisites and process to setup database in SQL Server.
- Prerequisites for Database Creation
- There are two ways to setup database. Click any of the below link as per your preferred method:
- AssistEdge Database Installer: AssistEdge Database Installer is a graphical tool that enables you to create database, create objects in existing database.
- Database Creation Scripts: Database Creation Scripts enables you to create database manually using SQL scripts.
|
NOTE: |
|
Creating Database using AssistEdge Database Installer
This section describes the step by step instructions to create the AE RPA database using AssistEdge Database Installer in the SQL server.
To create database in SQL Server:
- Navigate to $ > Database > Installer folder.
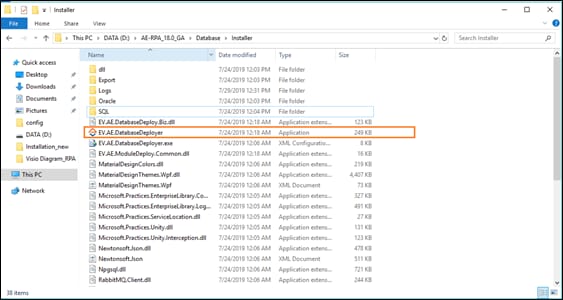
- Find EV.AE.DatabaseDeployer.exe file and double click to launch AssistEdge Database Installer.
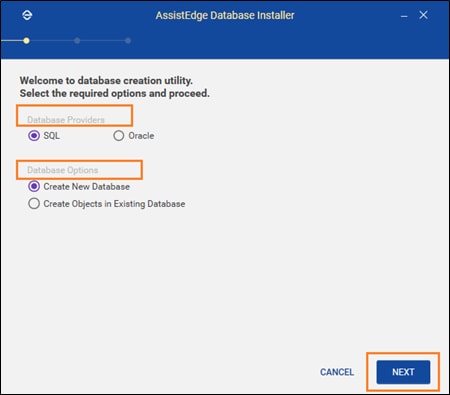
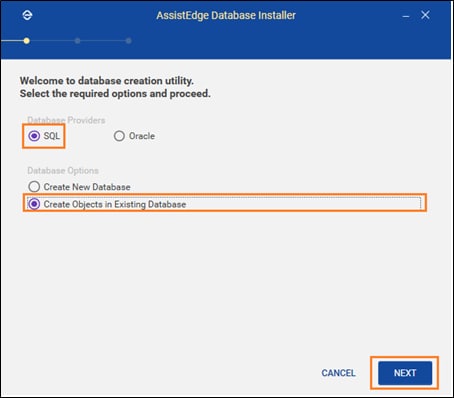
The AssistEdge Database Installer dialog box appears.
- In the Database Providers section, select SQL.
- In the Database Options section, you have three choices available. Click any of the below link to choose the preferred option based upon your requirement:
- Create New Database: Select this option, if you want to setup a new database in SQL server.
- Create Objects in Existing Database: Select this option if you already have an existing empty database that can be used for database creation. Note that, if Create Objects in Existing Database is selected, ensure a db_owner user holding the default schema as usch_aese is available.
Creating New Database
This section describes how to create a new AE RPA/Engage database in SQL server.
|
NOTE: |
|
To create new database:
- In the AssistEdge Database Installer dialog box:
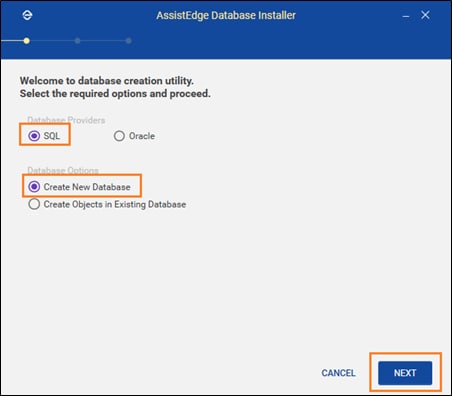
- In the Database Providers section, select SQL.
- In the Database Options section, select Create New Database.
- Click NEXT to proceed.
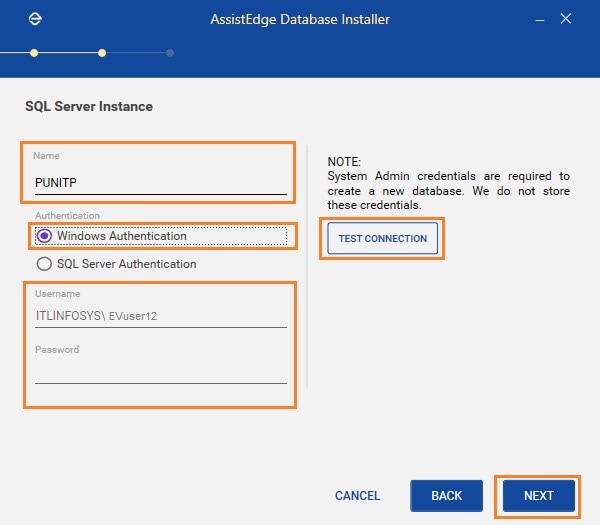
The SQL Server Instance page appears as shown below.
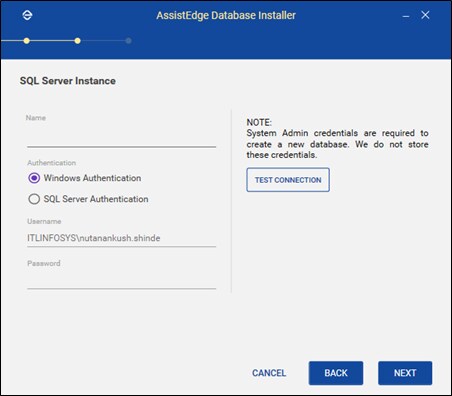
- In the Name field, enter the name of the SQL Server Instance that is hosting the database.
- In the Authentication section, select the option that signifies the type of authentication for working with the database. Possible options are:
- Windows Authentication: In the Windows authentication, the account resides in Active Directory for the Domain. Signifies the Windows based authentication process, it uses Windows credentials of the logged in user.
NOTE:
Windows authentication is not supported for the Linux based installation. - In the Username field, the authentication process retrieves the domain/account name of your system and populates it.
- In the Password field, you need not set any password as your system password is used by the authentication process at the time of logging in into the database.
NOTE:
Ensure that windows authentication credentials and Database User credentials on the new database details screen are not same.
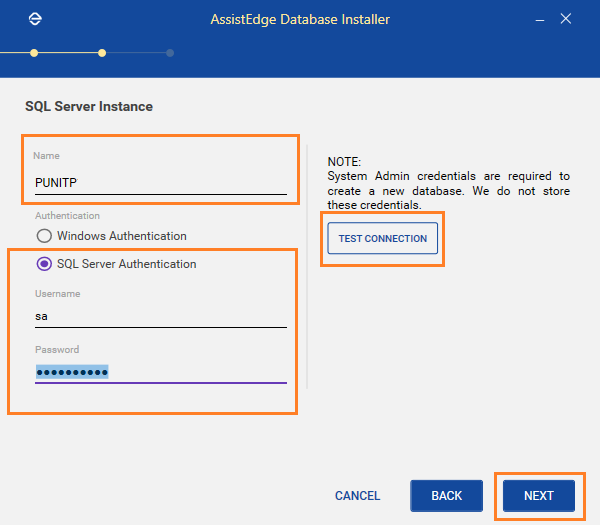
- SQL Server Authentication: In the SQL Server Authentication, SQL server’s user credentials is used for authentication. Signifies the SQL Server based authentication process.
- In the Username, enter name of the System Admin user (or username having database creation privileges)
- In the Password, enter a password for the same user.
- Windows Authentication: In the Windows authentication, the account resides in Active Directory for the Domain. Signifies the Windows based authentication process, it uses Windows credentials of the logged in user.
- Click TEST CONNECTION to validate, if the connection to the specified SQL server instance is established

- If the connection is established, a popup message appears as “Test connection successful”.
- If the connection fails, make sure you are entering the right credentials and try again.
- Click OK. The pop-up message closes.
|
NOTE: |
Do not proceed unless the test connection is successful. |
- Click NEXT to proceed.
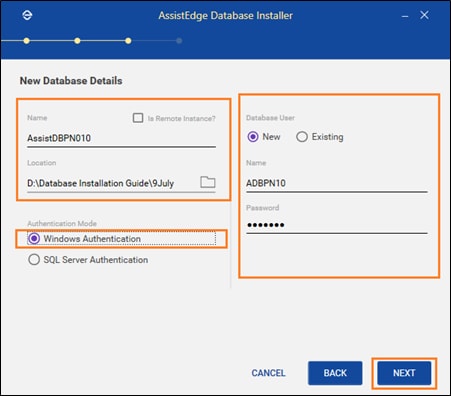
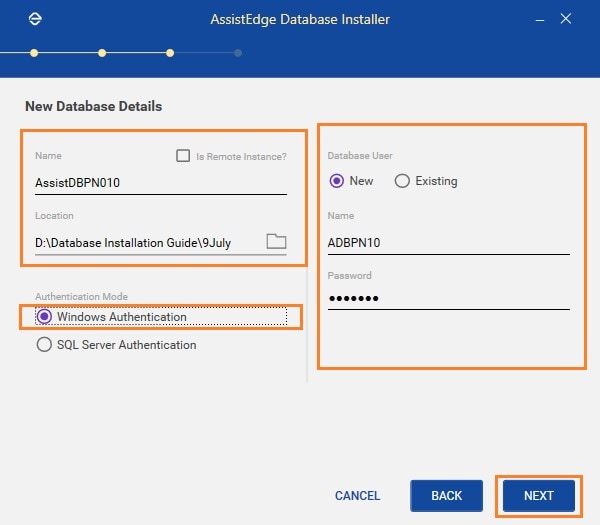
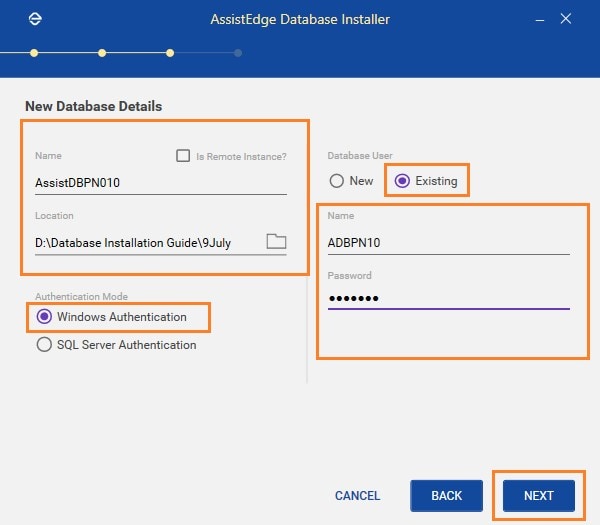
The New Database Details page appears as shown below. This page enables you to create a new database and also allows to create a new database user or proceed with the existing database user.
- In the Name field, enter the name of the new database created in the SQL Server Instance. Ensure that the Database name is unique.
- Select Is Remote Instance? check box, if the database is located on the remote system and not on the system where you are running this utility.
- In the Location section, click
 to select the physical file path where you want to save the database files such as .ldf , .mdf and .ndf
 - In the Authentication Mode section, select the preferred type of authentication mode such as Windows authentication or SQL Server authentication.
- In Windows authentication mode, your windows credentials are used for login to the SQL Server database.
- In the Database User section, select the type of database user. Possible values are:
- New: Select New as a database user option. You can add an existing windows authenticated users in your organization to SQL server database. This user will be assigned as database owner of the newly created database.
- In the Name field, enter a valid existing windows user name whom you want to provide access to the SQL database and assign ownership of the newly created database.
- In the Password field, enter the windows system password of the user.
NOTE:
Ensure that windows authentication credentials and Database User credentials are not same.
- Existing: Select Existing as the database user option when the windows user is already present in the SQL Server. You can use the user’s credentials for database creation and assign this user as an owner of the newly created database.
- In the Name field, enter an existing windows username who already has an access rights to SQL Server database.
- In the Password field, enter the windows password for the user.
- New: Select New as a database user option. You can add an existing windows authenticated users in your organization to SQL server database. This user will be assigned as database owner of the newly created database.
- In the Database User section, select the type of database user. Possible values are:
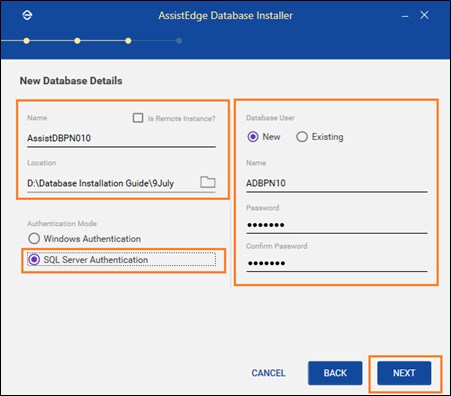
- For SQL Server authentication mode: You can login to SQL Server using your SQL Server credentials.
- In the Database User section, select the type of database user. Possible values are:
- New: Select New as a database user option when a new user is required to be created in the SQL Server Instance. A new user can be created in SQL Server login explicitly and can be set as an owner of the newly created database.
- In the Name field, specify a name of the user to be created.
- In the Password field, specify the password for the user to access the SQL server.
- In the Confirm Password field, re-enter the password.
- Existing: Select Existing as the database user option, when the required user is already present in the SQL server instance. These user credentials are used to create a new database and user can be set as an owner of the newly created database.
- In the Name field, enter an existing SQL Server user name having access to database in SQL server.
- In the Password field, enter the user’s password.
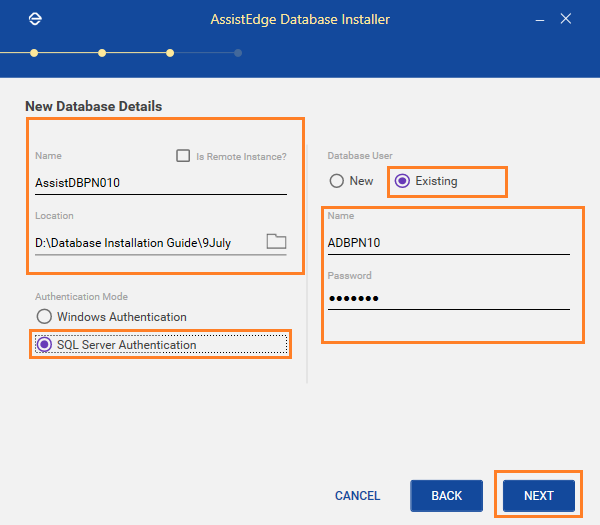
NOTE:
While using Existing option, ensure that credential given for database user must be different from one used for SQL Server Authentication in previous screen.
- New: Select New as a database user option when a new user is required to be created in the SQL Server Instance. A new user can be created in SQL Server login explicitly and can be set as an owner of the newly created database.
- In the Database User section, select the type of database user. Possible values are:
- In Windows authentication mode, your windows credentials are used for login to the SQL Server database.
- Click NEXT to proceed.
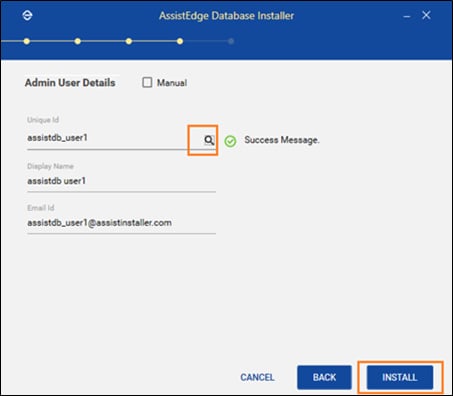
The Admin User Details page appears as shown below.
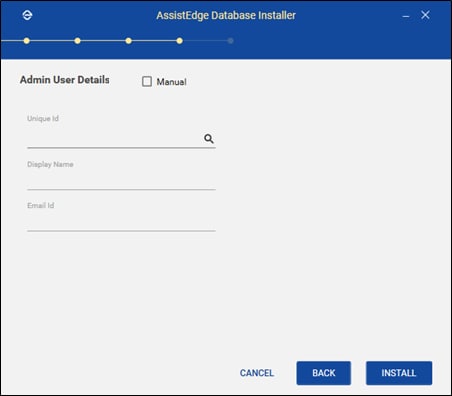
- In the Admin User Details page, you can create a super admin user who will have Admin access to AE Site Admin module and client tools of AE RPA/Engage Module. There are two ways to create Admin user, you can choose any of the option as per your preference.
- Default: By default, you can select an existing user from the active directory and assign the user as Admin user.
- In Unique ID field, enter the active directory username and then click
 Search . The details in this field are auto-filled. On selecting active directory username, a “Success Message” appears next to the search icon.
 - System auto fills the Display Name and Email ID details of the Admin user.
- In Unique ID field, enter the active directory username and then click
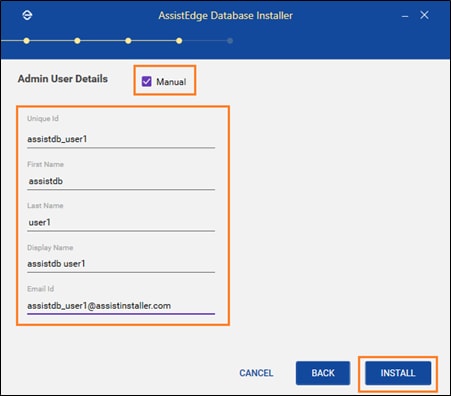
- Manual: Select Manual checkbox, if you can create super admin user manually. Enter the required details manually in the following fields.
- In the Unique ID field, enter a unique identifier for the AssistEdge Admin user.
- In the First Name field, enter the first name for the AssistEdge Admin user.
- In the Last Name field, enter the last name for the AssistEdge Admin user.
- In the Display Name field, enter the name that you wish to display for the AssistEdge Admin user.
- In the Email ID field, enter a valid email ID of the AssistEdge Admin user.
- Default: By default, you can select an existing user from the active directory and assign the user as Admin user.
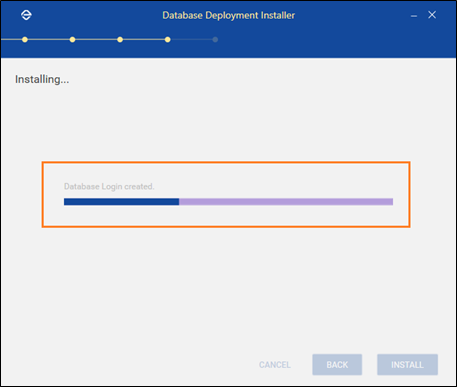
- Click INSTALL. The Progress page appears that shows the database creation progress.
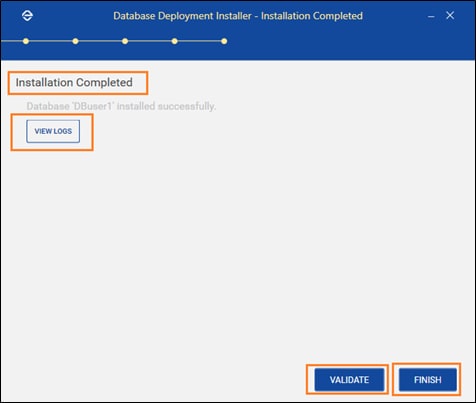
- The Installation Completed page appears. Upon successful set-up of database, a success message as “Database, <name of the database> updated successfully” appears. You can also check the logs and perform validation of database created before finishing the process:
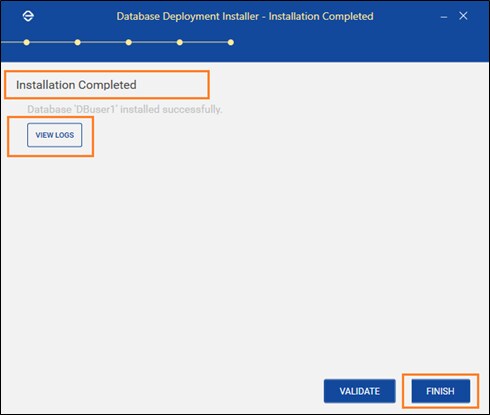
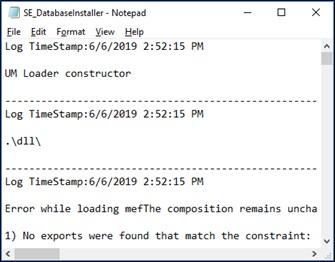
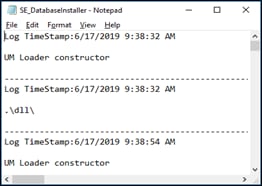
- Click VIEW LOGS to view the application log details. The log details contain information such as Log Time Stamp, UM Loader Constructor, dll, and so on.
- Click VALIDATE to view the validation results after completion of the database creation process.
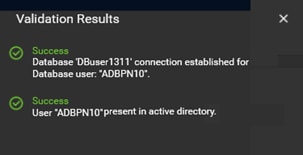
A popup window with Validation Results appears. Ensure that you get a success message for both listed items and close the dialog box.
- Click VIEW LOGS to view the application log details. The log details contain information such as Log Time Stamp, UM Loader Constructor, dll, and so on.
- Click FINISH to exit the application.

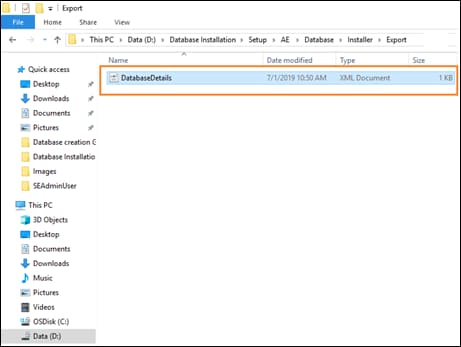
A popup window with DatabaseDetails.xml file appears and then click OK. - An export file is created at $\Database\Installer\Export\DatabaseDetails.xml in the installer’s folder.
NOTE:
In case of any errors, check the log files for more details.
The New Database - SQL is created successfully and you can start utilizing the database for the AE RPA/Engage installation process.
 Creating Objects in Existing Database
This section describes how to use an existing empty database already available in the SQL server.
|
NOTE: |
|
To create objects in existing database:
- In the AssistEdge Database Installer dialog box:
- In the Database Providers section, select SQL.
- In the Database Options section, select Create Objects in Existing Database.
- Click NEXT to proceed.
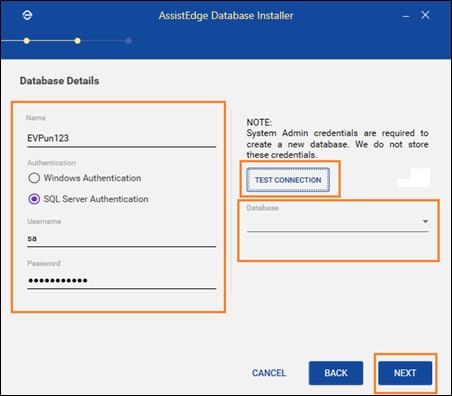
The Database Details page appears.
- In the Name field, enter the name of the server to connect to the SQL server instance present on the system.
- In the Authentication section, select the option that signifies the type of authentication for working with the database. Possible options are:
Windows Authentication: Signifies the Windows based authentication process for using the existing database, it uses Windows credentials of the logged in user:- In the Username field, the authentication process retrieves the domain/account name of your system and populates it.
- In the Password field, you need not set any password as your system password is used by the authentication process at the time of logging in into the database.
SQL Server Authentication: Signifies the SQL Server based authentication process for using the existing database:
- In the Username field, enter name of the System Admin user who owns an access to the existing database.
- In the Password field, enter a password for the same user.
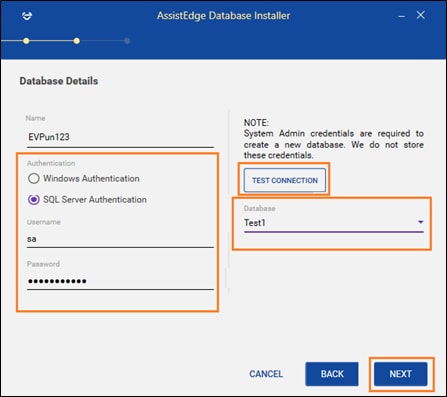
- Click TEST CONNECTION to validate, if the connection to the specified SQL server instance is established.

If the connection is established, a popup message appears as "Test connection successful". If the connection fails, make sure you are entering the right credentials and try again. Click OK. The pop-up message closes.
- In the Database drop-down, select the name of the existing database by clicking the drop down arrow.
-
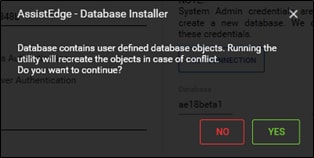
Click NEXT. The confirmation popup message to create objects appears as shown above.
-
If there are any existing objects present in the selected database, a confirmation pop-up message as “Database contains user defined database objects. Running the utility will recreate the objects in case of conflict. Do you want to continue?” appears.
-
Select YES to continue and recreate the objects.
-
Select NO, if you do not want to continue. You are directed to previous page > enter valid entries > click NEXT, the same database pop-up message appears again > and then, click Yes.
-
The Admin User Details page appears.

-
In the Admin User Details page, you can create a super admin user who will have Admin access to AE Site Admin module and client tools of AE RPA Module. There are two ways to create Admin user, you can choose any of the option as per your preference.
Default: By default, you can select an existing user from the active directory and assign the user as Admin user.
- In Unique ID field, enter the active directory username and then click
 Search . The details in this field are auto-filled. On selecting active directory username, a “Success Message” appears next to the search icon.
 - System auto fills the Display Name and Email ID details of the Admin user.

- Manual: Select Manual checkbox, if you can create super admin user manually. Enter the required details manually in the following fields.

- In the Unique ID field, enter a unique identifier for the AssistEdge Admin user.
- In the First Name field, enter the first name for the AssistEdge Admin user.
- In the Last Name field, enter the last name for the AssistEdge Admin user.
- In the Display Name field, enter the name that you wish to display for the AssistEdge Admin user.
- In the Email ID field, enter a valid email ID of the AssistEdge Admin user.
- Click INSTALL. The progress page appears that shows the database creation progress.
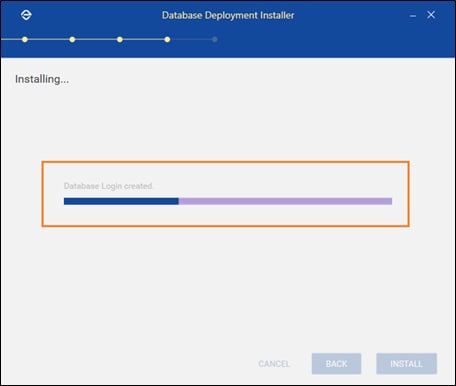
-
The Installation Completed page appears. Upon successful set-up of database, a success message as “Database, <name of the database> updated successfully” appears. You can also check the logs and perform validation of database created before finishing the process:
-
Click VIEW LOGS to view the application logdetails. The log details contain information such as Log Time Stamp, UM Loader Constructor, dll, and so on.
-
Click VALIDATE to view the validation results after completion of the database creation process.

-
A popup window with Validation Results appears. Ensure that you get a success message for both listed items and close the dialog box.
- Click FINISH to exit the application.

A popup window with DatabaseDetails.xml file appears.
Once you click OK, the export database details popup window is closed.
- An export file is created at $\Database\Installer\Export\DatabaseDetails.xml in the installer’s folder.

|
NOTE: |
In case of any errors, check the log files for more details. |
The objects for database are successfully created in the selected database after which you can start with AE installation process.