Creating Database Manually using Scripts – SQL Server
This section describes how to create database manually by running scripts for different components in the AE RPA.
|
NOTE: |
Before proceeding further, ensure that you have AssistEdge RPA compatible SQL Server version installed on your system and along with that you have access privileges for the database creation. |
Creating New Database using Scripts
![]() This sections explains you about creating a new database manually using scripts in the SQL Server. You are required to execute the SQL scripts mentioned in the below table for a successful deployment.
This sections explains you about creating a new database manually using scripts in the SQL Server. You are required to execute the SQL scripts mentioned in the below table for a successful deployment.
|
NOTE: |
|
To create database manually using scripts:
- Navigate to Navigate to the Product Package > Database > Installer > Scripts > SQL > SQLScripts > New_Database.
- Open New_Database folder.
- In the New_Database folder, you can access the following scripts in the respective folders.
|
Name of Scripts |
Path |
|
Create Database user for SQL |
DatabaseUser\CreateDB_SQL.sql |
|
Create tables for SQL database |
Tables\CreateSQLDatabase.sql Tables\Lowcode_SQL.sql |
|
Create AdminUser |
SEAdminUser\CreateAdminUser_SQL.sql |
- Connect to database.
- Access New_Database folder and navigate to SQLScripts > New_Database > DatabaseUSer > CreateDB_SQL.sql and open the script.
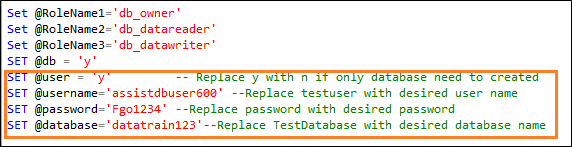
- Update the highlighted parameters in the script file as described below:
|
Name of Value |
Description |
|
@username |
Signifies the username of the database owner to be newly created |
|
@password |
Signifies the password for the new database |
|
@database |
Signifies the name of the database to be newly create |
- Replace the highlighted parameters for @database and @username with the parameters created in the Step 5.

|
NOTE: |
Do not use special characters in the database name. |
- Select Query and Click Execute.
- Upon successful execution of script, a message appears as “Query executed successfully”.
- Access “New_Database” folder and navigate to “SQLScripts > New_Database> Tables > CreateSQLDatabase.sql” and open the script.
- Enter the same username and password entered in the Step 5 and then Execute the query.
- If, same data base is required for Low Code table, then:
- Follow Step 12 to Step 14
- Proceed to Step 15 directly
OR
- If you want to have separate Database for Low Code Table then, perform the following
- Create a new database with unique name from step 1 to 8.
- Access New_Database folder and navigate to SQLScripts > New_Database > Tables > Lowcode_SQL.sql and open the script.
- Enter the username and password entered while creating database for separate LowCode Database and then, execute the query.
- Proceed to Step 15 directly.
- If, same data base is required for Low Code table, then:
- Upon successful execution of script, a message appears as “Query executed successfully”. A database table is created.
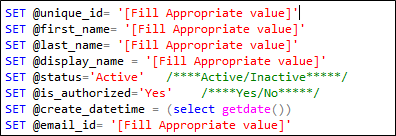
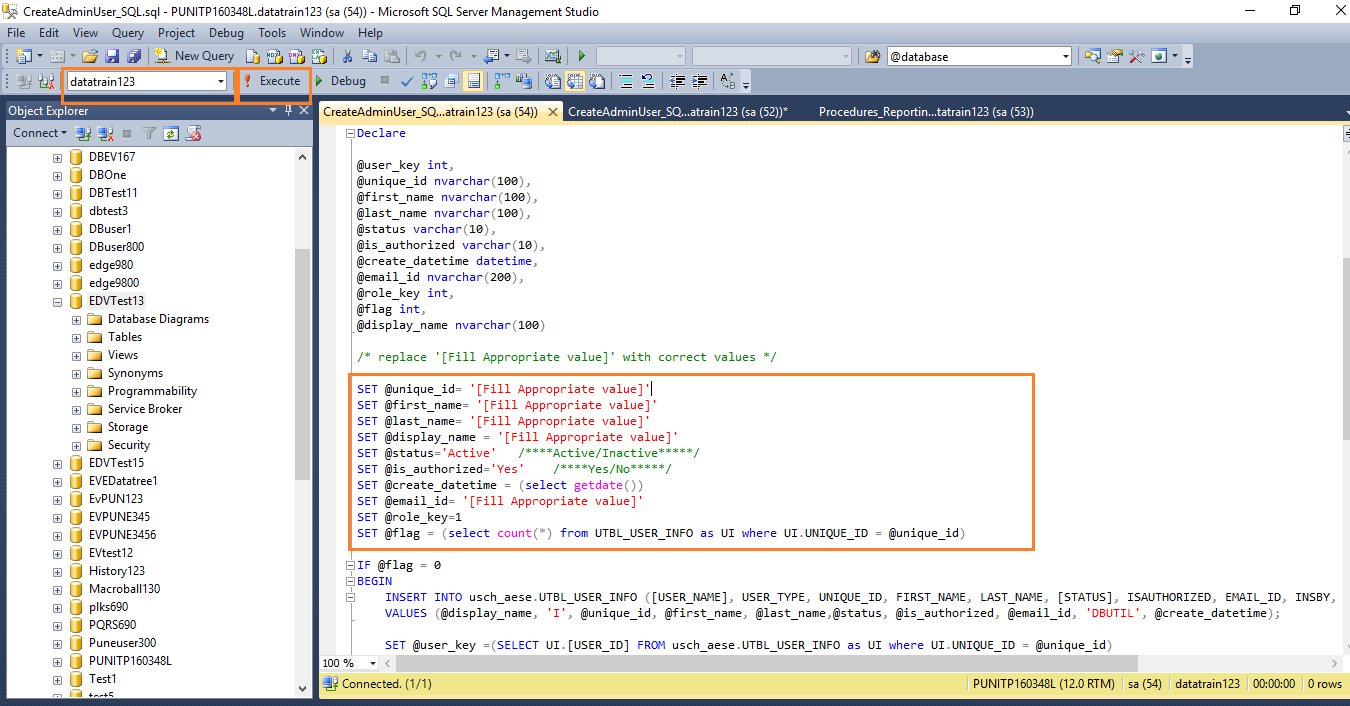
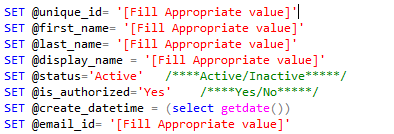
- Then, access “New_Database” folder and navigate to “SQLScripts > New_Database> SEAdminUser>CreateAdminUser_SQL.sql”and open the script.Update the parameters in the script file with correct admin user details as described below.
|
Name of Value |
Description |
|
@unique_id |
Signifies the Unique ID of the admin user |
|
@first_name |
Signifies the first name of the admin user |
|
@last_name |
Signifies the last name of the admin user |
|
@display_name |
Signifies the display name of the admin user |
|
@email ID |
Signifies the Email ID of the admin user |
|
NOTE: |
|
- Select Query and Click Execute.
- Upon successful execution of script, a message appears as Query executed successfully.
An admin user is created for database.
For example, to create database manually using Microsoft SQL Server Management Studio, refer SQL Database Creation using Microsoft SQL Server Management Studio section.
SQL Database Creation using Microsoft SQL Server Management Studio
This section describes how to create and upgrade database using scripts in SQL Server using Microsoft SQL Server Management Studio by following below steps:
Creating SQL Server Database User using Scripts
To create a new database user using scripts:
- Login to Microsoft SQL Server Management Studio using the system administrator privileges.
- Connect to the database.
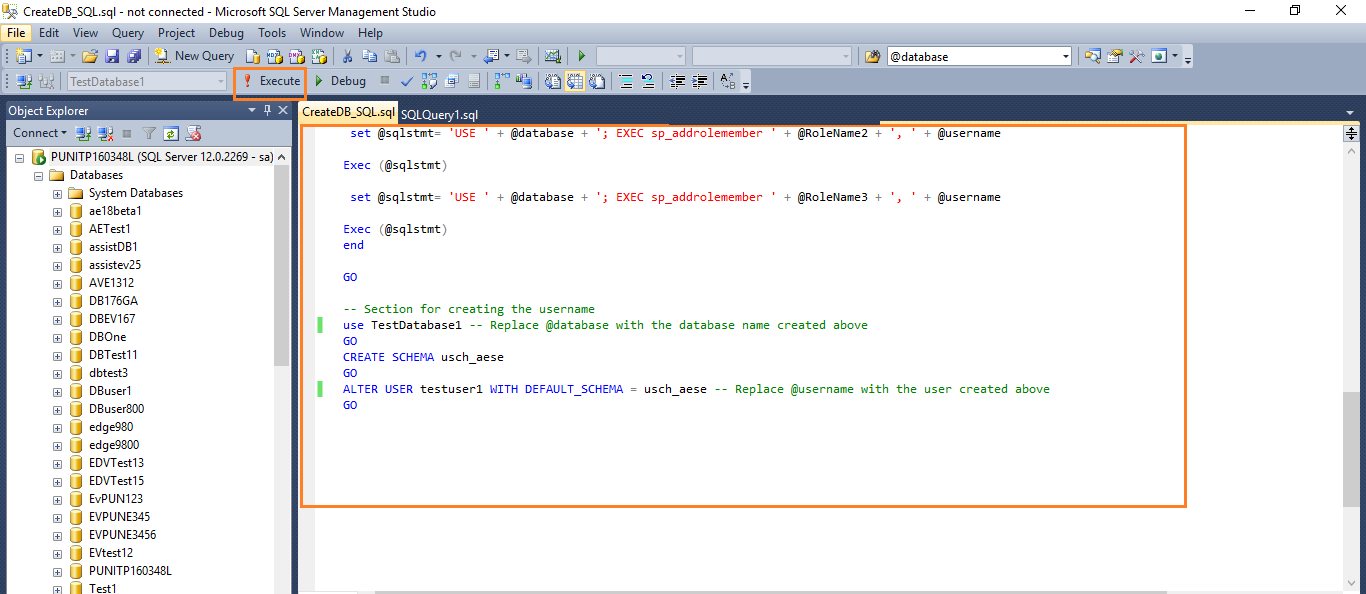
- Access “New_Database” folder and navigate to “SQLScripts > New_Database> DatabaseUSer > CreateDB_SQL.sql” and open the script.
- CreateDB_SQL script appears in Microsoft SQL Server Studio.
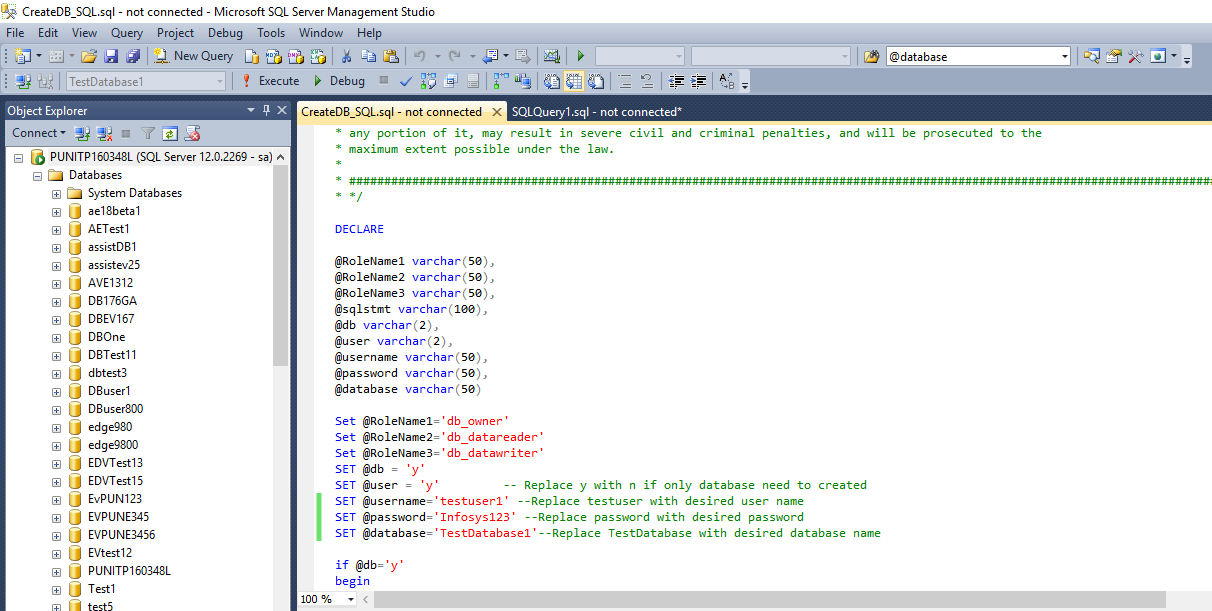
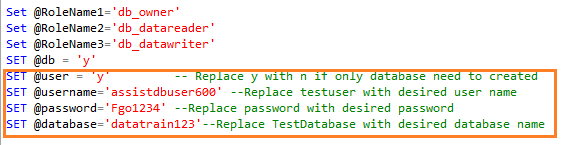
- Update the highlighted parameters in the script file as described below:
|
Name of Value |
Description |
|
@username |
Signifies the username of the database owner to be newly created |
|
@password |
Signifies the password for the new database |
|
@database |
Signifies the name of the database to be newly created |
- Replace the highlighted parameters for @database and @username with the parameters created in the Step 4.

|
NOTE: |
Do not use special characters in the database name. |
- Select Query and Click Execute.
- Upon successful execution of script, a message appears as Query executed successfully.
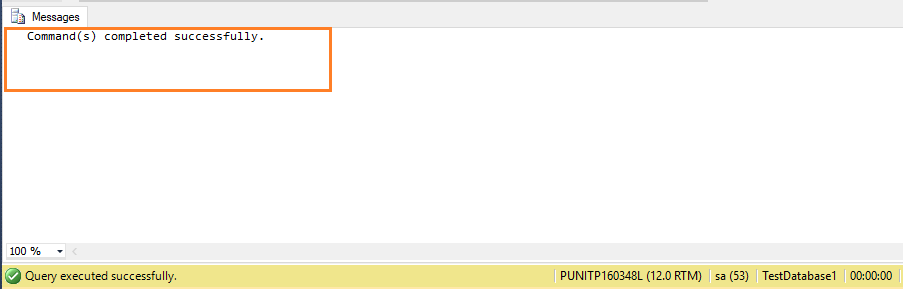
New Database and Database user are created explicitly for the AssistEdge Database.
Creating Tables in SQL database
To create tables in SQL database:
- Login to Microsoft SQL Server Management Studio using the system administrator privileges.
- Connect to the database.
- Create a new SQL connection using the credentials entered while creating the database user in the Creating SQL Server Database User using Scripts step.
- Access “New_Database” folder and navigate to “SQLScripts > New_Database> Tables > CreateSQLDatabase.sql” and open the script.
- Select Query and, click Execute.
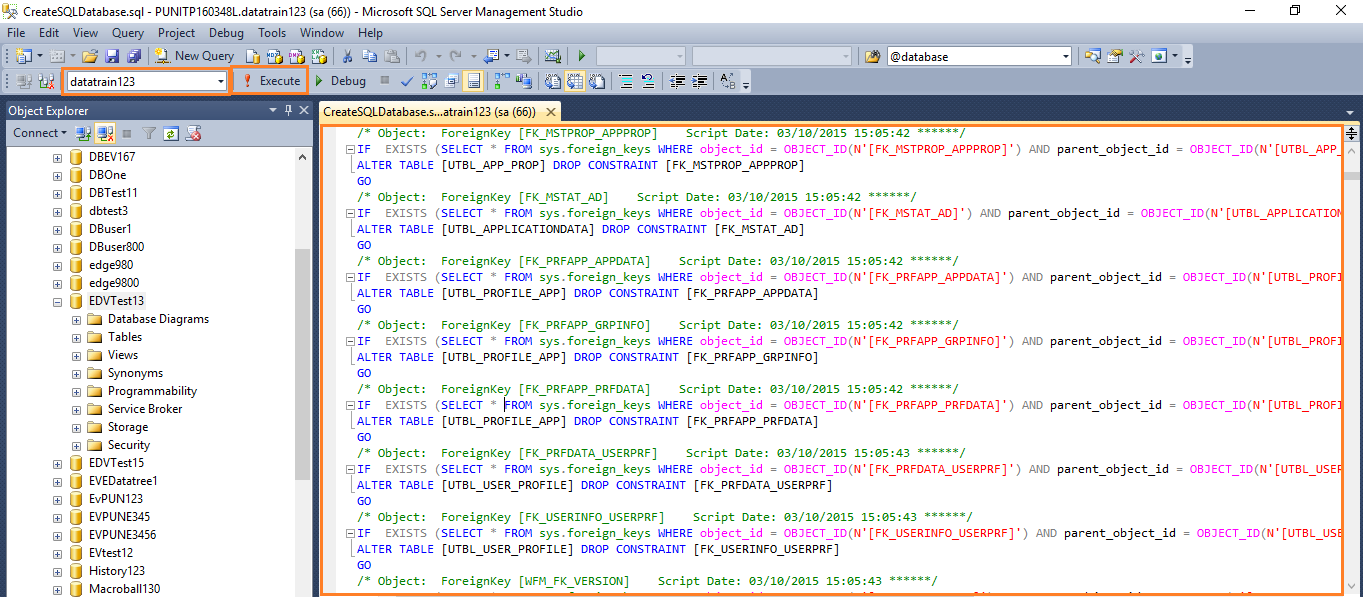
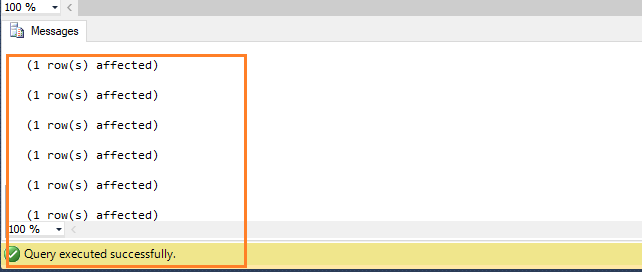
- Upon successful execution of script, a message appears as “Query executed successfully”. Required database tables are created for the AssistEdge Database.
Creating AssistEdge Admin user in SQL Server
To create AssistEdge admin user in SQL Server:
- Login to Microsoft SQL Server Management Studio using the system administrator privileges.
- Connect to the database.
- Create a new SQL connection using the credentials entered while creating the database user in the Creating SQL Server Database User using Scripts step.
- Access “New_Database” folder and navigate to “SQLScripts > New_Database> SEAdminUser> CreateAdminUser_SQL.sql”and open the script.
- Update the highlighted parameters in the script file with correct admin user details as described below:
|
Name of Value |
Description |
|
@unique_id |
Signifies the Unique ID of the AssistEdge admin user |
|
@first_name |
Signifies the first name of the AssistEdge admin user |
|
@last_name |
Signifies the last name of the AssistEdge admin user |
|
@display_name |
Signifies the display name of the AssistEdge admin user |
|
@email ID |
Signifies the Email ID of the AssistEdge admin user |
|
NOTE: |
|
- Select Query and Click Execute.
- Upon successful execution of script, a message appears as Query executed successfully. AssistEdge admin user is created in the AssistEdge database.
Prerequisite Validation - SQL Server
This section guides you with prerequisite validations of the SQL server. A successful installation of the SQL Server Database installs files to the file system, creates entries in the registry, and also install several tools.
To verify whether SQL server is installed on your system:
- Click Start > All Programs > Microsoft SQL Server > Configuration Tools> and then click SQL Server Configuration Manager.
|
NOTE: |
If you do not have these SQL entries on the Start menu, SQL Server is not correctly installed. Run Setup to install the SQL Server Database Engine. |
- In SQL Server Configuration Manager, navigate to Left pane and click SQL Server Services. Right pane lists down the services related to SQL Server.
- If the Database Engine is installed, then the engine service is listed as SQL Server(MSSQLSERVER) if it is the default instance.
OR
SQL Server (<instance_name>), if the database engine is installed as a named instance.
|
NOTE: |
Unless the instance name is changed to some other name, SQL server is installs as a named instance with the name SQLEXPRESS. |
- To start the Database Engine, right pane, right-click the Database Engine, and then click Start.
|
NOTE: |
A green triangle icon indicates that the Database Engine is running. A red square icon indicates that the Database Engine is stopped. |