Decision Rule
The Decision Rule functionality in Automation Studio is a set of business rules that helps you automate condition-based actions. It can be integrated and reused across multiple processes. It helps in reducing the number of rules created per automation, which in turn, increase process efficiency. For example, in the Insurance domain, you need to evaluate multiple criteria such as credit score and the age of the customers for issuing a credit card. With the Decision Rule functionality, you can automate the process of evaluating the multiple criteria to find out which customer is the best-fit for issuing the credit card amongst multiple entries.
To implement the required business rules for performing the automation, you need to:
- Configure Decision Rule Process: A decision rule process allows you to create a reusable set of business decision rules and pre-define them in the Automation Studio.
- Configure Decision Table Activity: This activity allows you to utilize the configured Decision Rule process to perform the automation.
Configure Decision Rule Process
To configure a Decision Rule process in Automation Studio:
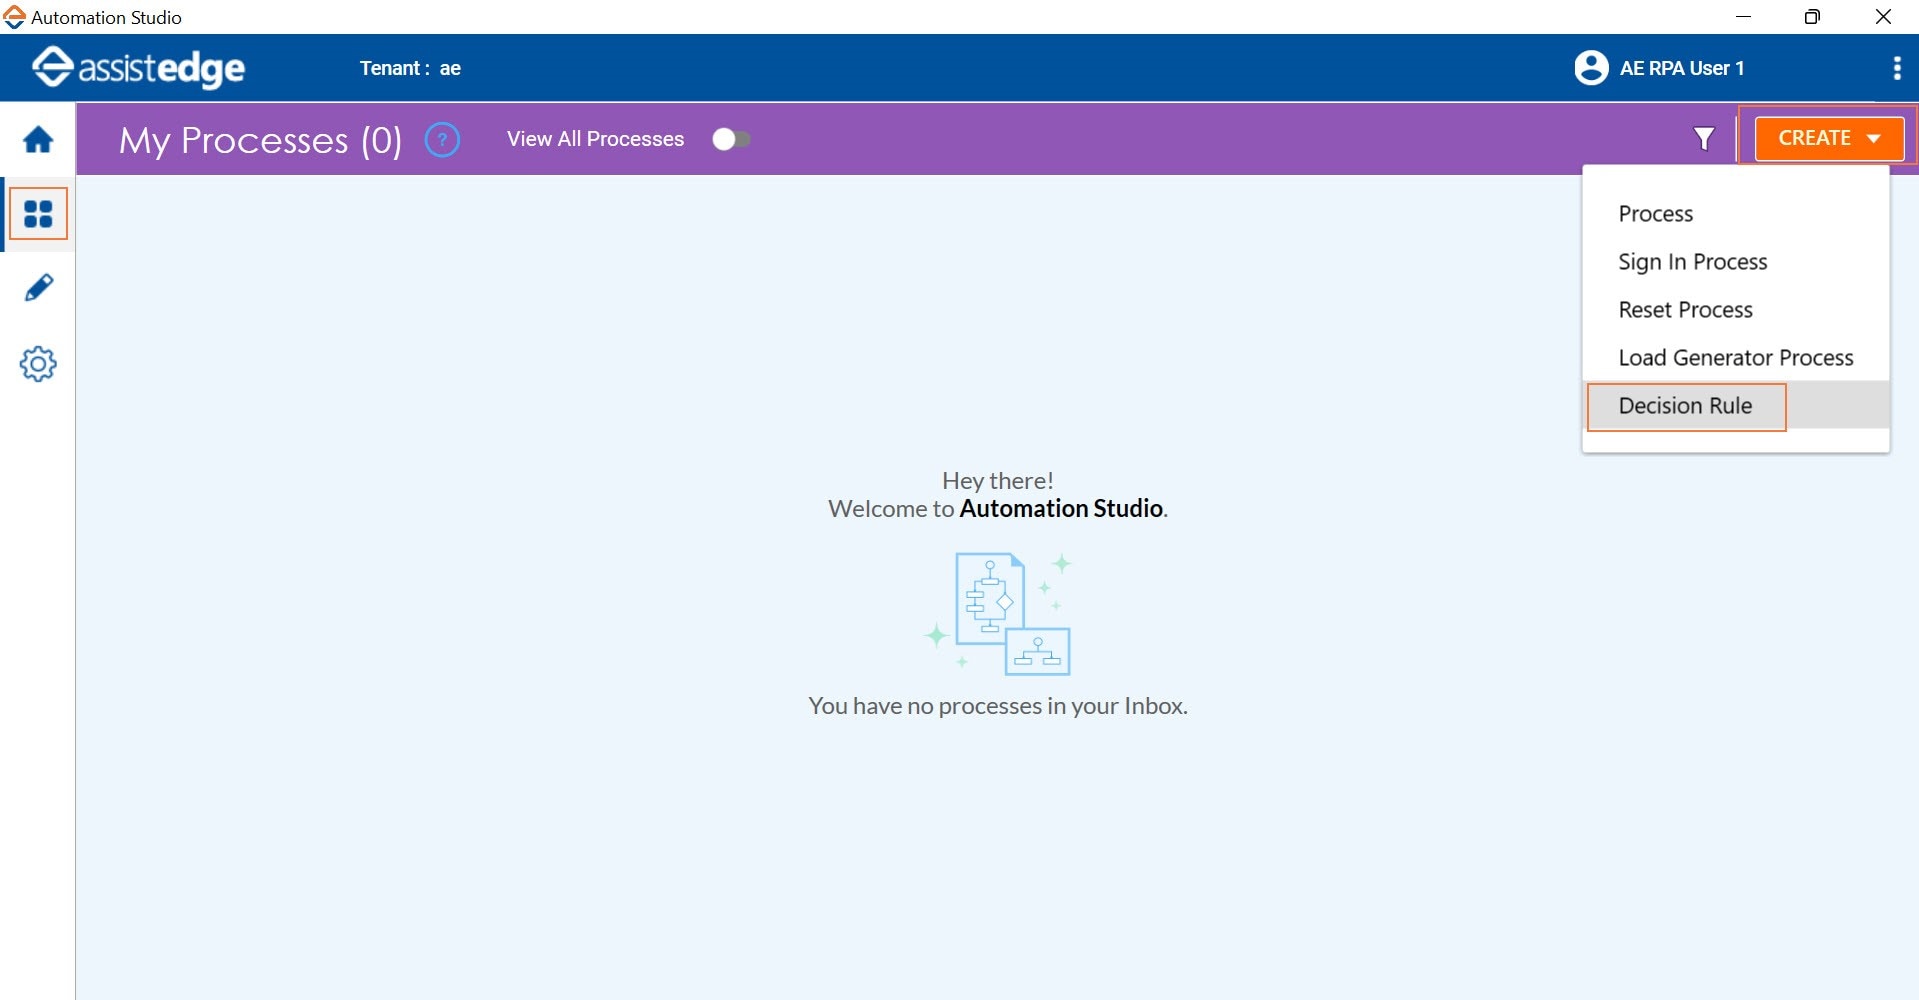
- In the Tool bar, click Create and then click Decision Rule. You are redirected to the
 (Studio) menu and the Flowchart designer opens.
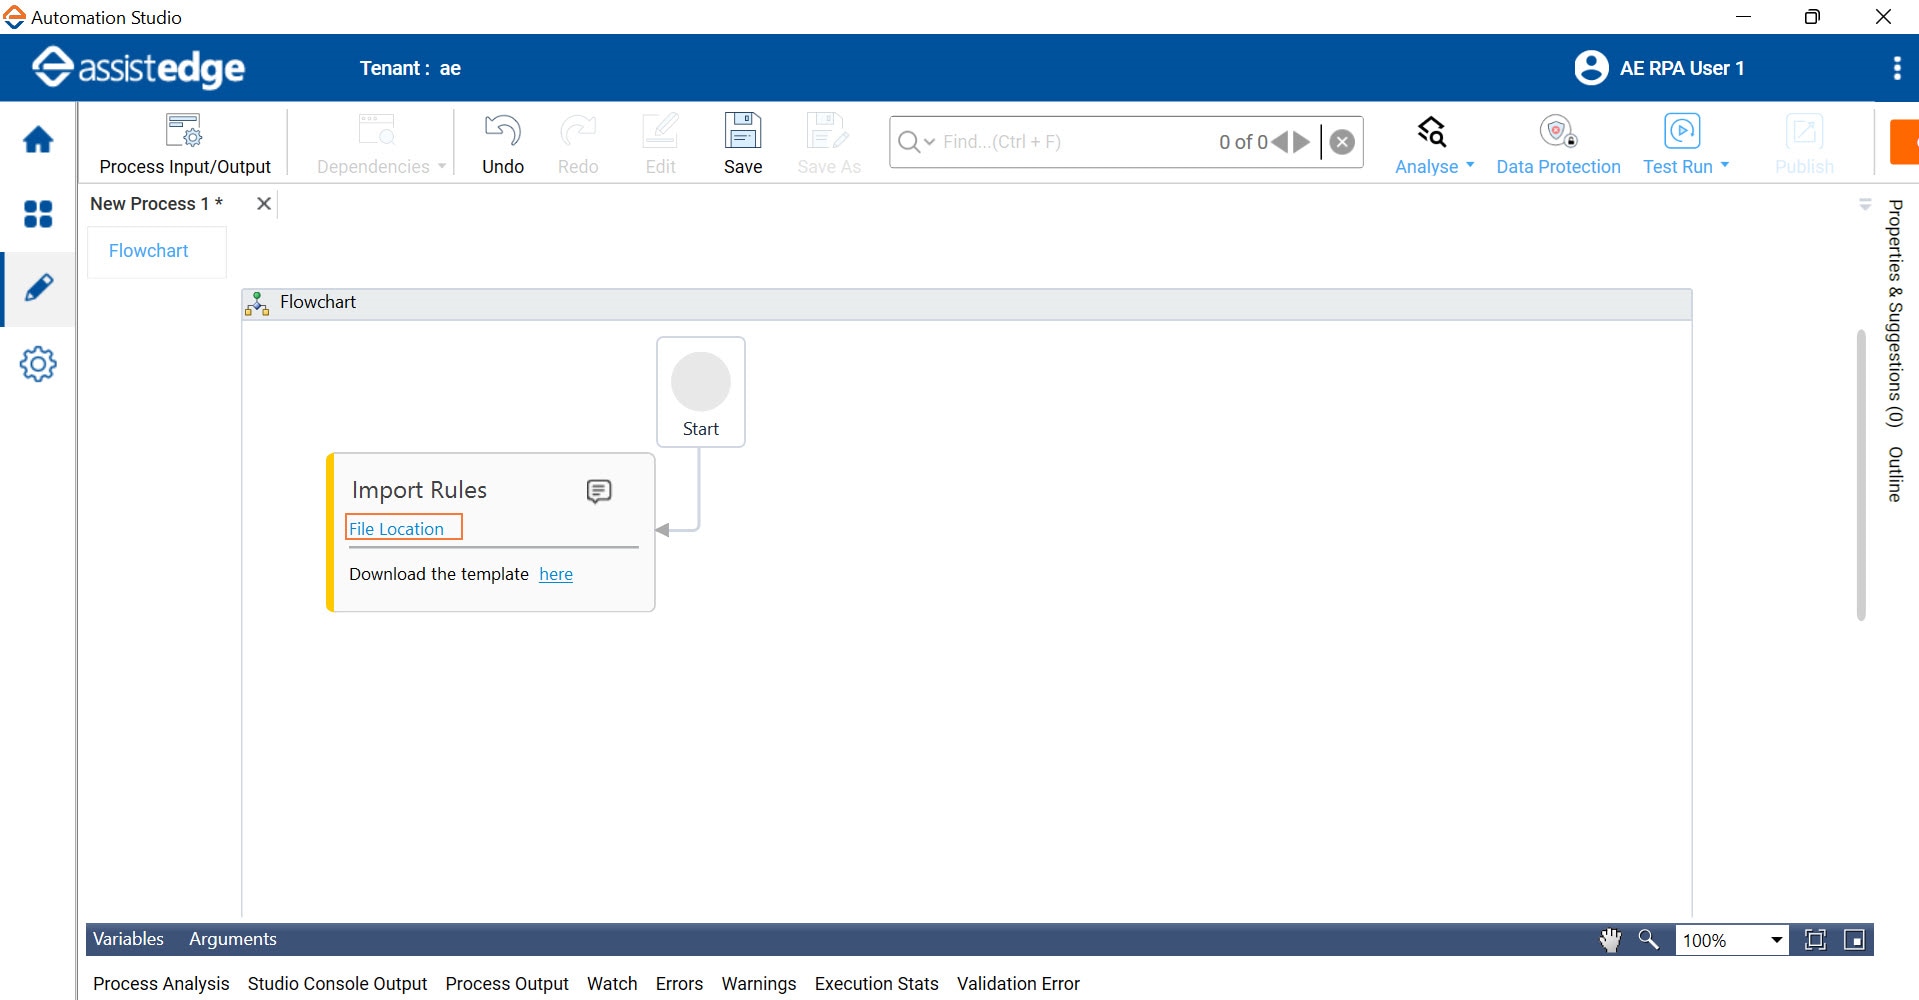
The Import Rules activity gets auto-populated in the Flowchart designer.
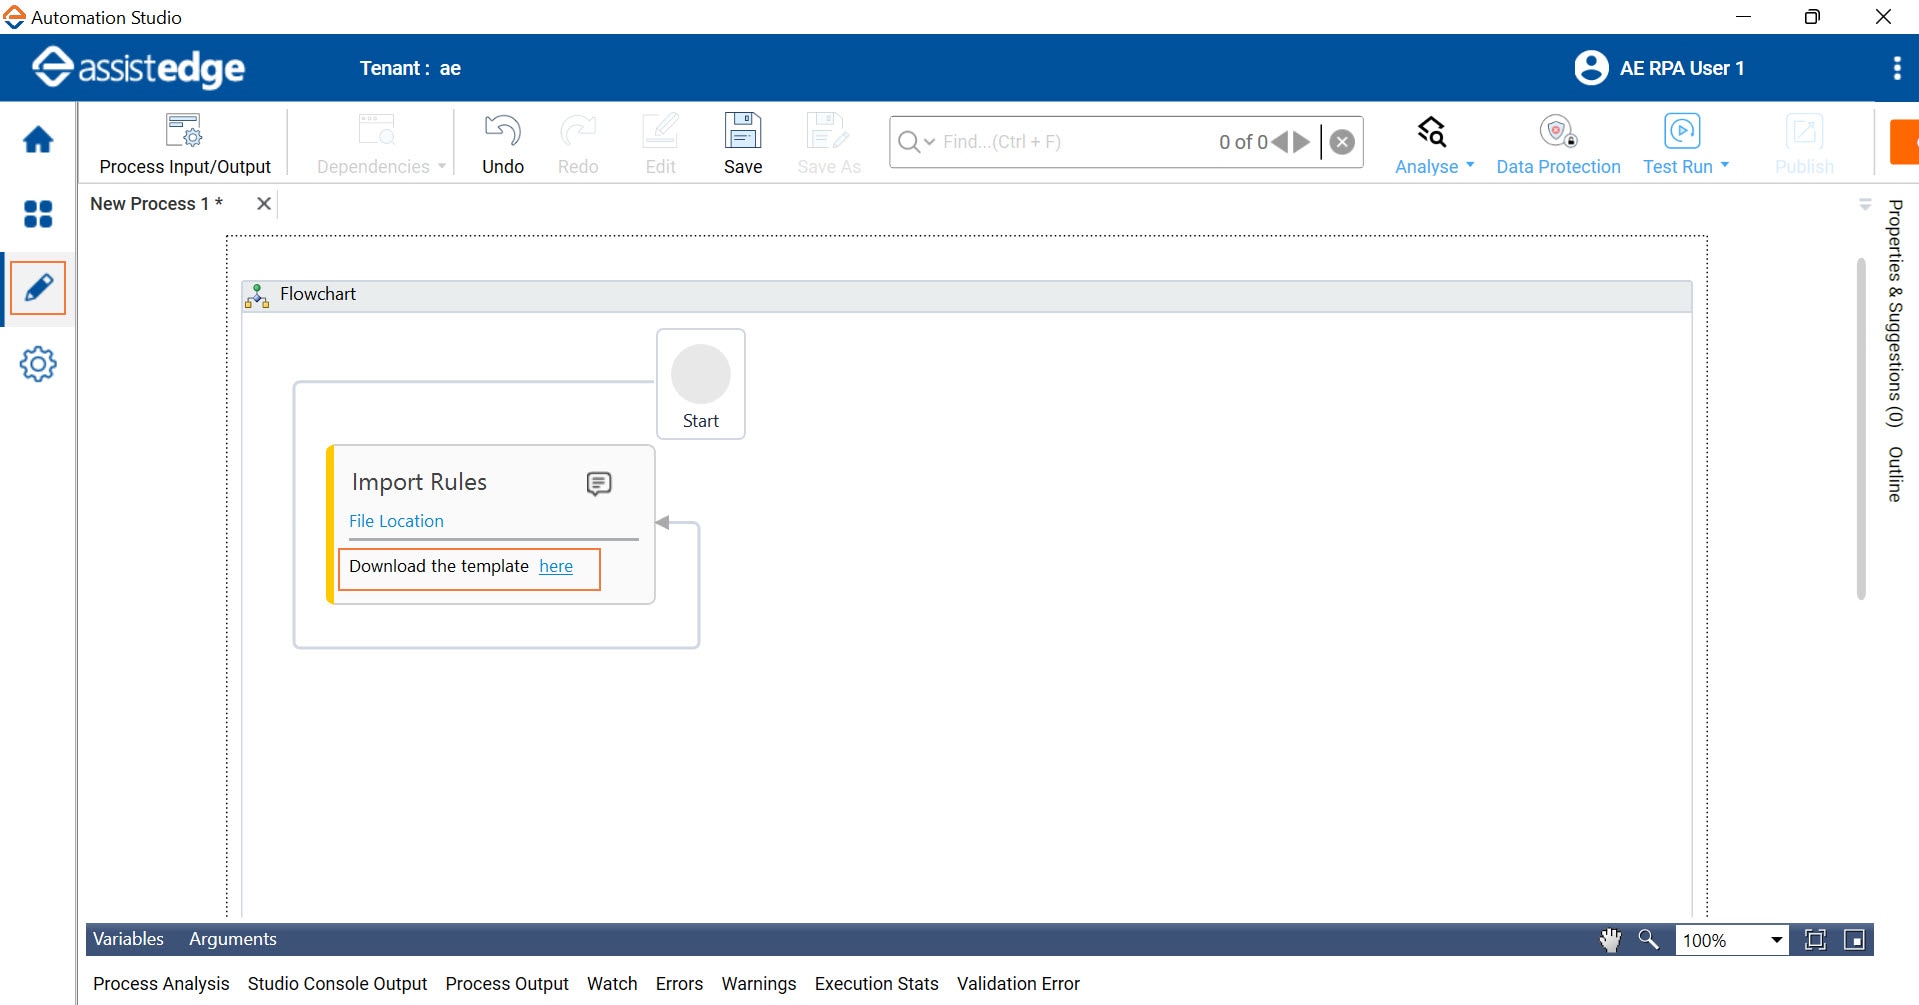
- In the Import Rules activity block, click here to download the Decision Rule template.
|
NOTE: |
You will not be able to add any other activity in this process. |
- Browse for the path where you want to download the template and then click Save.
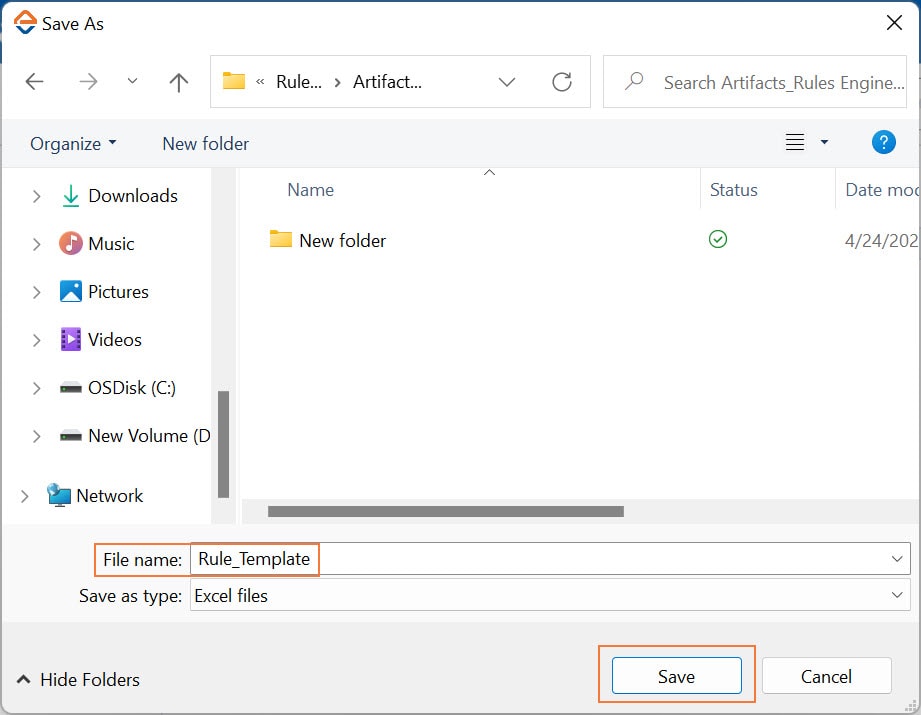
The Rule_Template Excel file is downloaded at the specified location.
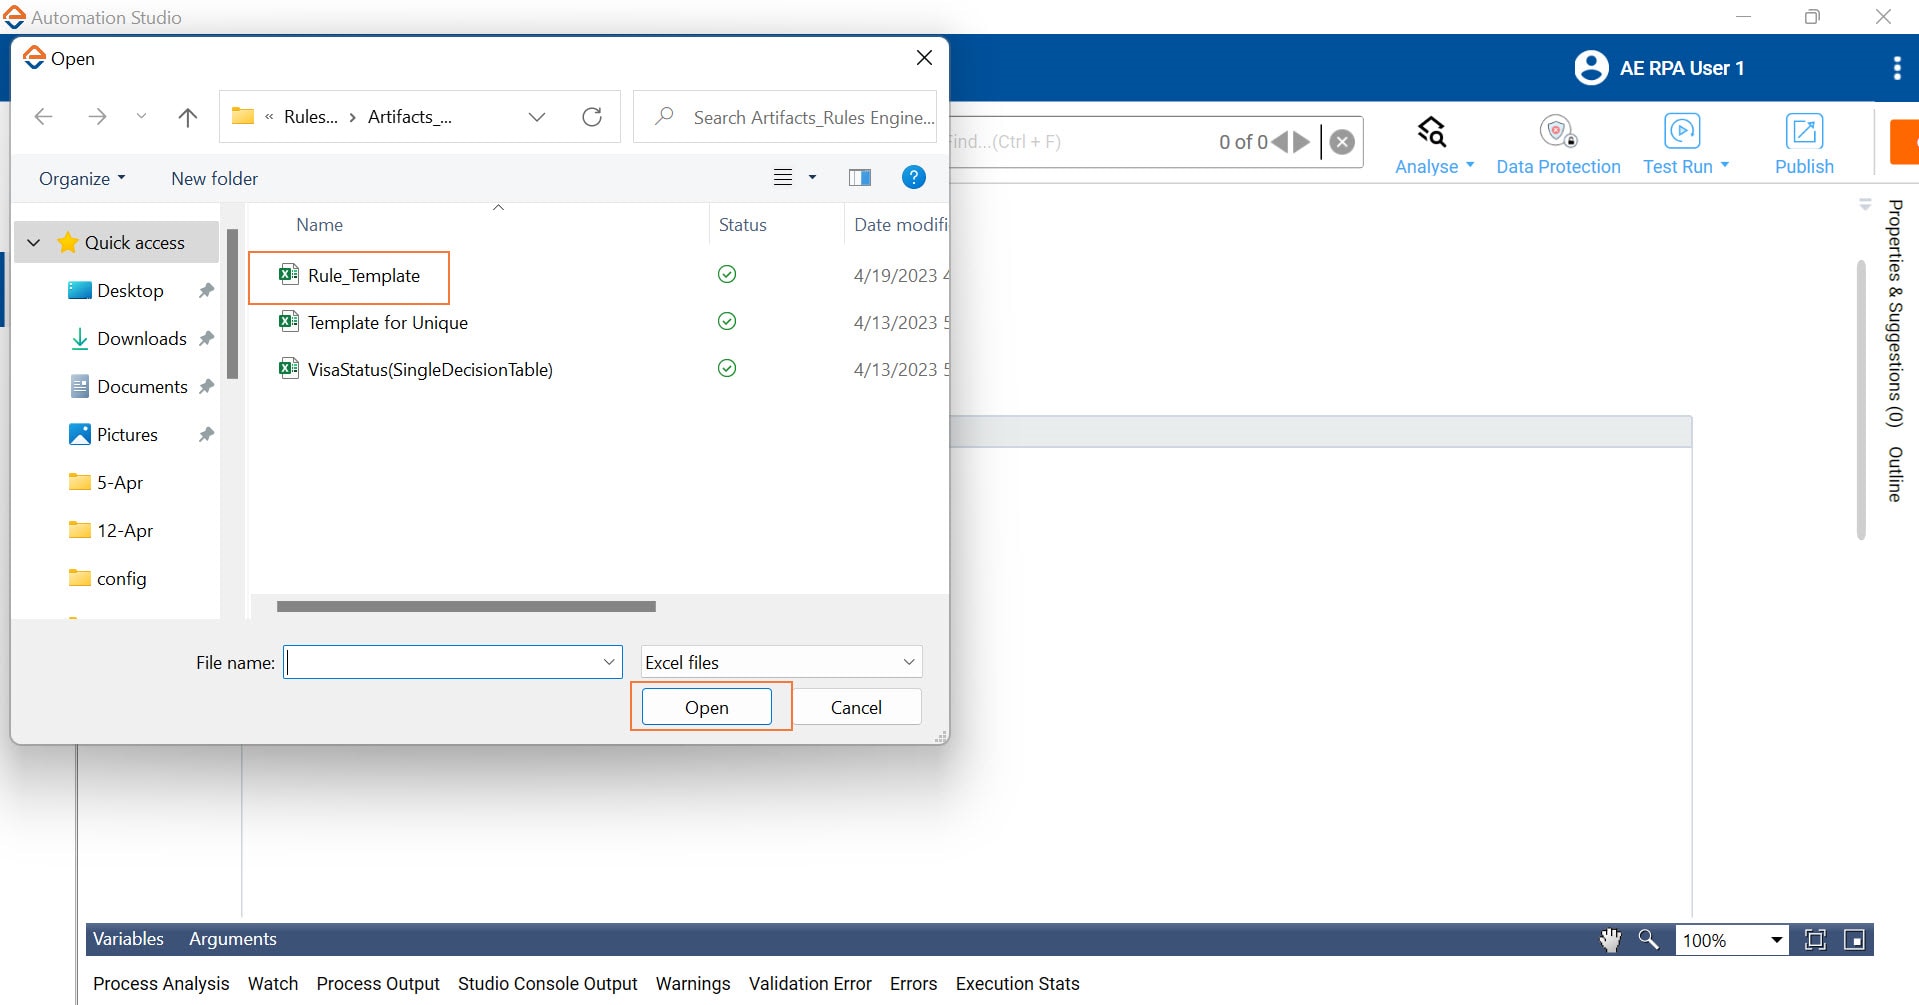
- Open the Rule_Template Excel file.
The Rule_Template includes the following two worksheets:
- Readme: This worksheet includes the Instructions and the Supported Data Types for using the Decision Table worksheet. The Supported Data Types can be String, Boolean, Decimal, Integer, Date and Date Time as shown in the following table with examples.
Data Type Allowed Operators Example String (in quotes, no operator Required) "Yes" Boolean
TRUE
TRUE
FALSE FALSE Decimal (no operator Required)
12
Less (<) <12
Less than or equal (<=) <=12
greater (>) >12
greater than or equal (>=) >=12 Integer (no operator Required)
12
Less (<) <12
Less than or equal (<=) <=12
greater (>) >12
greater than or equal (>=) >=12 Date (mm/dd/yyyy) (no operator Required)
12/15/2023 Less (<) <12/15/2023 Less than or equal (<=) <=12/15/2023 greater (>) >12/15/2023 greater than or equal (>=) >=12/15/2023 Date Time (mm/dd/yyyyTHH:MM:SS) (no operator Required)
12/15/2023T07:23:34 Less (<) <12/15/2023T07:23:34 Less than or equal (<=) <=12/15/2023T07:23:34 greater (>) >12/15/2023T07:23:34 greater than or equal (>=) >=12/15/2023T07:23:34
|
NOTE: |
|
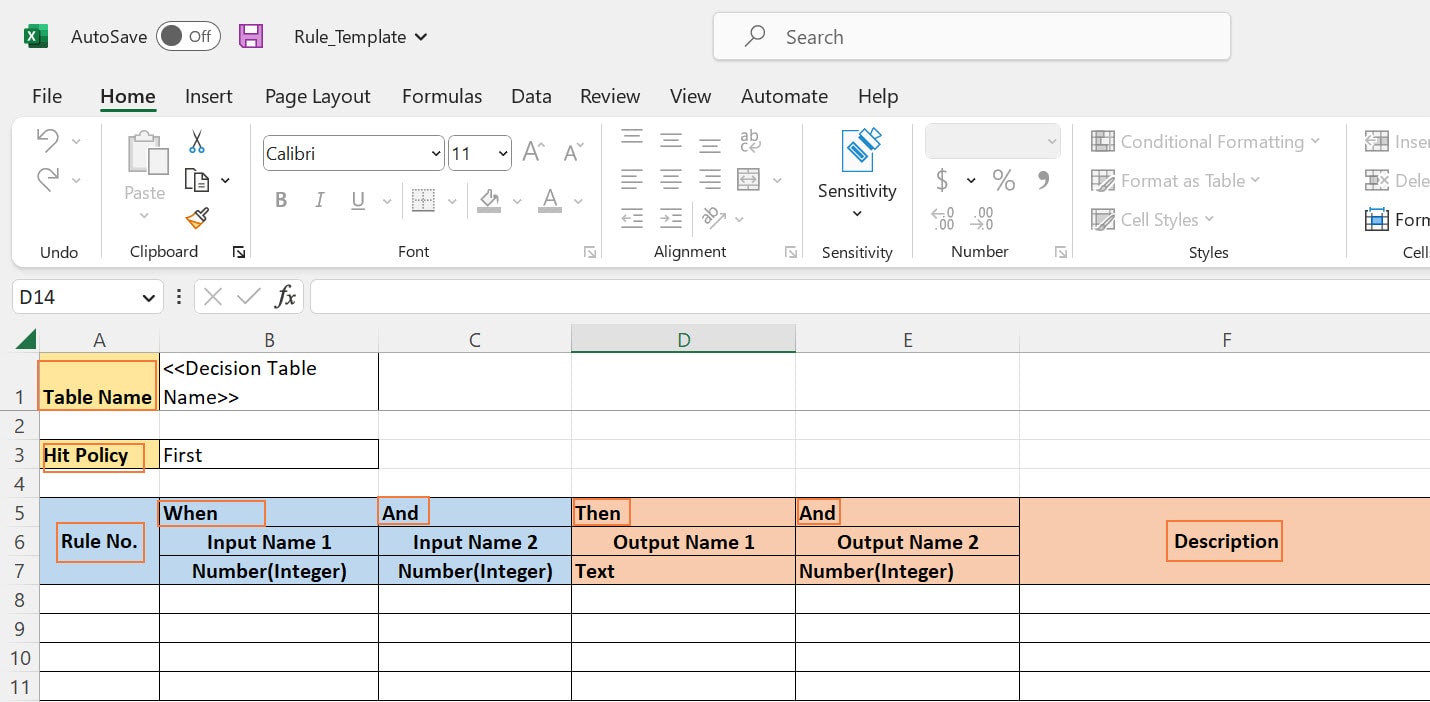
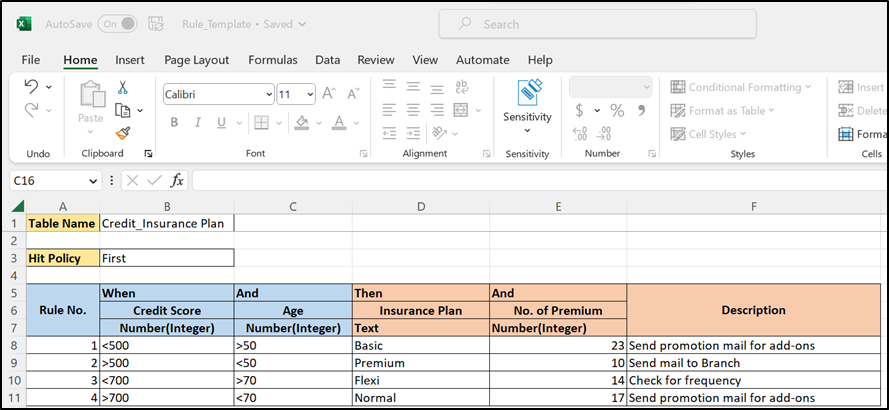
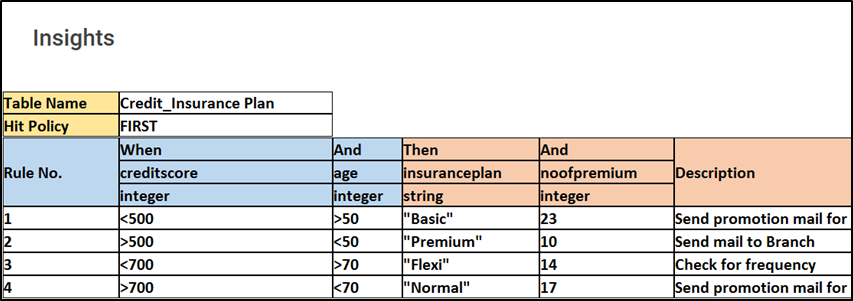
- Decision Table: This worksheet help you define the business rules and the expected result. The Decision Table worksheet consists of:
- Table Name: Specify the name of the decision table as per your business requirement. For example, Insurance Premium Decision Rule
- Hit Policy: Specify the method or approach to evaluate the business rules of the decision table. It can be either First (returns the first matching result of all the values as per the decision table rules) or Unique (returns the unique matching result of all the values as per the decision table rules)
- Rule No.: Specify the serial number of the rule. For example, 1
- Input Parameters (When-And Section): Specify the rule input values in When and And Columns as per the When and And condition.
For the When and And conditions, provide the Input Parameter Names (for example, Credit Score for When and Age for And), and the Data Types accordingly (for example, Number(Integer) for both the instances). For example, >500 and <50 for When and And conditions respectively.
- Output Parameters (Then-And Section): Specify the value as per the Then and And condition.
For the Then and And conditions, provide the Output Parameter Names (for example, Insurance Plan for Then and No. of premium for And), and the Data Types accordingly (for example, Text and Number(Integer). For example, Basicand 23 for Then and And conditions respectively.
- Description: Define or describe a rule in simple terms. This is for general reference purpose only. For example, Send promotion mail for add-ons.
|
NOTE: |
|
- Fill in the decision table data, save and then close the Excel file.
- In the Import Rules activity block, below the Start node, click File Location to browse for the saved file with the configured decision table.
-
Click Open. The Rule_Template Excel file is configured in the system and appears in the Flowchart designer area.
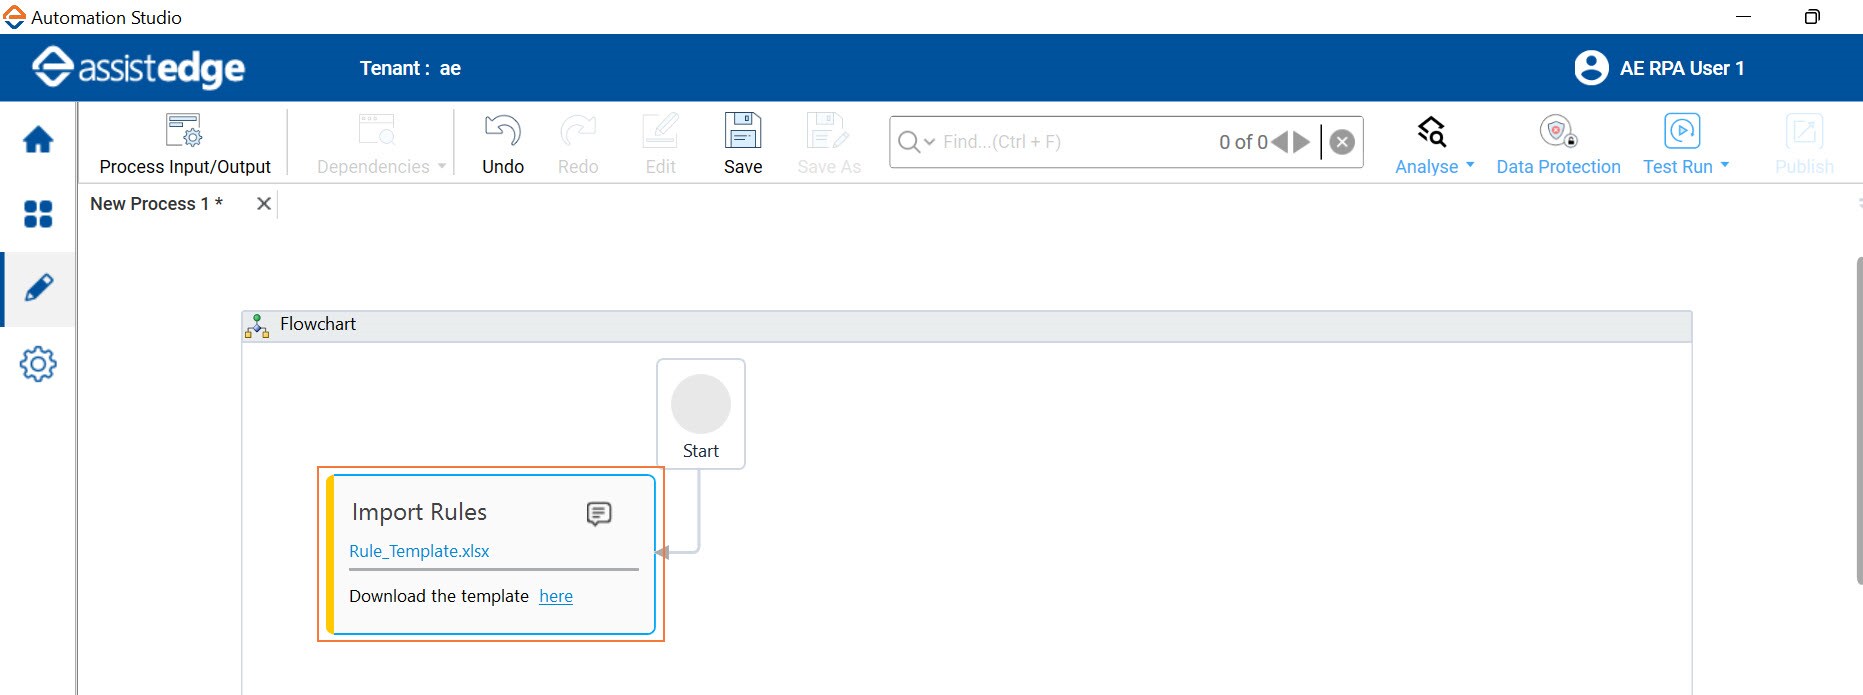
|
NOTE: |
The file name of the Rule template Excel can be renamed and not necessarily be Rule_Template. |
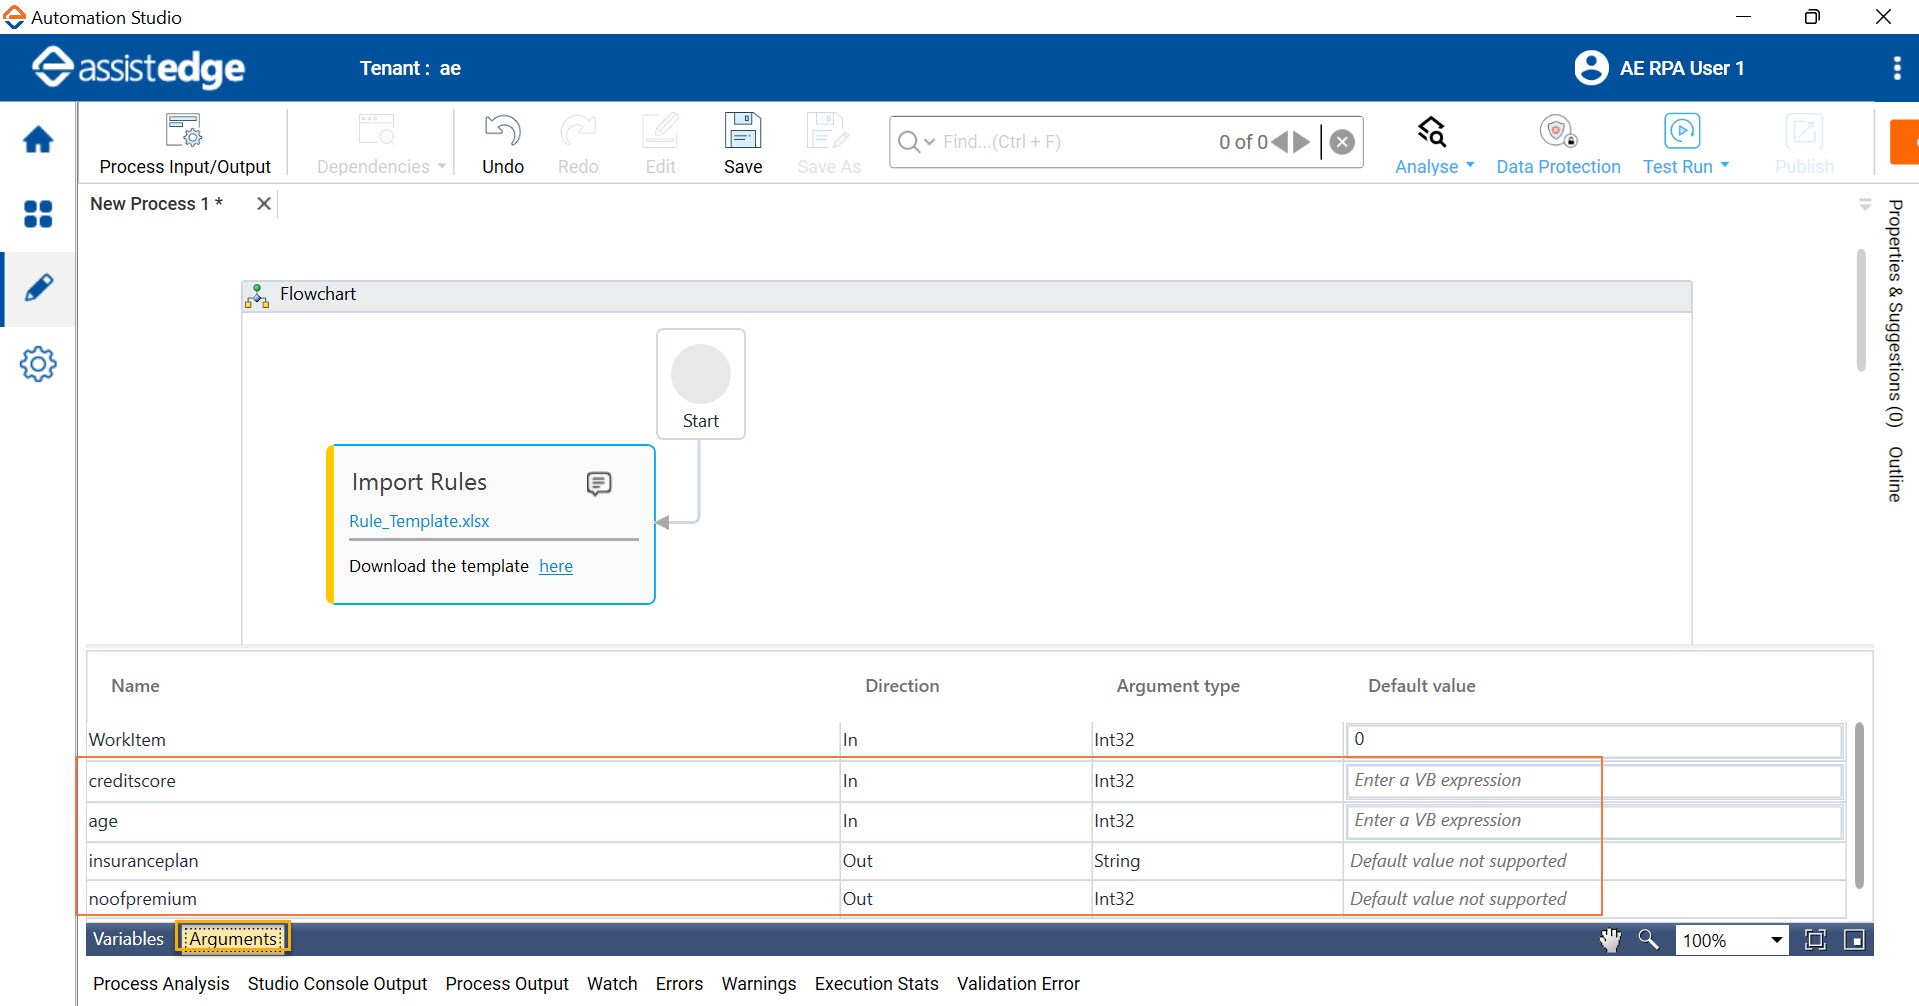
- In the Parameter bar of the Studio menu, click Arguments to open the Arguments pane. By default, the Arguments (Inputs and Outputs) are created automatically, based on data provided in the Excel. See Arguments in Automation Studio to know more about Arguments.
|
NOTE: |
Do not alter the Arguments created automatically as changing these arguments would lead to failure in process execution. |
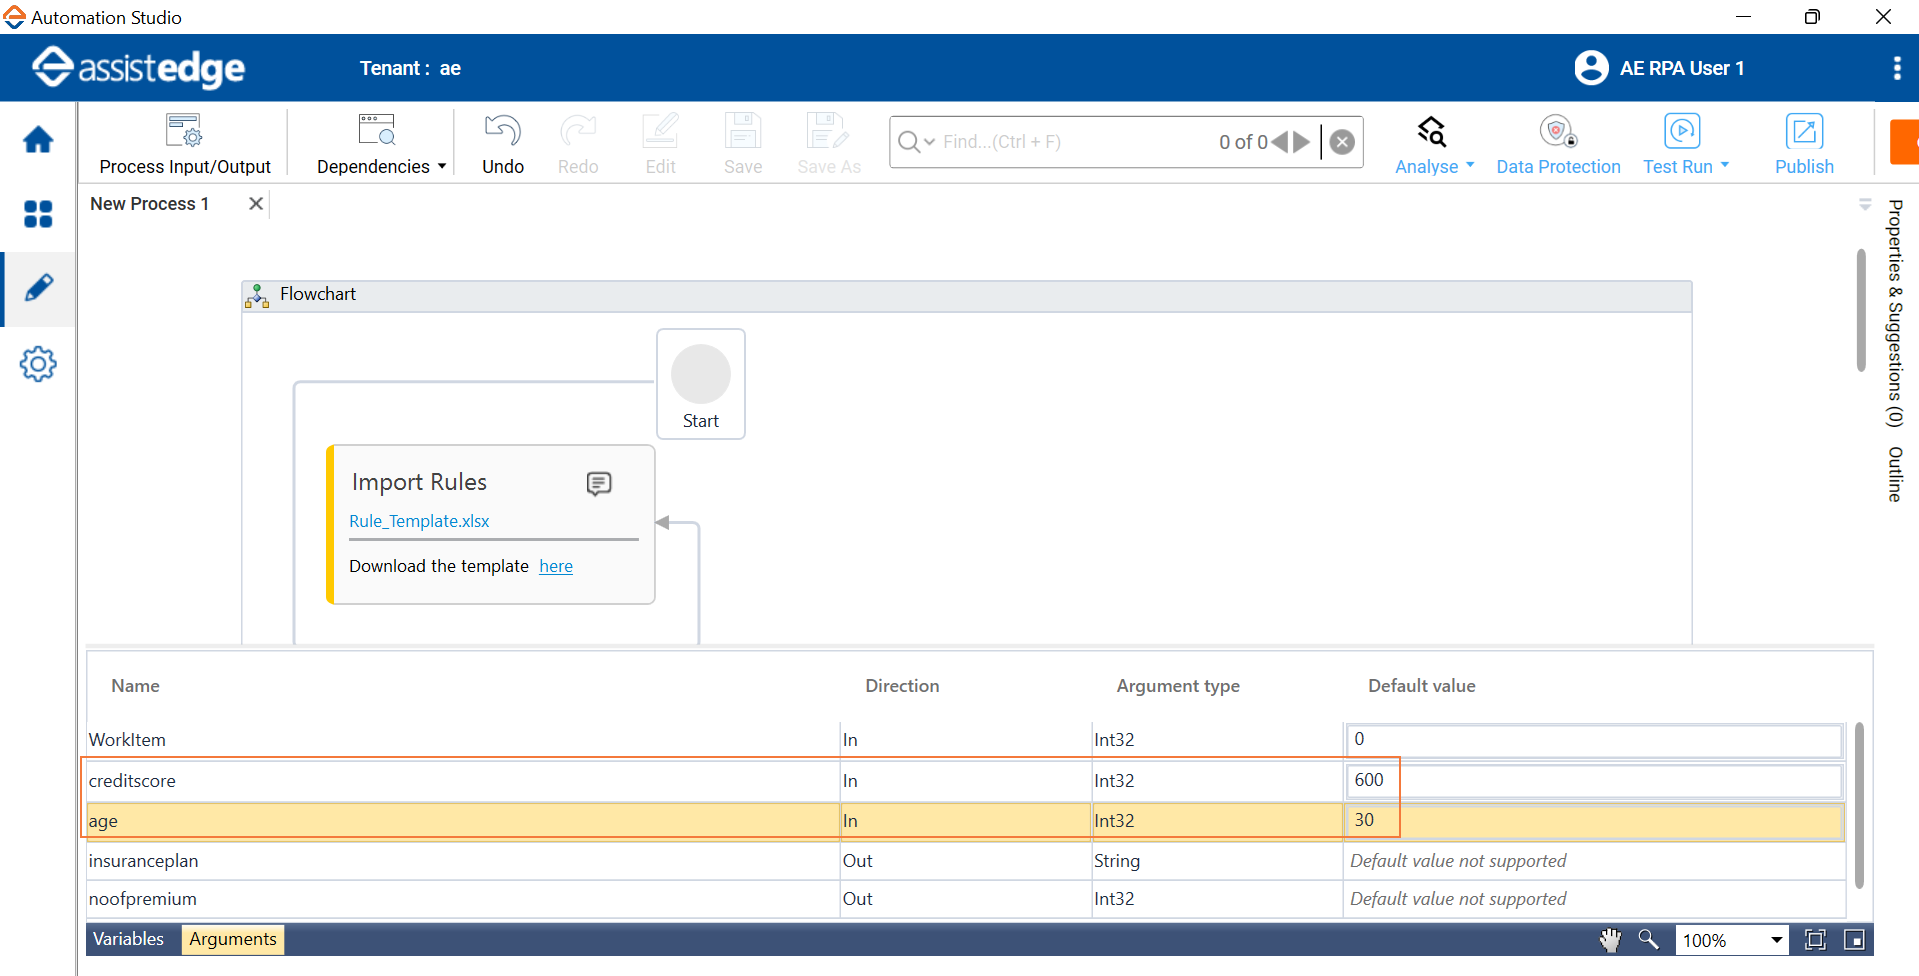
- In the Default value field, fill in the details for the input parameters details. For example, provide the values against which you want to test the configured decision rule.
|
NOTE: |
Step 9-11 is applicable only if you want to test run the configured decision rule process. |
- Test run the process. See Test Run Process to know how to perform testing of the process.
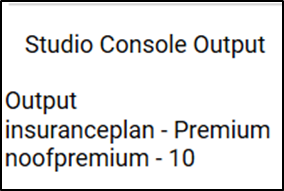
- Check the Studio Console Output for the result.
|
NOTE: |
If the provided values do not fulfil the conditions as defined in the Decision Table, the Studio Console Output is blank. |
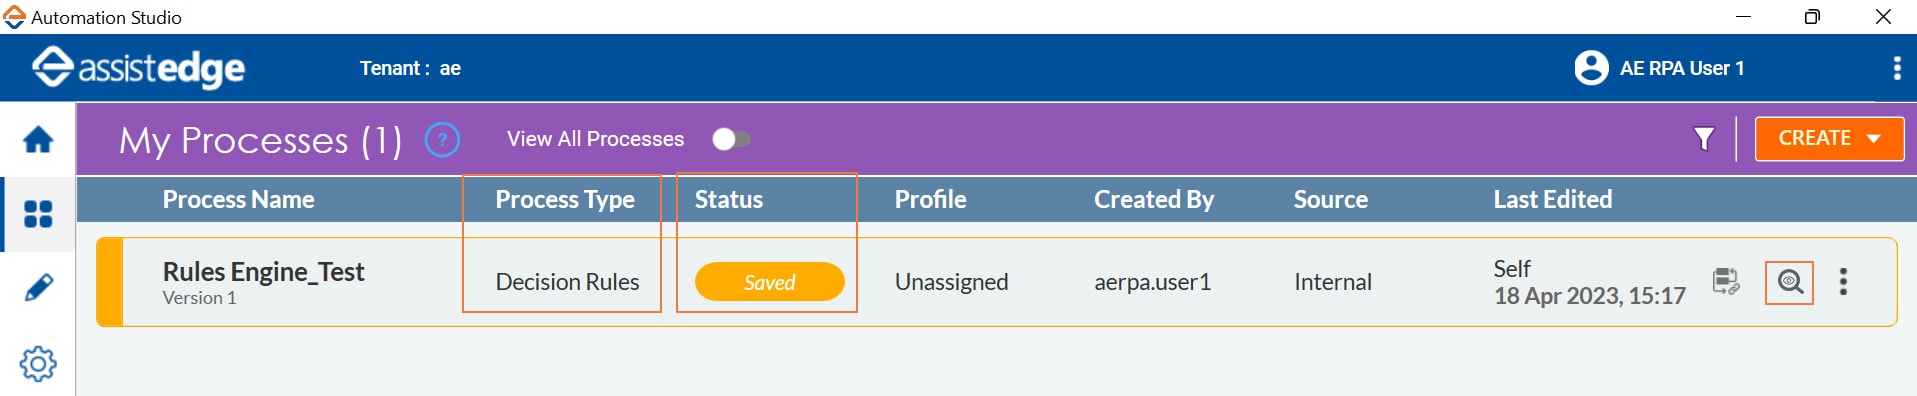
- Click Save to save the created Decision Rule process and provide the process name if prompted.
- Click
 (My Processes). The Rules Engine process created in Automation Studio is displayed and the process status can be viewed as Saved. Also, the Process Type is defined as Decision Rules for the created process.
- Click
 (Insights). The details relevant to the Decision Table are displayed.
- Publish and deploy the Decision Rule process. See Publish Process to know how to publish a process and Deploy Process section to know how to deploy a process.