Authorization Code
Authorization code OAuth flow type is used to gain access to the desired application. It involves authenticating the credentials using Authorize URL and then getting the access token using the Token URL.

To create Authorization Code Flow type in OAuth Activity
- In the OAuth Flow Types list, select the OAuth Flow types as Authorization Code.
- In the Preferred Browser list, select the browser that you want to use to open the required application for authentication. Supported browsers are- Chrome, FireFox and MicrosoftEdge
- Define all the input parameters as In arguments and output parameters as Out arguments in the Argument bar to make it available for the selection.
- Provide Client ID, Redirect Url, Authorize Url, Access Token Url, Scope and Client Secret (or Client Certificate related details) by selecting the In arguments holding the respective values. The selected arguments must be of String type. For more information, see Authentication Details.
Alternatively, manually enter the required details and select the Is Default checkbox to set the entered value as the default value for the respective fields.
NOTE:
- You can provide space separated multiple scopes as per the requirement.
- Either Client Certificate details or Client Secret value can be provided at a time. The Client Certificate related fields are disabled if Client Secret is provided and vice-versa.
- The file size of the client certificate must not exceed 5 kb. . The supported client certificate file formats are .pfx and .p12.
- Public Client Application: In case, the application has public client platform then, you can skip entering the value in client secret field.
- Private Client Application: In case of private client application, you must enter the client secret value. This value is considered difficult to access and can store an application secret. Private clients can hold configuration-time secrets.
- In the Provide Output Argument field, select the output argument. The output argument should have Direction as Out. It stores the access token value returned by the OAuth activity on successful authentication.
The Authorization Code flow type is configured.
Steps for Win Popup Handler - Once all the configurations are done, click the
 (Settings) icon on the OAuth activity. It launches the selected browser window.
 - Double click the OAuth Activity. Drag & Drop Win Popup Handler Activity inside it.
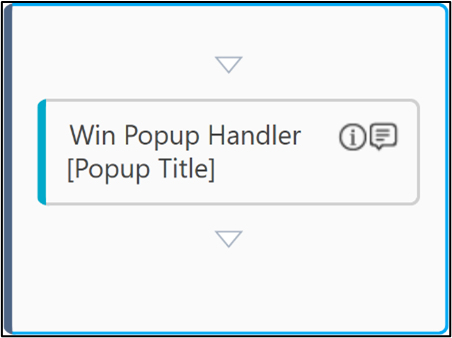
- Double click the Win Popup Handler Activity and click Add to add Application Control.
- Click the
 (Field Configuration) icon.
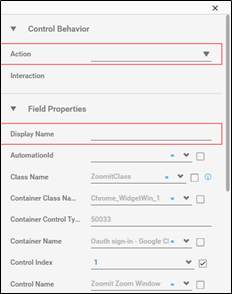
 - Configure the step to provide the email id.
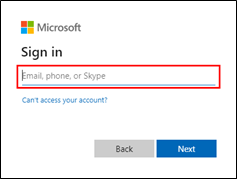
- Configure the parameters in the Application Control to enter the mail id.
- Similarly, add multiple Application Control activities till the sign in process is completed for the user.
The Authorization Code flow type is configured.
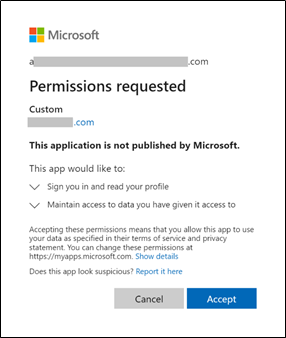
If the user is accessing the application for the first time with the provided scope, then a prompt to give the consent appears. If the consent is provided once, then re-consent will not be taken. Hence, automating this step is not required.
|
NOTE: |
|
Step-By-Step Guide to use Authorization Code Flow type in OAuth Activity
Let’s create an example to fetch token using the Authorization Code Flow type in OAuth Activity.
- Make sure the prerequisites for using OAuth activities are met.
- In the Canvas Tools pane, click Auth Types to expand the tool and view the associated activities.
- Drag the OAuth activity and drop the activity on the Canvas.
- In the OAuth Flow Types list, select the Authorization Code as OAuth Flow type.
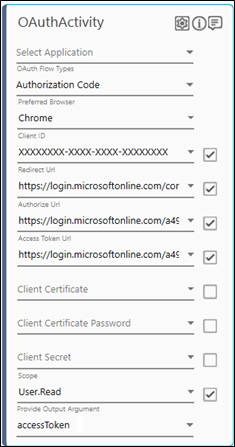
- In the Preferred Browser list, select the browser from the available options. For example, Chrome.
- In the Client ID field, specify the Client ID. Additionally, select the checkbox if it is a default value. Sample Format: XXXXXXXX-XXXX-XXXX-XXXX-XXXXXXXXXXXX. For more information, see Prerequisites.
- In the Redirect URL field, specify the redirect URL. Additionally, select the checkbox if it is a default value. For example: https://login.microsoftonline.com/common/oauth2/nativeclient.
- In the Authorize URL field, specify the Authorize URL. Additionally, select the checkbox if it is a default value. For example: https://login.microsoftonline.com/{tenant-id}/oauth2/v2.0/authorize.
- In the Access Token URL field, specify the Access Token URL. Additionally, select the checkbox if it is a default value. For example: https://login.microsoftonline.com/{tenant-id}/oauth2/v2.0/token.
- In the Client Secret field, specify the Client Secret generated during the registration of the application. Additionally, select the checkbox if it is a default value. In case, the client is running on Public Client application then, you can skip entering the value in client secret field.
- In the Scope field, specify the scope of the OAuth activity. For example, User.Read. Additionally, select the checkbox if it is a default value.
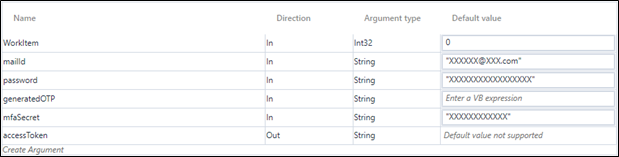
- In the Parameter bar, create the below arguments with Direction as In:
- mailId – Enter the Email to store and pass as the input value for email. Example – aeuser@ev.com
- password – Enter the Password to store and pass as the input value for password.
- generatedOTP
- mfaSecret – Enter the secret key displayed while adding Authenticator app. For more information, see prerequisites for using OAuth activities.
NOTE:
- mailId and password can also be passed as the default value.
- If Multi-Factor Authentication is not enabled on the user account using which authentication will be performed, then no arguments should be created for storing OTP and MFA Secret Key.
- In the Parameter bar, create an Out argument as accessToken to store the extracted token returned from the OAuth activity.
- In Provide Output Argument list of the OAuth activity, select the accessToken argument.
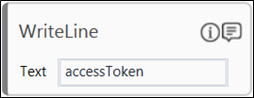
- To verify or check the generated access token WriteLine activity can be used. The text entered should be a string or a string variable.
- Click the
 (Settings) icon on the OAuthActivity. It launches the selected browser window.
 - Perform the Configurations using Win Pop Handler to SignIn into the application. For more information, see Configurations using Win Popup Handler.
- Once the Win Popup Handler configurations are done, test run the process.
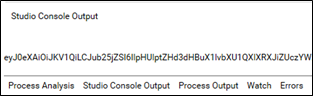
- Once the test run is successful, the accessToken value gets printed in the Studio Console Output.