Configuration
This section helps you to perform the configuration changes according to which the ROI is calculated upon the RPA deployment. As an administrator, you are required to perform certain configuration changes to start with the product.
Before starting with configurations, ensure that you have performed the following:
- Business Hierarchy is created in the Administrator module. For more information about creating hierarchy, see Hierarchy section in Administrator.
- Before proceeding, verify the logged in user role and its access. For more information about providing access to a specific user, see Role Access section.
You can perform the following configurations:
Before proceeding – Business Hierarchy (Example)
For the ease of understanding and feasibility, an example of business hierarchy is considered in all the sections i.e., Business Group > Department > Sub-Department.
ROI Analytics displays the hierarchy in ROI Analytics page depending on the hierarchy configured in the Administrator module. For more information about creating preferred hierarchy for the business, see Hierarchy Configuration section in the Administrator.
|
NOTE: |
As per the configured hierarchy in the Admin Module, the number of entities may vary in the ROI Analytics tabs and pages. |
General Configuration
This is the first configuration which user has to perform as per the assigned role.
To set the general configuration settings:
- On the ROI analytics page, click Configurations > General
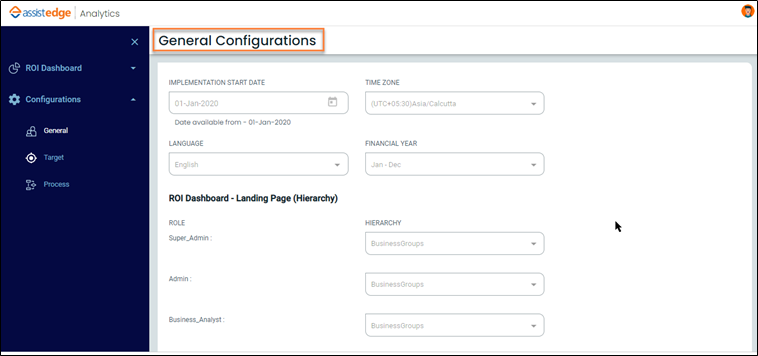
The General Configurations page is displayed.
- In the IMPLEMENTATION START DATE, click the
 (Calendar) icon and select the date. You can edit the date only after the first process execution.
 - In the TIME ZONE list, select the preferred option from the available list.
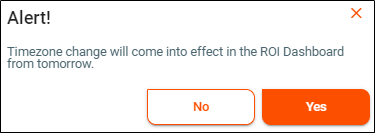
An alert message appears as Time zone change will come into effect in the ROI Dashboard from tomorrow on the page. Click Yes, to update the time zone changes else; click No.
- In the LANGUAGE list, select the preferred option from the available list.
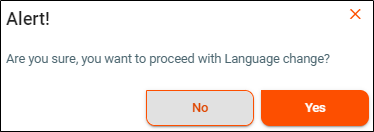
An alert message appears as Are you sure, you want to proceed with Language change. Click Yes to update the language changes; else, click No.
- In the FINANCIAL YEAR, select the preferred option from the available list. You will get the financial year option as per configuration implemented while installation of the product.
- In the ROI Dashboard - Landing Page (Hierarchy) section, from the HIERARCHY list, select the preferred hierarchy such as Organization, Profile, and Process corresponding to a particular role and map it. Hierarchy list is shown depending on the Hierarchy selected, ROI Achieved Dashboard showcase the data from the selected Hierarchy. As per the hierarchy level selected here, the ROI Analytics dashboard is shown to the logged-in user or role.
|
NOTE: |
|
- Click Save to set the general configuration settings for the ROI Analytics.
A message appears as General configuration updated successfully on the page.
Target Configuration
As a business analyst, you are required to set yearly targets for effort and cost savings for a particular process. Customers having AE Discover can refer the Estimated Effort and Cost Savings predicted by Discover and set the targets accordingly. Entity name created in the Hierarchy configuration page is shown on this page to set the target for ROI Analytics. You can also apply filter to the particular target set.
To set ROI Analytics target:
- On the ROI analytics page, click Configurations > Target

The Target Configurations page is displayed.
- In the <Business Groups> list, select the preferred option. For more information, see Before proceeding – Business Hierarchy (Example).
- In the YEAR list, select the preferred financial year. In the drop-down, you can see the previous financial year, current financial year, and next financial year.
- Then, click Apply.
The Target for the particular financial year is set and displays the details such as Process Name, Profile Name, Target Effort Savings (hours), and Target Cost Saving (USD).Fields Description Process Name Displays the name of the executed process. Profile Name Displays the name of the executed profile name. Target Efforts Savings (hours) Displays the target efforts saving values in hours. Additionally, you can edit the target values. Click in the field to edit the target values. Target Cost Saving (USD) Displays the target cost-saving values in USD. Additionally, you can edit the target values. Click in the field to edit the target values.
- Download template: Click the
 (Download Template) icon to download the particular template.
 - Target Savings: Click the
 (Target Savings) icon to save the target savings.
 - Filter: This capability enables you to search the particular process or profile as per requirement. You can search using the following options:
- Profile Name
- Process Name
- Download template: Click the
In the filter list, select filter type and then select the preferred profile or process. Selected profile or process details are displayed.
|
NOTE: |
Default value is always 0. The Target value is 0 by-default unless, the user sets the target value as per preference. |
- Click Save.
Process Execution Configuration
As an administrator, you are required to perform certain process execution configuration settings to start working with ROI Analytics.
Process Execution Configuration contains two tabs which include:
Effort Savings
Effort Savings is calculated based on the number of automation transactions completed.
In this method, BA (Business Analyst ) provides the details of Manual Execution time per work-item and AssistEdge calculates the number of work-item processed in the process.
• Effort savings per record = Manual execution time per record (Manual Input)
• Effort savings per process = Number of records executed for the process * Efforts savings per record.
Let’s understand the concept of workItem and about automation process which can be categorized as follows:
- Quantified process: The automation involves quantities of work items that can be measured such as Number of invoices, Number of excel rows, number of emails sent, number of issues, and so on. When the automation is executed, 1 transaction can process 1 or more of these workitems.
To calculate the effort savings.- An argument called WorkItem is present in each process i.e. Normal and Load Gen processes.
- By default, the value of WorkItem is 0.
- RPA Designer can update/increment the value of workItem for each SUCCESSFUL workitem processed. For example, the WorkItem argument can be defined in an Excel loop where once the first excel row is processed workItem value would become 1, the second row is processed the workItem value would become 2.
- Based on the SUCCESSFUL workitems processed, the workItem values keep increasing.
- Post the completion of Process execution (Success/Failure) the value of Successful WorkItems calculated is multiplied with the Average Manual Effort Savings (Effort savings per record)
- Non-Quantified process: In this case, the automation does not involve any workitems or work items that need to process. The whole process can be as a single work item. For example, Form filling and submission, create a ticket based on customer inputs, and so on.
To calculate the effort savings:- The argument called WorkItem is present as part of each process (Normal and Load Gen processes only).
- By default, the value of WorkItem is 0.
- Since the whole process is a single work item the value won’t increase.
- In case the process is a success, workItem successfully executed is considered as 1 and multiplied with the Average Manual Effort Savings and stored as part of Effort Savings (Success).
Mechanism for handling Business Exception:
- In case the process is a failure. WorkItem failed while executing is considered as 1 and multiplied with the Average Manual Effort Savings and stored as part of Effort Savings (Failure).
To configure the process execution (effort savings) ROI Analytics:
- On the ROI analytics page, click Configurations > Process
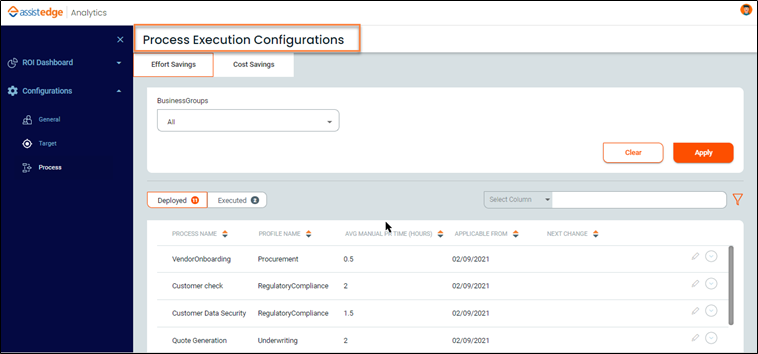
The Process Execution Configurations page is displayed.
- Click the Effort Savings tab.
- In the <Business Groups> list, select the preferred option. For more information, see Before proceeding – Business Hierarchy (Example).
|
NOTE: |
|
- Then, click Apply.
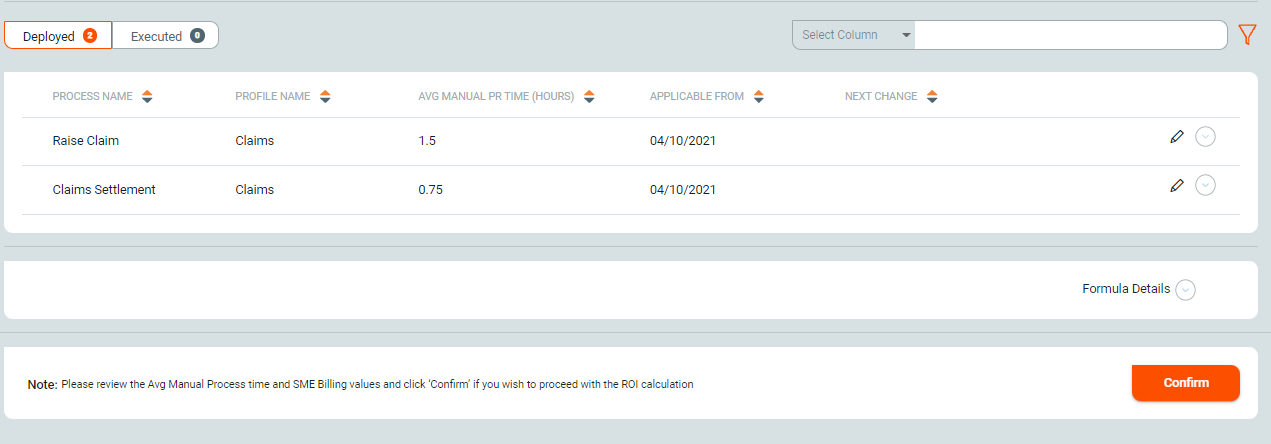
The Deployed and Executed Tab with the following details is displayed.
| Fields | Description |
| Process Name | Displays the name of the deployed and executed process. |
| Profile Name | Displays the name of the deployed and executed profile name. |
| AVG Manual Pr Time (hours) |
Displays the deployed and executed process or profile average manual per time of the hours. Additionally, you can edit the values.
To edit the avg manual pr time (hours):
4. Click Save. |
| Applicable From | Displays the date from which the values are applicable. |
| Next Change | Displays the date on which the edited value would come into effect. |
|
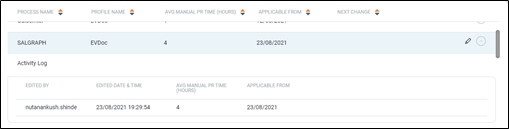
Expand/Collapse |
Expand and Collapse icon enables you to view the recently edited details of the process. Click the  (Expand) icon to view details such as Edited by, Edited Date & Time, AVG Manual Pr Time (hours), and Applicable from. (Expand) icon to view details such as Edited by, Edited Date & Time, AVG Manual Pr Time (hours), and Applicable from. |
 (Edit) icon corresponding to a particular process name.
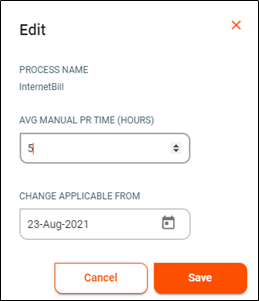

- Formula Details: Click the
 icon to view the formula details. In this method, BA(Business Analyst ) to provide the details of Manual Execution time per record and AssistEdge will calculate the number of records processed in the Process.
- Effort savings per record = Manual execution time per record (Manual Input)
- Effort savings per process = Number of records executed for the process * Efforts savings per record.
- Filter: This capability enables you to search the particular process or profile as per requirement. You can search using the following options:
- Profile Name
- Process Name
In the filter list, select filter type and then select the preferred profile or process. Selected profile or process details are displayed. For more information see, Effort Savings.
- Activity Log: Click the
 (Expand) icon to view the details of the profile and process such as Edited by, Edited Date & Time, AVG Manual Pr Time (hours), and Applicable from.
Cost Savings
Cost savings enables you to reduce the expected cost of given process execution.
To configure the process execution (effort savings) ROI Analytics:
- On the ROI analytics page, click Configurations > Process
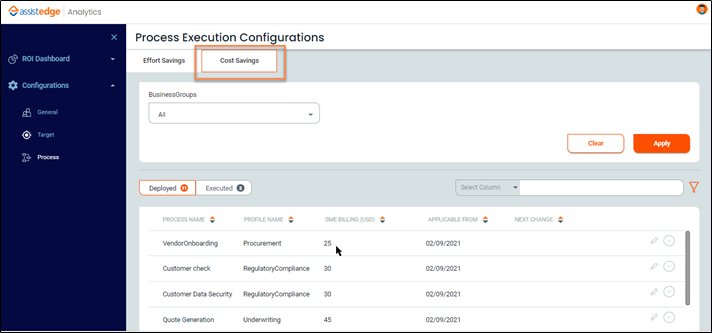
The Process Execution Configurations page is displayed.
- Click the Cost Savings tab.
- In the <Business Groups> list, select the preferred option. For more information, see Before proceeding – Business Hierarchy (Example).
|
NOTE: |
|
- Then, click Apply.
The Deployed and Executed tabs are displayed with the following details:
| Fields | Description |
| Process Name | Displays the name of the deployed and executed process. |
| Profile Name | Displays the name of the deployed and executed profile name. |
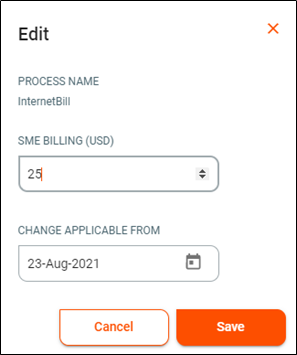
| SME Billing (USD) |
Displays the SME Billing hours in USD. Additionally, you can edit the values.
|
 |
Click the
|
| Applicable From | Displays the date from which the values are applicable. |
| Next Change | Displays the date on which the edited value will come into effect. |
 (Expand) icon to view the details such as Edited by, Edited Date & Time, SME Billing (USD), and Applicable from.
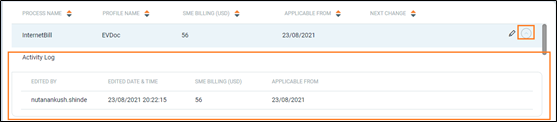
- Filter: This capability enables you to search the particular process or profile as per requirement. You can search using the following options:
- Profile Name
- Process Name
- In the filter list, select the filter type and then select the preferred profile or process. Selected profile or process details are displayed.
- Activity Log: Click the
 (Expand) icon to view the details such as Edited by, Edited Date & Time, SME Billing (USD), and Applicable from.

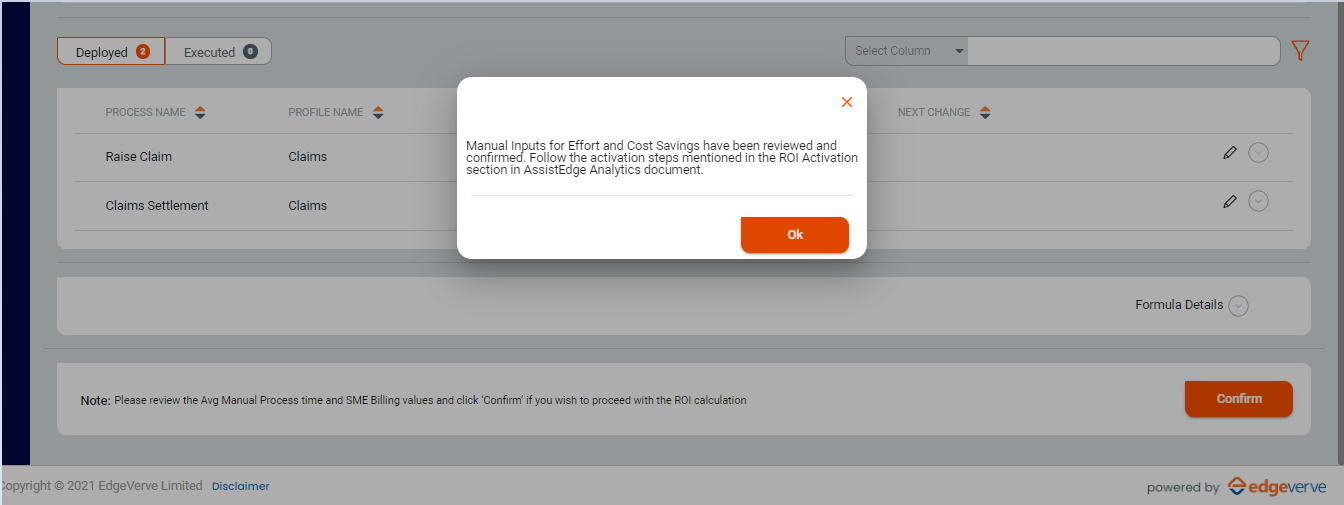
- If you want to proceed with ROI activation, click Confirm. ROI Activation means to start ROI calculation based on the reviewed manual effort (Avg Manual process time) and cost values (SME Billing).
|
NOTE: |
Default value of effort savings is considered as 1 hour and default SME Billing per hour as $25. |
Then, a message appears on the page as Manual inputs for Effort and Cost Savings have been reviewed and confirmed. Follow the activation steps mentioned in the ROI Activation section in AssistEdge Analytics document. For more information, see ROI Activation.
- Click Ok.