Installing Proctor
This section is applicable only if you want automated Robot Farm management via ControlTower.
Prerequisite
- Install Microsoft .Net framework (v 4.8) on the machine where Proctor will be installed.
- Install Microsoft Visual C++ 2015 Redistributable (x86) or Install Microsoft Visual C++ 2017 Redistributable (x86) or Microsoft Visual C++ 2015-2019 Redistributable (x86) or Microsoft Visual C++ 2022 Redistributable (x86).Net framework (v 4.8) on the machine where Proctor will be installed. You can download it from the below link:
https://support.microsoft.com/en-in/help/2977003/the-latest-supported-visual-c-downloads.
To install Proctor:
- Open the Admin Module> Client tools > Download Robot. For more information about downloading robot folder, see Client tools > Download Robot section in AE-RPA-Administrator Guide.
- Copy the Robot folder on your system.
NOTE:
Proctor should be copied and installed at a shorter path. For example, D:\Robot\Proctor.
- Access Robot > Proctor > EV.AE.Proctor.exe.config file to set configurations that are specific to your system, double click and open the file. The EV.AE.Proctor.exe.config file opens.
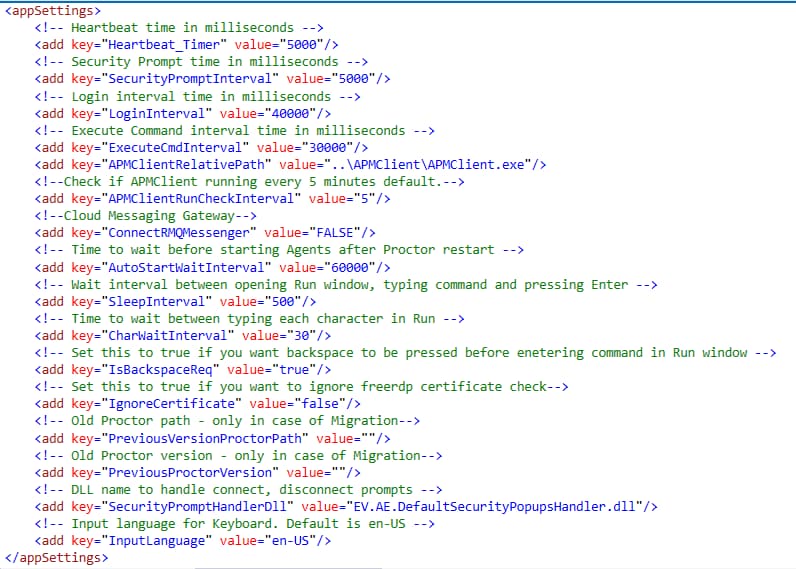
- Update the below mentions parameters:
Configuration Description Heartbeat_Timer
The time interval in which Proctor sends its heartbeat.
It is recommended not to change the default value.SecurityPromptInterval It signifies the interval of security prompts specified in milliseconds. LoginInterval It signifies the time interval that is required for user session to get created i.e. time required for you to login to your system. ExecuteCmdInterval It signifies the time interval required by the Proctor to complete the actions and then start the agent.
When a new agent is added, Proctor has to perform certain actions on the system such as, making a new copy of the Robot Agent folder for the particular user.APMClientRelativePath It signifies the folder path of the APM client along with the APMClinet.exe file name. APMClinetRunCheckInterval Signifies the time interval to check if the APM client is running. By default, this value is set to 5 minutes. ConnectRMQMessenger Signifies if the cloud messaging gateway is connected. By default, it is set to FALSE. AutoStartWaitInterval It signifies the time interval to wait before the agents start after Proctor restart. It must be specified in milliseconds. By default, it is set to 60000 milliseconds. SleepInterval It signifies the wait time until the Run window is open, command is written and the Enter key is pressed. CharWaitInterval It signifies the wait time while typing each character in the Run window.
IsBackspaceReq It signifies if backspace must be provided prior to writing command in the Run window. By default, it is set to true.
IgnoreCertificate It signifies if the freerdp certificate check must be ignored or not. By default, it is set to false. Change this value to true if you want to apply the check.
PreviousVersionProctorPath It signifies the Proctor installation path. This property is used in the migration. Previous proctor version It signifies the previous version of proctor. This property is used in the migration. SecurityPromptHandlerDll Signifies the DLL name to handle connect and disconnect the prompts using the EV.AE.DefaultSecurityPopupsHandler.dll file at the location- Robot > Proctor InputLanguage Signifies the Keyboard Language of the system. The default value is en-US. This represents the English(United States) language. Out of the box support is also available for English (United Kingdom) keyboard. In case, you are using the English(United Kingdom) keyboard then, change the value of this property to “en-UK”. key=”InputLanguage” value= “en-UK”
NOTE:
For more information about security prompts configuration in Proctor, see Configuration for security prompt section in AE-RPA-Control Tower Guide.
- Save and close the file.
Perform below mentioned steps:- For Windows: Open the command prompt with administrator rights and change the directory to Robot folder.
- Run ae install to install Proctor.
Robot>ae install .
Net framework 4.8 and Microsoft Visual C++ 2015 Redistributable (x86) or
Micros oft Visual C++ 2017 Redistributable (x86) or Microsoft Visual C++ 2019 Redistributable (x86) or Microsoft Visual C++ 2022
Redistributable (x86) is pre-requisite to run Proctor.
Please confirm if it is installed and proceed further (y/n) : y
Proctor Installed. Proctor status is: START_PENDING
- Run ae status to check the current status of Proctor. Command line returns to the base directory.
<Robot>ae status
Proctor status is: RUNNING
The Proctor is installed.
NOTE:
- Proctor must be installed on the system where you wish to run the RobotAgent.
- Robot Agent master copy (RobotAgent folder) present at Proctor should be new and was never used to launch Agent manually from this RoboAgent folder. You can verify this by opening file Robot > RobotAgent > Configurations > AgentConfig.xml, here AgentId should be in following format ‘<AgentId></AgentId>’.
- When Agent are created using Proctor it may take few minutes as it creates windows session, copy agent and launches it. The progress bar at the right bottom screen of control tower will disappear after 1 minute. You can check the Notification on right top of control tower for the success/ failure status.
Verifying Proctor installation
To verify Proctor:
- In the Start menu, enter Run, and then click the displayed app. The Run window opens.
- Enter services.msc and then click OK.

The Services window opens. - Locate Proctor and check the Status of it. By default, after installation, Proctor remains in the Running status.
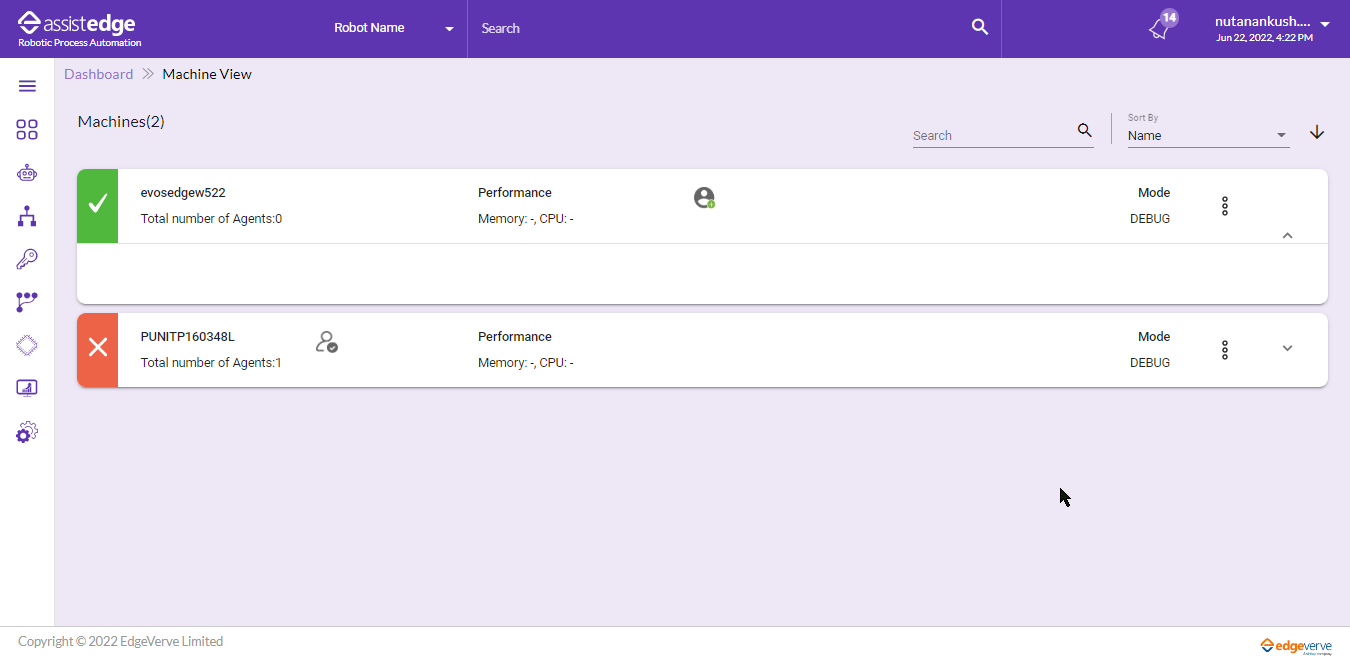
- Visit the URL of the Control Tower. The Admin page opens.
- Expand the left navigation pane and access Control Tower.
- Click Machines.
The Control Tower page opens. It reflects the name of the machine where proctor is installed. - Click name of the machine to expand and view the details of the Robot Agent created via Proctor.
The successful verification of Proctor is done.
NOTE:
Refer the AE-RPA-Control Tower Guide to know the details.
Verifying Robot Agent
To verify RobotAgent:
- Access Robot > RobotAgent
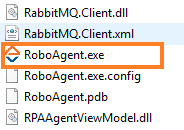
Find RoboAgent.exe file, double click to launch the application.
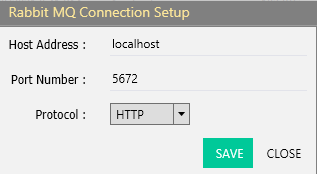
The Rabbit MQ Connection Setup dialog box opens. - In the Host Address field, enter the hostname of the machine where the installation was done.
- In the Protocol list, select HTTP or HTTPS depending on the type protocol used for the installation.
- Click Save. The Robot Agent – AssistEdge window opens.
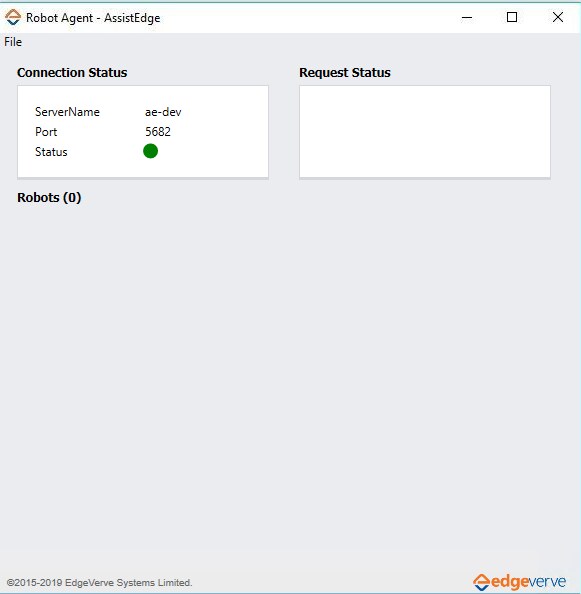
The successful verification of Robot Agent is done.
NOTE:
For information about how to download the Robot Agent, see Download Robot section.