Process Input/Output
It is defined as the input parameter based on which the process execution is initiated. The values of the process input parameter can be either provided by other process workflow or by the trigger created in Control Tower, while generating the automation request.

Using Process Inputs
- In the Studio menu, click Process Inputs in the Menu bar. The Process Inputs dialog box opens.
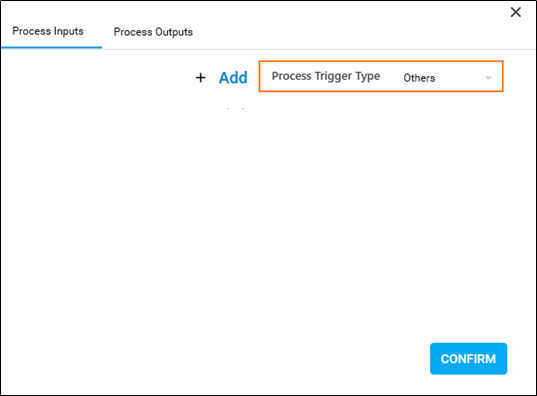
- In the Process Trigger Type list, select the type of trigger you want to set as process input.
- Click Add and then click CONFIRM to create the process input related to the selected Process Trigger Type. Click following link to see the details related to the types of trigger parameters that can be set as process input:
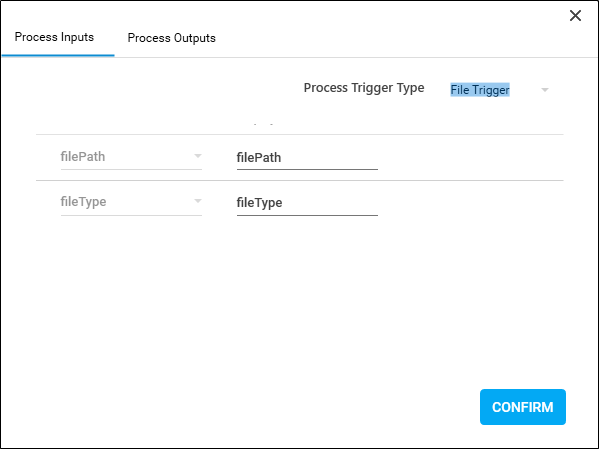
File Trigger
It creates two default process input parameters- filepath and filetype, that starts appearing in the Parameter bar of the selected process workflow. The values of these parameters are passed while creating a Trigger in the Control Tower.
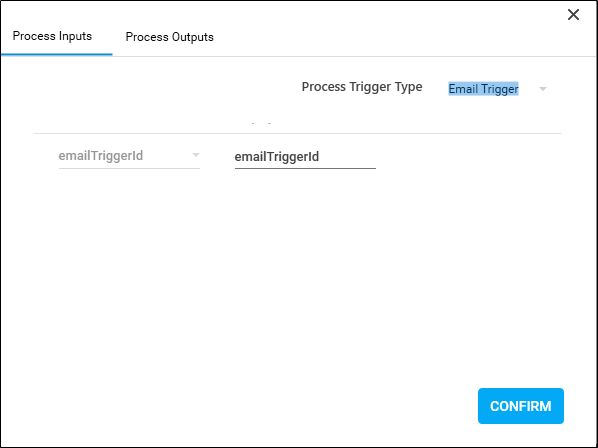
Email Trigger
It creates a default process input parameters- emailTriggerId, that starts appearing in the Parameter bar of the selected process workflow. The value of this parameter is passed while creating a Trigger in the Control Tower.
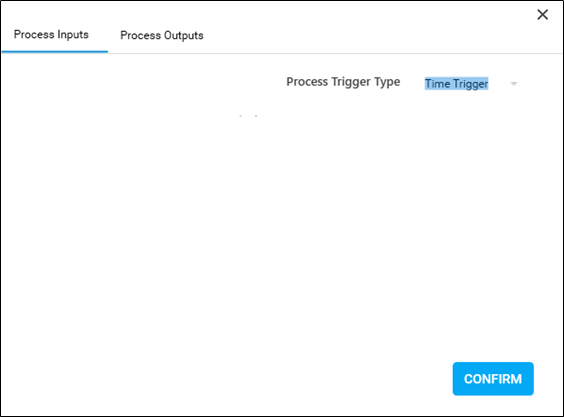
Time Tigger
Once you click CONFIRM, it adds an interval based trigger that is created in the Control Tower.
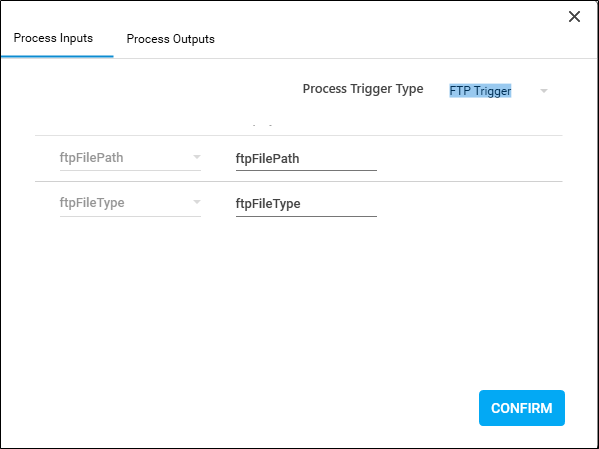
FTP Trigger
It creates two default process input parameters- ftpfilepath and ftpfiletype, that starts appearing in the Parameter bar of the selected process workflow. The values of these parameters are passed while creating a Trigger in the Control Tower.
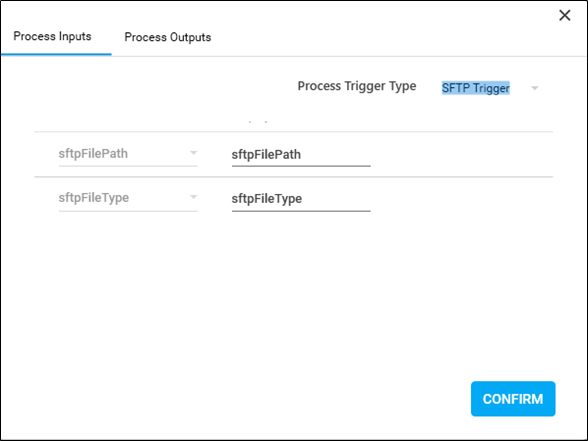
SFTP Trigger
It creates two default process input parameters- sftpfilepath and sftpfiletype, that starts appearing in the Parameter bar of the selected process workflow. The values of these parameters are passed while creating a Trigger in the Control Tower.
Others
It sends input from any other process workflow as the process input parameter to initiate process execution.
- Click Add and select or add the required parameter.
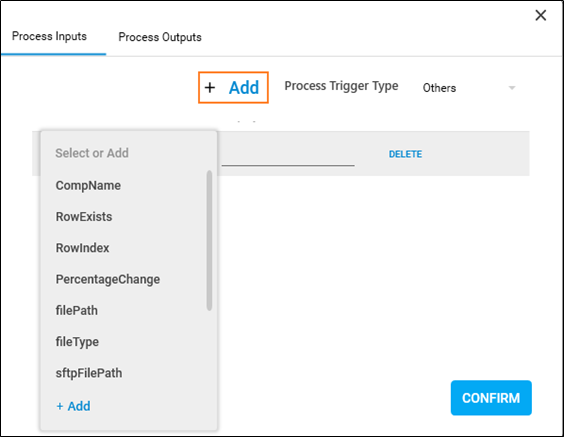
- In the FieldName field, select an existing parameter from the available list. Alternatively, click Add to create a new parameter to configure the field of the process workflow as a process input. The Add new Argument dialog box appears.
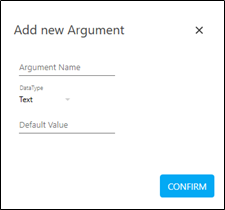
- In the Argument Name field, enter a desired name.
- The DataType list, select the type of data. Available options are:
- Text - A sequence of character, either as a constant or a variable.
- Numeric - An integer type that range from negative through positive.
- Decimal - An exact numeric value defined by its precision and scale.
- Boolean - A data type used for making decision. Can have only two values- true or false
- DataTime – A data type used for values that contain date and time both.
- Click CONFIRM to save the argument details.
- In the DisplayName field, enter a desired display name of the process input.As this is a process input functionality, the Default Value field remains disabled as this field is enabled only for Out arguments.
- Click CONFIRM.
- Click CONFIRM. A message Data Saved Successfully appears, close the dialog box.
The process input parameters are saved.
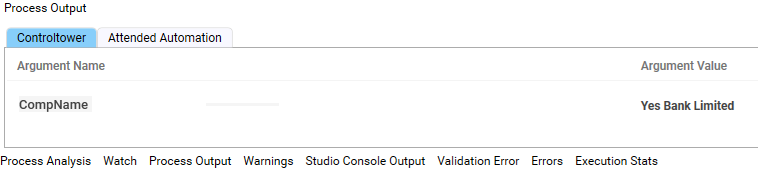
Process Outputs
It is defined as the capability that allows you to view the parameters holding the output values of the process workflow such as the web application extracted values, data extracted from the Excel application, and so on. The parameters are displayed in the Search Output of Control Tower based on your parameter selected.
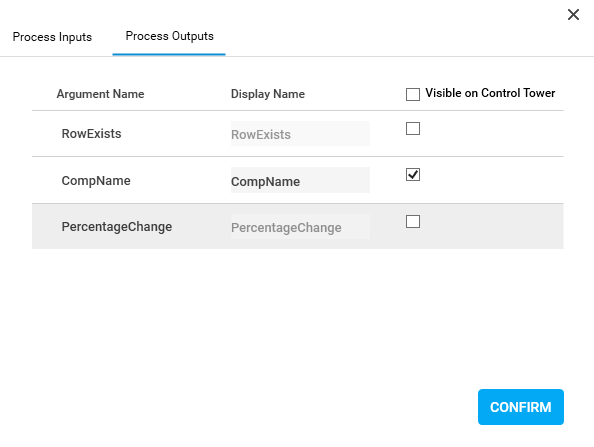
Select the Visible on Control Tower checkbox and then click CONFIRM to save the configuration. By default, all the parameters holding the process output are selected to be able to view in the Control Tower. Once the process workflow is Published and Deployed, the marked parameters are visible in the Control Tower. You can view the marked parameters in the Process Output console on performing the test run in Automation Studio.