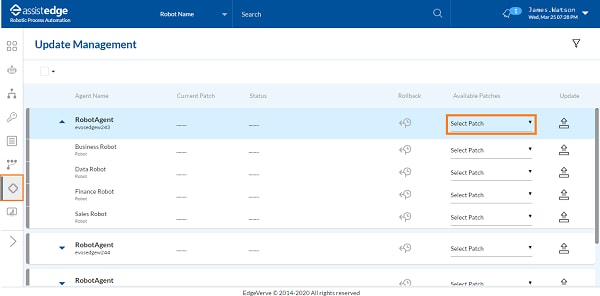
Applying Patch to Robot Agent or Robot
Using the update management, you can apply the available patches to robot agent or robot.
To apply a patch to Robot Agent or Robot:
1. Click
the (Update
Management) icon.
(Update
Management) icon.
The Update Management page is displayed.
2. Corresponding
to the Robot Agent or Robot for which you want to apply the patch,
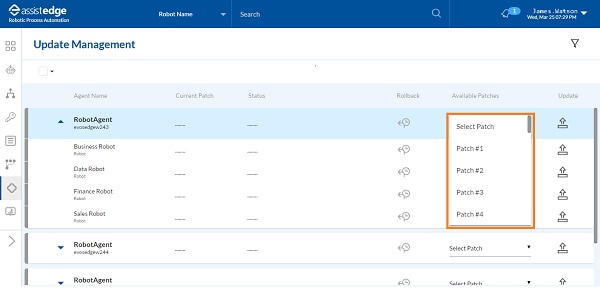
in the Available Patches
column, click  (Select Patch) to select the
required patch. All the patches that you have uploaded for Robot
Agent and Robot are available to apply.
(Select Patch) to select the
required patch. All the patches that you have uploaded for Robot
Agent and Robot are available to apply.
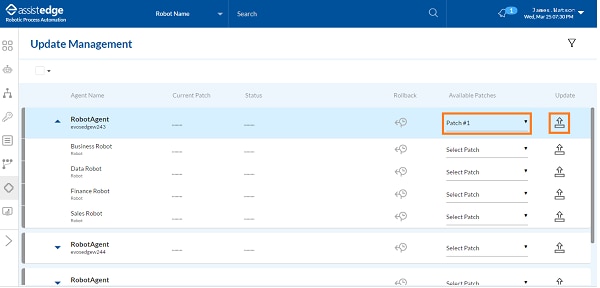
3. Click
Update .
NOTE: |
If the patch is already applied, select patch drop-down is highlighted in red and tool tip appears on the page. |
A message appears as Applying
Patches # <Number>. The Apply Patch and Rollback
Patch buttons are disabled during this process.
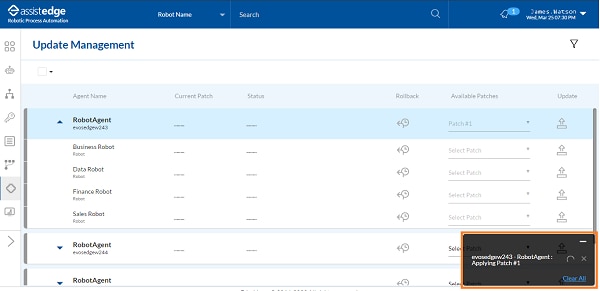
NOTE: |
If you are applying patches to a Robot Agent, the Apply Patch and Rollback Patch buttons for all Robots assigned to it are also disabled. If you are applying patches to a Robot, the Apply Patch and Rollback Patch button for the associated Robot Agent are disabled. |
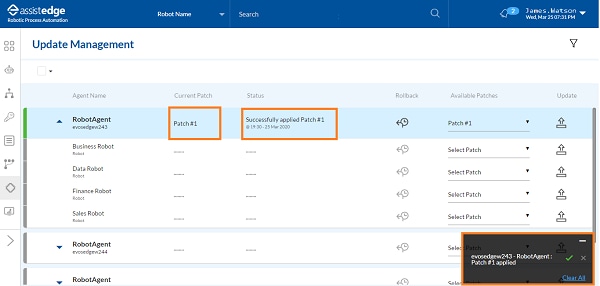
Once the patch is applied successfully, a message as Machine name - RobotAgent: Patch number applied appears. Additionally, Status column is updated as Successfully applied Patch#<number> with the date and time stamp.
4. Click
the  (Notification)
icon to view the patch status. A notification messages as
<Successfully applied patch
#<number> on agent <Machine name> - <Robot Agent
Name> by <user name> appears on the page.
The Patch Version displays
the version of all the patches that you applied.
(Notification)
icon to view the patch status. A notification messages as
<Successfully applied patch
#<number> on agent <Machine name> - <Robot Agent
Name> by <user name> appears on the page.
The Patch Version displays
the version of all the patches that you applied.

Once the patch is applied, the Apply Patch and Rollback buttons for the component are enabled.
Related Topics