Adding User
You can add user in two ways:
Adding Single User
To add a single user:
1. Click Add User and then select the Add Single User option.
2. In the Unique Id field, enter the user's user name and then click the Search link.
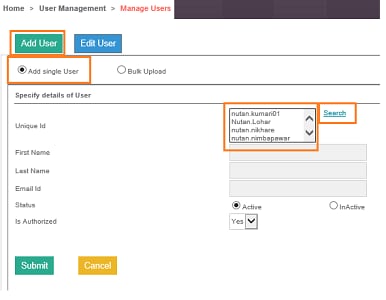
The list box appears with the matching results available in the active directory.
3. If the user is available in the active directory, select the user. The First Name, Last Name, and Email ID details of the selected user is automatically populated from the user repository. If the unique ID is not available in the active directory, an error message appears on the page as No Data Found.
4. By default, the Status field is set as active. You can set the user as inactive, whenever required.
5. Is Authorized field allows you to indicate whether a user is authorized to access Control Tower.
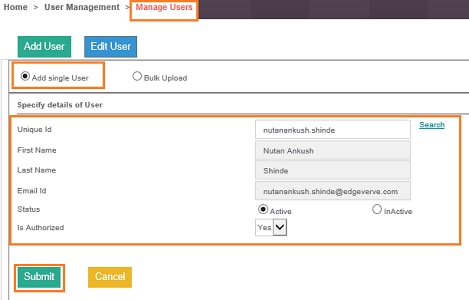
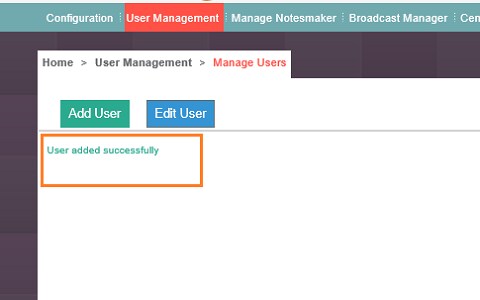
6. Click Submit to add the user to the database. Click Cancel to discard the changes.
Bulk Uploading Users
Bulk upload enables you to upload multiple users at a time.
To bulk upload a user:
1. Click Add User and then click Bulk Upload.

· For uploading multiple users at a time, you need to enter user details in an excel sheet. The excel sheet (*.xls) is uploaded using a file upload control.
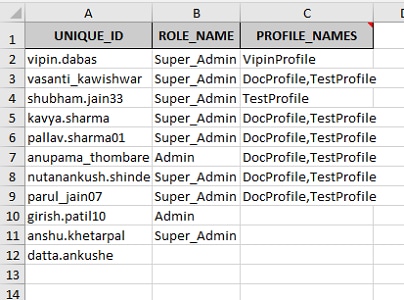
· The worksheet should contain the following columns:
§ Unique_Id: Unique Id (user name) of the user to be uploaded
§ Role_Name: Role name to be mapped to the user
§ Profile_Names: Profile names to be mapped to the user. These profile names must be comma separated.
2. Click Download Data to download the template in excel format.

· A pop-up message appears as Do you want to open or save <File name> from <Environment> on the page. Click Save to save the template.
· If there are existing users with mapped roles and profiles, the downloaded file includes the data.
· Update: the excel sheet by either adding
details of new users or updating data for existing users. You
can even ' delete' all the records from the excel sheet and
upload only the required 'data.
3. Click Browse, navigate and select the excel file to bulk upload the data. The selected file appears in the text box.
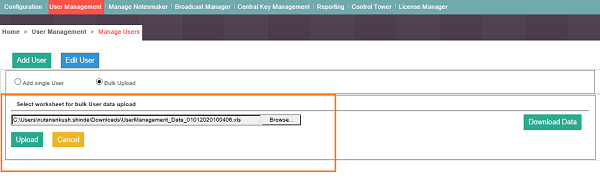
4. Click Upload.
· No Error Message:
§ If no error message is displayed on the page then, it indicates that the user information is updated successfully.
· Error Message:
§ Incase of any mismatch of data related to user an error information is displayed on the page.
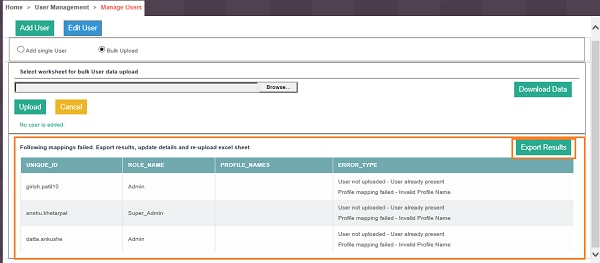
§ Verify the changes from the User Mappings page and change the roles accordingly.
§ Click Export Results to download all the failed entries in an excel file.

§ Excel sheet contains columns Error_Type which includes the error information for that particular entry.
§ Search or filter the type of error, correct the error and upload the excel file again. The Error_Type column can be removed before the upload. However, if the Error_Type column exists in the excel sheet, the information is still uploaded successfully.
§ If any additional column is introduced in the template, apart from these 4 columns, the upload operation fails.
On This Page Hide
Related Topics