Step-By-Step Guide to Use Microbot to Check the Disk Space of the Local Machine
Let's see an example to check the disk space of the local machine using a microbot whose related DLL file is created in the Visual Studio as Automation studio does not have an out-of-box activity to do so.
The microbot captures the free space of drive of local machine and return True if there is free space available else it returns False. In case of failure the ErrDesc and ErrCode parameters are used to store the respective logged message.
To check the local disk space using a microbot:
1. Create and save the required DLL file in Visual Studio and add the SE.Core.Automation.Interfaces DLL and SE.Core.Automation.Models DLL references of Automation Studio to your project. Refer AE-RPA-Customization Guide to know the steps to create the required DLL file.
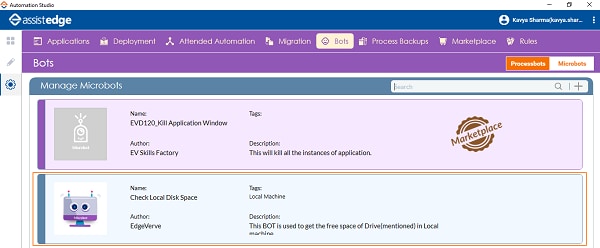
2. In the Bots tab of Admin menu, click Microbots tab.
3. Click
the  (CREATE)
icon. The Add New Microbot
dialog appears.
(CREATE)
icon. The Add New Microbot
dialog appears.
2. Select Create microbot. The Add New Microbot dialog box appears.
3. In the Name field, enter Check Local Disk Space as the name of the microbot.
4. In the Author field, enter the name of the creator of the microbot. Here we have specified EdgeVerve.
5. In the Description field, enter a description of the microbot stating its functionality.
6. In the Microbot Path field, browse and select the location of the DLL file saved.
7. In the Readme File Path, browse and select the .txt file that includes instruction related to usage of the microbot such as the type of input to be used, the kind of output expected and so on.
8. In the Tags field, enter Local Machine as the label for the microbot identification. You can assign the same tag to multiple microbots to keep them under one group for the ease of identification and access.
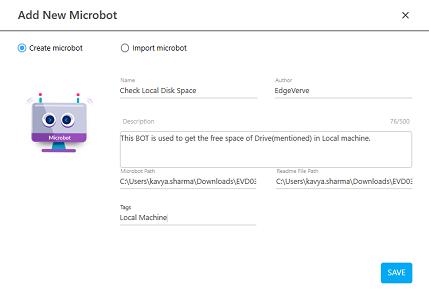
9. Click SAVE. The microbot is created and starts appearing under the Microbot tab.
10. In the Studio menu, create a new process.
11. In the Parameter bar, create In argument, DiskName to pass the required OS disc name as the input to the Microbot activity.
12. In the Parameter bar, create an Out arguments:
· OperationResult - to store the result of the operation failure or success. It returns True if the operation is successful and False if it Fails.
· ErrorDescription - to store the exception message if the code fails to execution.
· ErrorCode - to store error code if the code fails to execute.
· FreeSpace - to store the information related to the free space available in the specified OS disc.

13. In the Canvas Tools pane, click Process Components to expand the tool and view the associated activities.
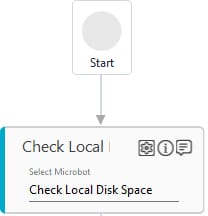
14. Drag the Microbot activity and drop on to the Flowchart designer on the Canvas.
15. Click Select Microbot field. The Select Microbot dialog box appears.
16. Search for the Check Local Disk Space microbot.
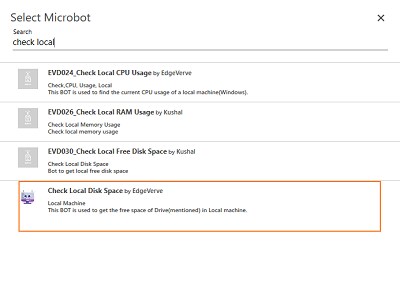
17. Select the required microbot from the available list. The display name of the Microbot activity changes to the name of the microbot selected.
18. Click
the  (Settings)
icon.
(Settings)
icon.
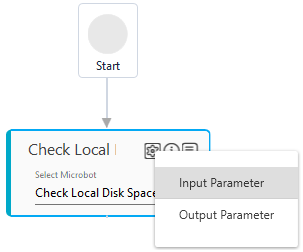
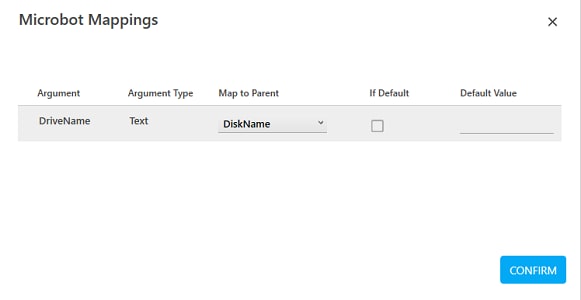
19. Click Input Parameter. The Microbot Mappings dialog box appears displaying the list of input parameters defined in the DLL file.
20. In the Map to Parent drop down list, select DiskName parameter defined above.
21. Click CONFIRM. The input parameters are set
22. Click
the (Settings)
icon, and then click Output Parameter.
The Microbot Mappings
dialog box appears displaying the list of output parameters defined
in the DLL file.
23. In the Map to Parent drop down list of the IsSuccess argument, select OperationResult parameter defined above.
24. In the Map to Parent drop down list of the ErrDesc argument, select ErrorDescription parameter defined above.
25. In the Map to Parent drop down list of the Ouput argument, select FreeSpace parameter defined above.
26. In the Map to Parent drop down list of the ErrorCode argument, select ErrorCode parameter defined above.
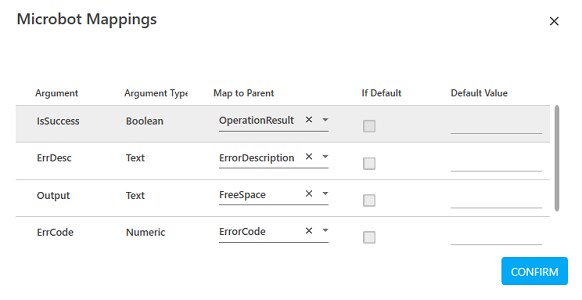
27. Click CONFIRM. The output parameters are set.
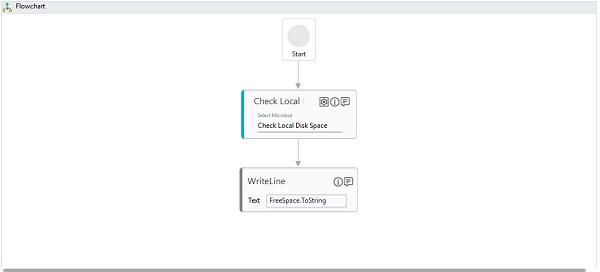
To view the value of available free disc space of the local machine in Automation Studio, let's add WriteLine activity. You can publish, deploy and assign this process to a robot, if you want to execute this process outside Automation Studio.
28. Add a WriteLine activity and in the Text field, enter FreeSpace parameter. Below is the sample automation process workflow created:
29. Save the process.
30. Setup the environment and perform test run.
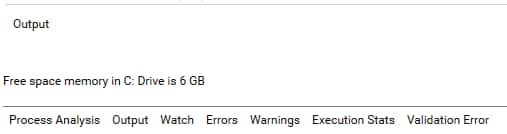
The value of free disc space is displayed in the Output console of Automation Studio. Below is the sample screen shot:
Related Topics