Step-by-Step Guide to Use Excel Application to Extract the Total Amount in the Invoice
Let's create a process to extract the total amount of the invoice saved in an excel application.
Prerequisite:
1. In the Admin menu, add an application of Application Type- ExcelApps.
2. In the Application Name field, enter a desired name of the excel application you want to add. The name must not contain any special character or space.
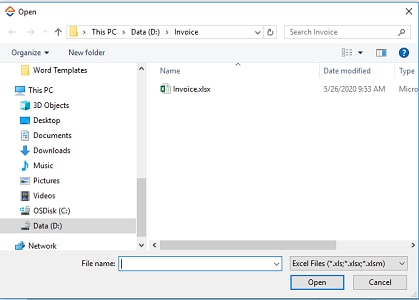
3. Click ADD and browse for the excel file. Click Open.
A message for successful addition of the excel application is displayed.
To automate the task of extracting cell values:
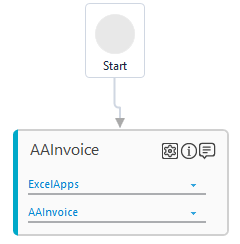
1. Create a new process.
2. Create an In arguments, TotalInvoice of String type and Amount of Int32 type. These parameters are used to store the extracted cell values.
3. From the Canvas Tools panel, add Application activity to the Flowchart designer on the Canvas.
4. In the Application Type list, select ExcelApps.
5. In the Select an Application list, select the configured excel file.
6. Click the  (Settings) icon to launch the
EXCEL MODE of the Multimodal panel. The excel file appears.
(Settings) icon to launch the
EXCEL MODE of the Multimodal panel. The excel file appears.
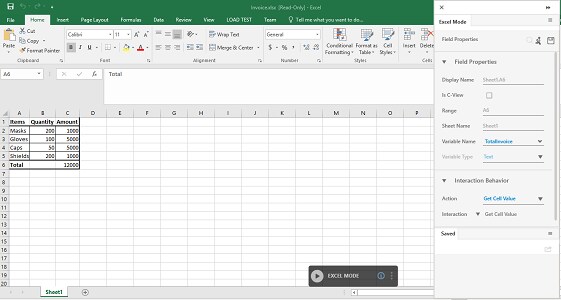
7. Click
the (Play) icon, and
then click the A6 cell
to extract the required cell value. The Field Properties
panel of the Excel Mode appears.
The fields that are mandatory are highlighted with red box.
(Play) icon, and
then click the A6 cell
to extract the required cell value. The Field Properties
panel of the Excel Mode appears.
The fields that are mandatory are highlighted with red box.
8. In the Action list, select Get Cell Value.
9. In Variable Name list, select TotalInvoice argument created in the Parameter bar. Other fields get auto populated as per the cell details.
10. Click
the  (Save)
icon to configure the details captured. The saved details start
appearing in the Saved
tab of Field Properties
bar.
(Save)
icon to configure the details captured. The saved details start
appearing in the Saved
tab of Field Properties
bar.
11. Click
the (Play) icon, and
then click the C6 cell
to extract the required cell value. The Field Properties
panel of the Excel Mode appears.
The fields that are mandatory are highlighted with red box.
12. In the Action list, select Get Cell Value.
13. In Variable Name list, select Amountargument created in the Parameter bar.
14. In the Variable Type list, select Numeric.
15. Click
the (Save)
icon to configure the details captured. The saved details start
appearing in the Saved
tab of Field Properties
bar.
16. Click
the (Save configured field and return to
studio) icon to save the field that you configured
and return to the Studio menu. The automation
process workflow to configure the search process is created.
(Save configured field and return to
studio) icon to save the field that you configured
and return to the Studio menu. The automation
process workflow to configure the search process is created.
To view the output in Automation Studio , let's add WriteLine activity. You can assign this process to a robot, if you want to execute this process outside Automation Studio.
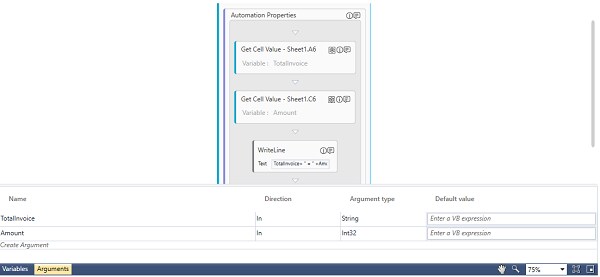
17. Add a WriteLine activity below the Get Cell Value block.
18. Save the process.
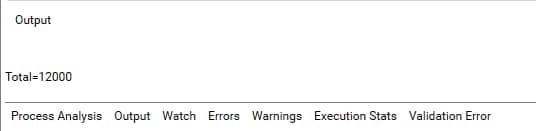
19. Setup the environment and then perform test run. Following is the output displayed in the console:
Related Topics