Step-by-Step Guide to Use Citrix to Search Information on Web Application and Update in Non-Citrix Environment
Let's see an example of automating a search process in the Citrix environment for information on a web application and update the search result in the non-Citrix environment.
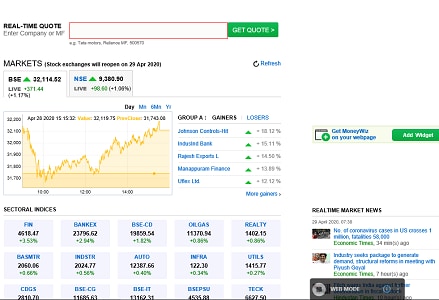
In this example, consider the web page of Rediff Money where we automate the process of retrieving the real time stock price of a desired company.
Prerequisite:
· Install of CitrixPackage and Automation Studio on the Citrix server.
· Install AssitEdge RPA and Automation Studio on the local machine where the non-Citrix environment is available.
· Citrix Launcher considered in this example is ctxLauncher=CitrixLauncher2. Publish your own Citrix Launcher to execute the automation process workflow.
Create Automation Process Workflow in the Citrix Environment:
1. Login to the Citrix environment and launch the Automation Studio present in the Citrix environment.
2. In the Admin menu, add an application of Application Type- WebApps.
3. In the Application Properties panel:
· Enter the Login URL as https://money.rediff.com/index.html
· Enter the Search URL as https://money.rediff.com/index.html
NOTE: |
Since this application does not require login, hence the login and the search URL remains same. However, it changes if they are different. |
· Enter the Display Name.
4. Click
the  (Save
Properties) icon to save the application details.
(Save
Properties) icon to save the application details.
5. Enter other details as per your requirement. The WebApps application is created.
6. In the Studio menu, create a new process.
7. In the Parameter bar, create an In argument, CompName of type String and define the name of the company whose real time stock price needs to be fetched. Create an Out argument, StockPrice of type String to store the real time stock price of the same.

8. From the Canvas Tools panel, add Application activity to the Flowchart designer on the Canvas.
9. In the Application Type list, select WebApps.
10. In the Select an Application list, select the available web application that you configured.
11. Click
the  (Settings)
icon to launch the WEB MODE of
the Multimodal interface. The
intended web page appears.
(Settings)
icon to launch the WEB MODE of
the Multimodal interface. The
intended web page appears.
12. Click
the  (Play) icon to capture the
steps of entering the company name on the web page. Hover over
the Enter Company or MF
field. The field gets highlighted with red box.
(Play) icon to capture the
steps of entering the company name on the web page. Hover over
the Enter Company or MF
field. The field gets highlighted with red box.
13. Click the highlighted area. The Field Properties panel of the Web Mode appears. The fields that are mandatory are highlighted with red box.
14. In the Action list, select Set Value.
15. In the Input Source list, select the CompName argument.
16. Enter
a Display Name, and then
click the (Save) icon
to configure the details captured. The saved details start appearing
in the Saved tab of Field Properties bar.
17. Click
the (Play) button to capture
the step of clicking the button to retrieve the real-time stock
price of the entered company name.
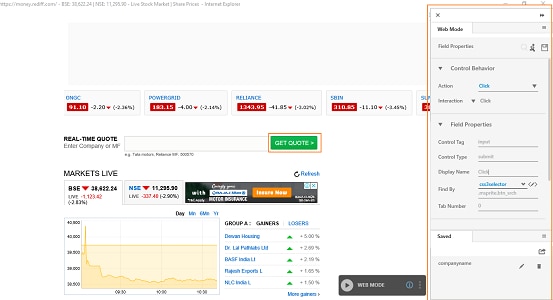
18. Hover over the GET QUOTE> field. The field gets highlighted with red box.
19. Click the highlighted area. The Field Properties panel of the Web Mode of the web application appears. The fields that are mandatory are highlighted with red box.
20. In the Action list, select Click.
21. Enter
a Display Name and then
click the  (Save) icon to configure the
details captured. The saved details start appearing in the Saved tab of Field
Properties bar.
(Save) icon to configure the
details captured. The saved details start appearing in the Saved tab of Field
Properties bar.
22. Click
the (Play) button to capture
the step of getting the stock price displayed. Hover over the
stock price displayed. The area gets highlighted with red box.
23. Click the highlighted area. The Field Properties panel of the Web Mode appears. The fields that are mandatory are highlighted with red box.
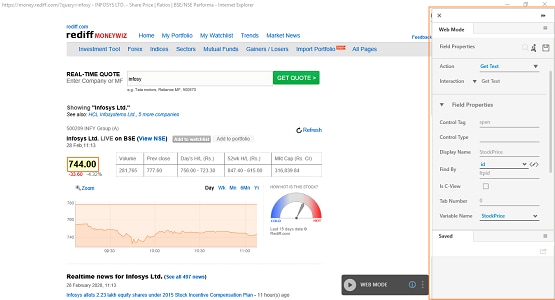
24. In
the Action list, select
Get Text. You can click
the  (Configure)
icon to configure the backup selectors for scenarios where primary
selector does not work.
(Configure)
icon to configure the backup selectors for scenarios where primary
selector does not work.
25. In
the Variable Name list,
select StockPrice and
then click the
(Save) icon to configure
the details captured. The saved details start appearing in the
Saved tab of Field
Properties bar.
26. Click
the (Save configured field and return to
studio) icon to save the field that you configured
and return to the Studio menu. The automation
process workflow to configure the search process is created.
(Save configured field and return to
studio) icon to save the field that you configured
and return to the Studio menu. The automation
process workflow to configure the search process is created.
27. Save the process with a desired name. We have saved the process as SearchProcessCitrix.
28. In the Studio menu, setup the environment and then perform the test run. The process returns the real time stock price of the company entered.
Export the Process Created in Citrix Environment:
You must publish and deploy the saved process as only a deployed process can be migrated.
In the Citrix environment we do not have an Admin module to create a Profile. You must create the required Profile in the Automation Studio of the Citrix environment itself.
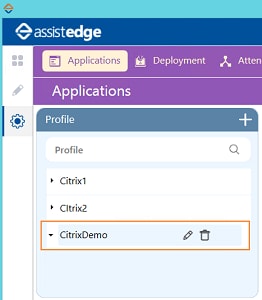
1. In
the Admin menu, click
the  (Add Profile) icon to
create a profile. The Create
Profile dialog box appears.
(Add Profile) icon to
create a profile. The Create
Profile dialog box appears.
2. In the Type list, select Automation and in the Name field, enter a desired name of the profile. Here we have entered CitrixDemo as the name of the profile.
3. Click OK.
4. Publish and deploy the saved process, SearchProcessCitrix using CitrixDemo profile created above.
5. In the Migration tab, click Export.

6. Click Create. The Create New Package page opens displaying the deployed processes.
7. Select SearchProcessCitrix, and then click EXPORT. The Summary dialog box appears displaying the information such as the name of the processes and the application configured.
8. In the Package Name field, enter a desired name of the package where the process gets exported.
9. In the Remarks field, enter information related to the package.
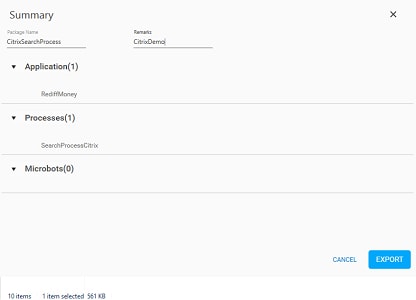
10. Click EXPORT.
11. A message for completion of the export appears along with a link where it gets exported.

12. Navigate to the link, copy and save the exported process in the non-Citrix environment.
Perform Citrix Automation from non-Citrix Environment:
The Citrix automation in the non-Citrix environment involves:
· Configuring Citrix Server Application
· Importing Citrix process
· Creating a Sign In Process for Citrix host
· Reusing Imported Process
1. Launch Automation Studio present in the non-Citrix environment.
2. In the Admin menu, add an application of Application Type- CitrixApps.
3. In the Application Properties panel:
· In the Display Name, enter a desired name of the web application.
· In the CitrixApp Type list, select CitrixHost to configure the Citrix Server application. You can only configure a Citrix Host while a Citrix application of CitrixApps type- Citrix Apps, gets automatically configured once a process created in Citrix environment is imported.
· In the Store Front URL field, enter the URL of the Citrix server.
· In the Misc1 field, enter the name of the Citrix Launcher that is published in the delivery group. It is the target VM where the automation must happen.
4. Click
the
(Save Properties) icon
to save the application. The Citrix Host is configured.
5. In the Migration tab, click Import.

6. Click Browse. The Import Package dialog appear.
7. Click the Package Path field. Browse and select the process package zip folder to import.
8. Click Open. The Import Package dialog box appears.
9. In the Package Path field, browse and select the Select CitrixSearchProcess.zip process package exported from the Citrix environment.
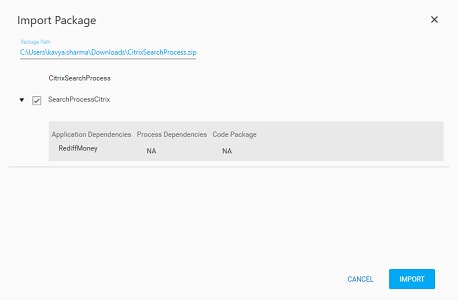
10. Click IMPORT. The Import Process dialog box appears.
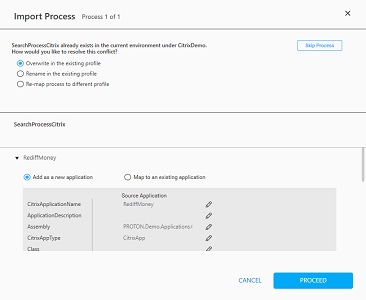
11. Click PROCEED. The Import Package Summary with details process imported is displayed.
12. Click FINISH. The process package exported from the Citrix environment is successfully imported.
13. In the Tool bar, click Create and then click Sign In Process. The Flowchart designer opens.
14. In the Studio menu, from the Canvas Tools pane, drag Application activity and drop on to the Flowchart designer, below the Start element.
15. In the Application Type list, select CitrixApps.
16. In the Select an Application list, select the CitrixHostDemo Citrix Host configured in the Admin menu.
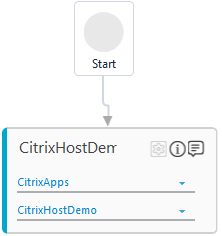
17. Save the process. The Sign In Process for the intended Citrix Host is created and saved with the name of the application.
18. Publish and deploy the Sign In Process as only deployed Sign in process can be used.
19. Create a process in Studio menu of the non-Citrix environment.
20. In the Parameter bar, create an In argument, CompNameReuseIn of type String and define the name of the company whose real time stock price needs to be fetched.
21. In the Parameter bar, create an Out argument, StockPriceReuseOut of type String to store the real time stock price of the same in the non-Citrix environment.

22. In the Canvas Tools pane, click Process Components to expand the tool and view the associated activities.
23. Drag the Application activity and drop on to the Flowchart designer area on the Canvas.
24. In the Application Type list, select CitrixApps.
25. In the Select An Application list, select the select the CitrixHostDemo Citrix Host configured in the Admin menu.
26. Double click the Application activity to open the activity container.
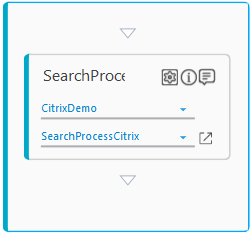
27. Drag the Reuse Process activity and drop inside the Application activity container.
28. In the Browse for Profile list, select the CitrixDemo profile which is the profile of the imported process The profile that gets automatically created once you import the exported process and the associated application, from the Citrix environment.
29. In the Browse for Process list, select the SearchProcessCitrix process imported from the Citrix environment.

30. Click
the (Settings)
icon, and then click Parameter
Mapping to align the parameters of the reused process with
the parameters of the process where it is being used (also called
as Parent process). The ReUsed
Process's Arguments Mapping dialog box appears.
31. In the Map to Parent list corresponding to StockPrice argument, select the StockPriceReuseOut parameter.
32. In the Map to Parent list corresponding to CompNAme argument, select the CompNameReuseOut parameter.
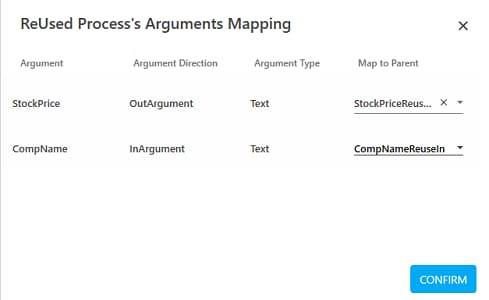
33. Click CONFIRM to save the mapping.
To view the output in Automation Studio, let's add WriteLine activity. You can publish, deploy and assign this process to a robot if you want to execute the process outside Automation Studio.
34. Add a WriteLine activity and in the Text field, enter StockPriceReuseOut argument to store the fetched stock price. Below is the sample automation process workflow created:
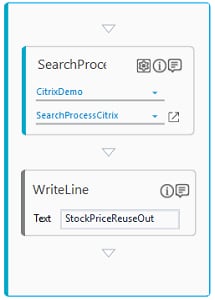
35. Save the process.
36. Setup the environment and then perform test run.
Observe that the configured Citrix host launches post sign-in and the automation takes place in a window that is remotely connected to the Citrix host. Below is the sample screen shot:
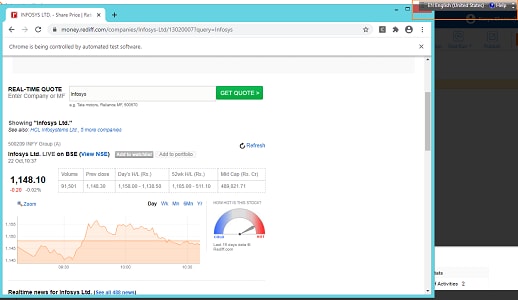
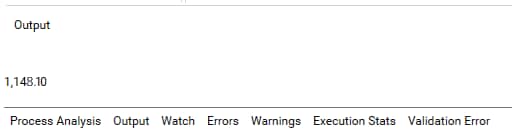
The Output console of the Automation Studio of the non-Citrix environment displays the fetched stock price as shown below:
Related Topics