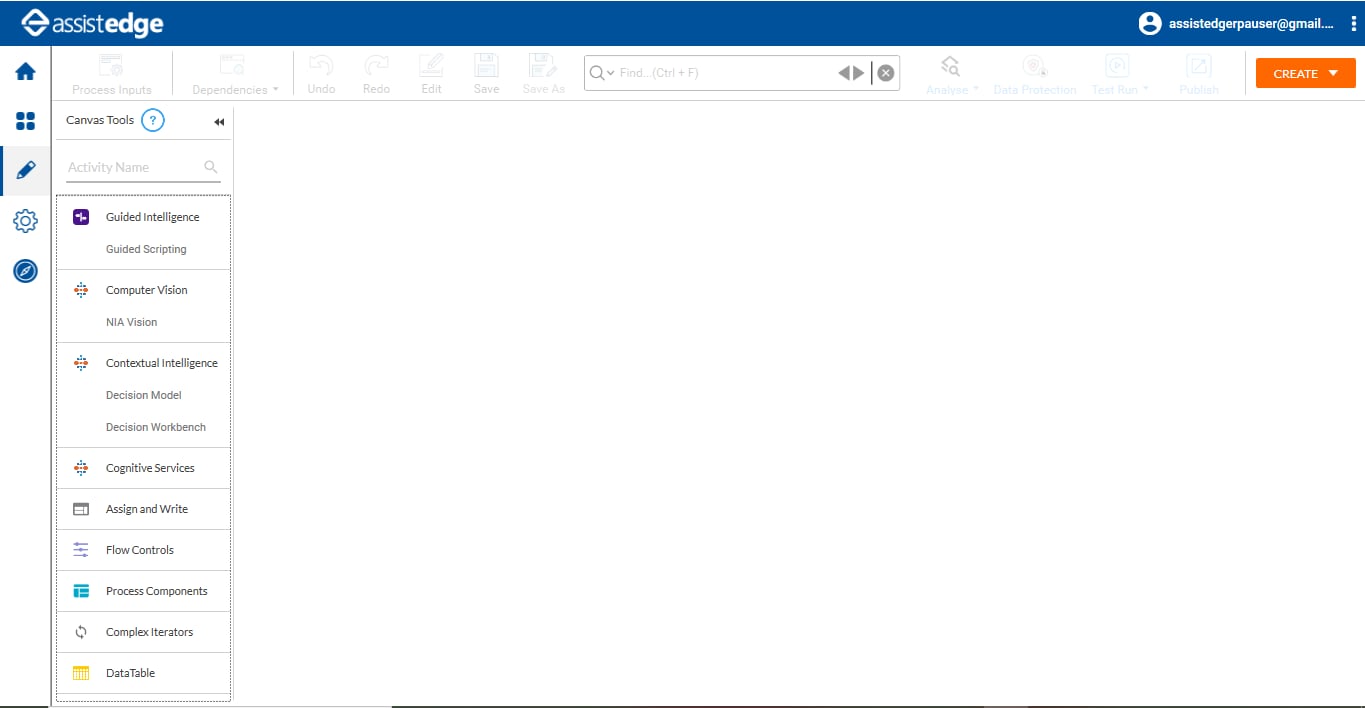
You can create, test and publish process workflow in the Studio menu. It offers a rich interface that varies from automating a simple step of visiting a website to automating a complex process involving complex enterprise applications.
The Tool bar consists of functionality such as creating or editing a process, providing inputs to a process and so on. You can perform the following actions:

· Process Inputs- Allows to selects or adds an argument as an input into the process.
· Dependencies- Allows to view details of the application/s used in the process. additionally, you can view if the selected process is re-used in any other process or not. This option is enabled only after a process is saved.
· Undo- Allows to reverse the last action performed. This option is enabled only after the process is edited.
· Redo- Allows reverse the action that was previously undone. This option is enabled only after an edit in the process is reversed.
· Edit- Allows to make changes in an existing process workflow. Only a published or a deployed process can be edited.
· Save- Saves the latest content in the process workflow.
· Save As- Saves a new process workflow by providing a name.
· Find Options- Allows to search a word in the process in the Flowchart designer area. The search is similar to MS Word and allows to search any text, an argument or property within the process. You can select the option to match case or match whole word while finding a word. The interface shows the number of occurrences for that search , along with its location at activity level within the process. Use the arrows to move to the previous and the next word found.
· Data Protection- Allows to mask critical data/information. For more information, see Business Metrics activity. For more information, see Data Protection section.
· Analyse- Helps validating the process based on the predefined rules in Automation Studio. Click the arrow to analyze the process for RPA or Engage. The result is displayed in the Process Analysis tab of Status bar. The analysis is done based on pre-defined rules, that must be enabled in the Rules tab of Admin menu.
· Test Run - Prepares the environment and applications for testing. For more information, see Test Run Process.
· Publish- Creates a backup of the process and prepares it for deployment. This option is enabled only after the process is saved. For more information, see Publish Process.
· Create- Creates different types of automation process workflow. For more information, see Process Management.
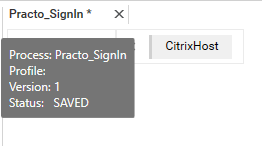
Canvas acts as the custom workflow designer area where RPA sequences are created. The center of the screen is the canvas where each tab displays name of the process that you open. You can hover over the process tab to view the details like name of the process, its status and current version. Additionally, the navigation trail of the selected process is displayed.
The Canvas Tools panel is the interface where you can find pre-defined automation tools to suit your business needs.
Use the  (collapse) icon to collapse the Canvas
Tools panel and
(collapse) icon to collapse the Canvas
Tools panel and  to expand
it.
to expand
it.
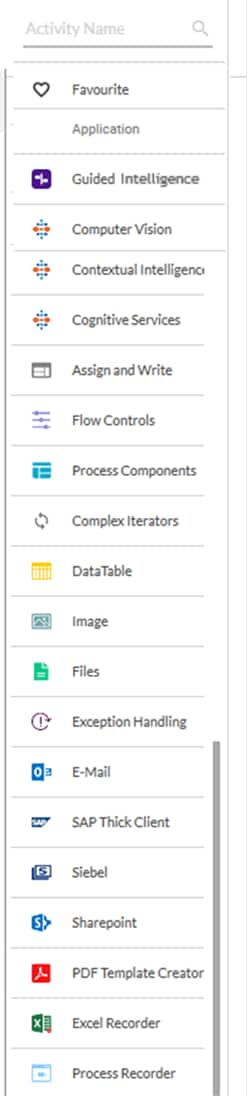
Activity are pre-defined, out-of-box operators in Automation Studio. They are the building blocks that enables you to create the automation process workflow. Similar activities are clubbed under one tool category for an easy navigation.
You can mark the frequently used activities in Canvas Tools as favorite. This enhances the ease of access to the activities marked.
Right click the selected activity and then click Add to Favourite. The activities marked as favorite are listed under Favourite Activity.
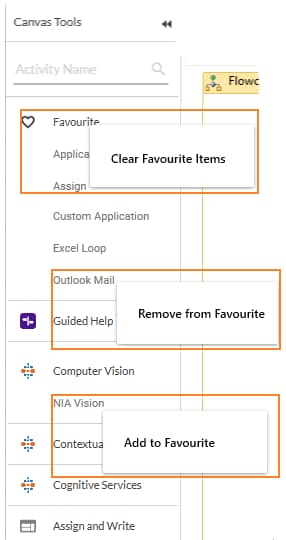
Right click the activity added to Favourite to remove from the list. Additionally, you can clear the entire list of favorites in a go by using Clear Favourite Items.
You can drag an activity from the Canvas Tool pane and drop on to the Flowchart designer to add to a process workflow.
When you add an activity, details like the name of the activity, its properties, and the outline view of the selected activity appears.
Below are the functionality of an activity:
Symbol |
Symbol Name |
Description |
|
Validation Error or Warnings |
Signifies either there is a validation error or the required inputs for the activity to proceed is currently missing. It disappears when required inputs are provided in the correct format. |
|
Help |
Help that is available within Automation Studio itself regarding the particular activity such as its definition or usage . |
|
Annotations |
Add a note or a comment for additional information regarding the activity. |
|
Settings |
Settings that you can use to define features of an activity such as capturing data from a web application or to provide input/output parameters. |
|
Compiler Error |
Signifies the error that occurs when the compiler fails to compile the source code. |
The Flowchart designer is the area on the Canvas where you can add activities to build workflow of the automation process. It appears when you start creating a process.
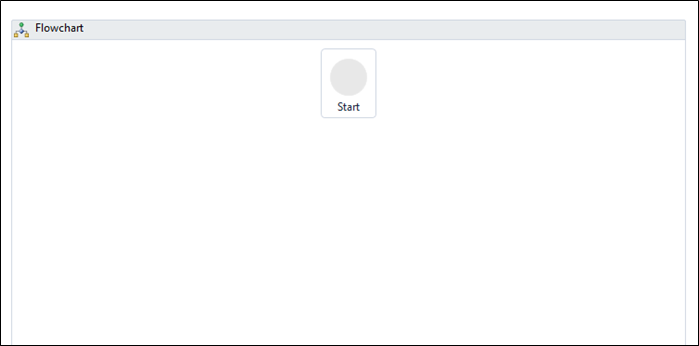
To enhance usability of Automation Studio, additional features are available on the Flowchart designer are:
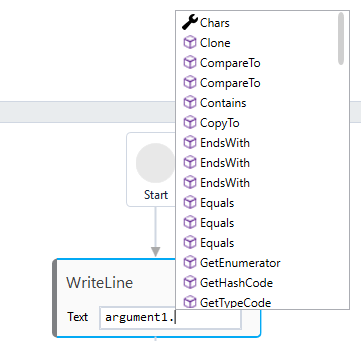
IntelliSense in Automation Studio is the expression building aid that includes features- List VB Expression and Select Parameter.
List VB Expression
It lists the valid VB expressions once you type a the trigger character, a period (.) after the required parameter or expression. A few examples of such members are CopyTo, Insert, ToString and so on.
Select Parameters
You can select the intended parameter that you have already defined in Automation Studio, by pressing Ctrl+Space key together from the keyboard.
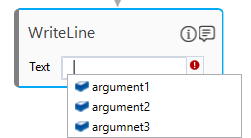
If the parameter name is changed, it gets auto reflected at activity level at all the instances where it is used. The parameter name, used inside scripts and the code, must be changed manually.
Click Properties to open the
grid and  (close) to close the grid. With the help
of
(close) to close the grid. With the help
of  (pin), you can auto hide the grid.
The fields specific to the Canvas, Flowchart designer and the selected activity are displayed in the Properties grid. It helps you to view and edit properties that describe how they are used in the flowchart. Additionally, you can perform following actions:
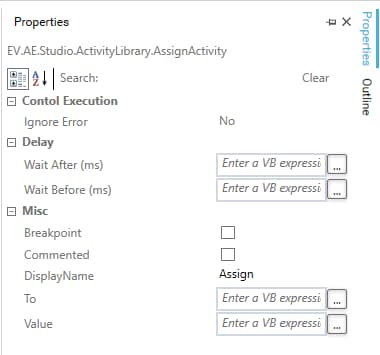
· Categorized- Views properties of the selected activity based on the category of the properties.
· Alphabetical- Views properties of the selected activity based on the alphabetical order of the properties.
· Search- Allows to search for a specific property of the selected activity.
· Clear- Clears the search box.
Click Outline to open the grid
and (close) to close the grid.. With the help of
, you can auto hide the grid.
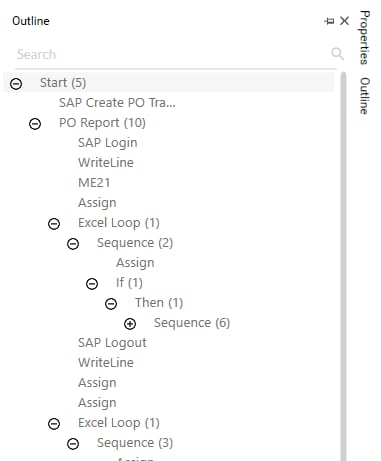
The Outline grid provides a view to the flow of the entire process workflow. You can view all the nodes of a process including the tools and activities used.
Use this grid to navigate to the desired section of the selected automation process.
Variables and arguments are defined in the Parameter bar of the Studio menu. You can even re-size the Flowchart designer using this bar.

Click the  icon
to activate the Toggle Pan Mode. Hold the space key or
press mouse middle button to pan on demand. There are instances when
you want to zoom in or zoom out a section of your process. Use the zoom
drop down to set the percentage of the layout and the
icon
to activate the Toggle Pan Mode. Hold the space key or
press mouse middle button to pan on demand. There are instances when
you want to zoom in or zoom out a section of your process. Use the zoom
drop down to set the percentage of the layout and the  to reset the it to 100%.
You can use the  icon
to fit the entire content of the Flowchart designer in
a single view-able screen. This helps you to have a glance at the entire
process as a whole. The
icon
to fit the entire content of the Flowchart designer in
a single view-able screen. This helps you to have a glance at the entire
process as a whole. The  icon helps you
to get am overview of the entire process.
icon helps you
to get am overview of the entire process.
A variable in Automation Studio is used to store data. It can be a string, integer, boolean, null or other data type depending on the requirement. You can view the list of available variable type in the Variable pane. They have limited scope and can be used within an activity.
The fields of a variable in Studio are listed in the following table:
Field Name |
Description |
Name |
The name of the variable created. If you do not assign a name, variable with a default name is created. |
Variable Type |
Defines the type of variable created. Available options are: · String - a sequence of character, either as a constant or a variable. · Boolean -a datatype used for making decision. Can have only two values- true or false. · Int32 -an integer type that range from negative through positive. · Object - an abstract datatype that holds data of any kind. · Array of [T] - a group or collection of same datatype. · Browse for Types... - other types of data. Automation studio supports, .Net variable datatype. Default value is set as String. |
Scope |
Determines the range of visibility and validity of the variable inside Automation Studio. Variables can be used only within an activity or a workflow. Variables created within an activity or a process workflow is available for selection only within that workflow by other activities. It would not be available to use within other workflow. |
Default |
The value that you want to assign to the variable. If you do not provide a value then the predefined value of the selected variable type is set, for example, null for boolean, 0 for integer and so on. |
1. In the Parameter bar, click Variables to open the Variables pane.
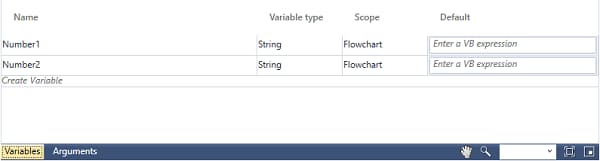
2. Click the Create Variable field and enter a name of the variable.
3. From the Variable Type drop down list, select the type of variable you want to create.
4. In the Default field, enter a value that you want to assign to the variable.
The variable is created.
1. In the Parameter bar, click Variables to open the Variables pane.
2. Right click the variable and then click Delete.
An argument in automation Studio is also used to stores data but the scope of a argument is not limited. It can be used to pass data across different automation process workflow. This implies that an argument created within one workflow is available for selection within other workflow. It can be a string, integer, boolean, null or other data type depending on the requirement. You can view the list of available variable type in the Variable pane
The fields of an argument in Studio are listed in the following table:
Field Name |
Description |
Name |
The name of the argument created. If you do not assign a name, argument with a default name is created. |
Direction |
Defines the direction of the argument. Available options are:
|
Argument Type |
Defines the type of argument created. Available options are: · String - a sequence of character, either as a constant or a variable. · Boolean - a datatype used for making decision. Can have only only two values- true or false. · Int32 - an integer type that range from negative through positive. · Object - an abstract datatype that holds data of any kind. · Array of [T] - a group or collection of same datatype. · Browse for Types... - other types of data. Automation studio supports, .Net variable datatype. Default value is set as String. |
Default Value |
The value that you want to assign to the argument. |
1. In the Parameter bar, click Arguments to open the Arguments pane.
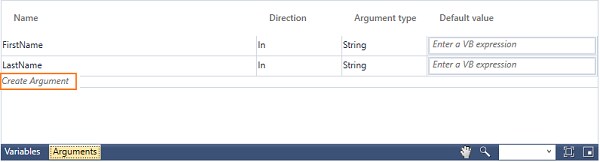
2. Click the Create Argument and enter a name of the argument.
3. From the Direction drop down list, define the direction of the argument.
4. From the Argument Type drop down list, select the type of argument you want to create.
5. In the Default value field, enter a value of the argument created.
The argument is created.
Automation Studio supports .Net variable type apart from default variable or argument types such as System.Data.DataRowView. You can browse for the .Net variable type using Browse for Types... option available in the Variable panel or the Argument panel.
1. In the Variable/Argument panel, from the Variable type/Argument type drop down, select Browse for Types.
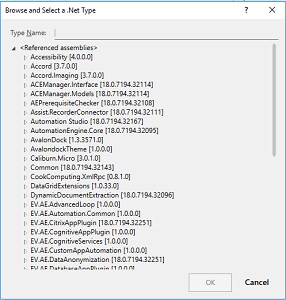
2. The Browse and Select a .Net Type dialog box appears.
3. In the Type Name field, enter the keyword of the variable type you want to use.
4. Select the desired variable type and then click OK.
A variable with selected variable type is created.
In the Status bar, you can view status and other stats of the process you executed along with the errors, if any.
The stats available can help the configurator to understand the CPU and memory utilization during the execution of the process. The configurator can also track the time taken by the steps involved in the process without actually deploying the process to a bot.

It lists the potential errors that might occur at the time of process execution. This analysis is done only for the enabled rules available in the Rules tab of Admin menu.
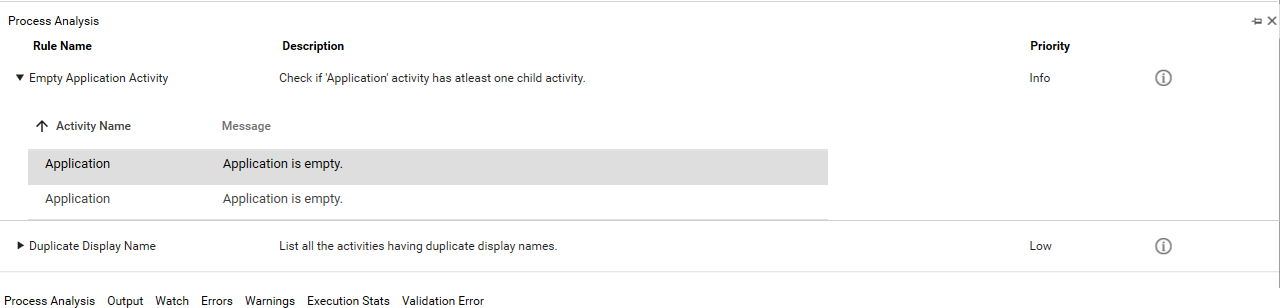
Click Analyse in the Tool Bar menu to generate and view the analysis result in the Process Analysis tab. It displays the name of the rule, the related rule description and the priority of the rule that might occur. You can expand the rule and see the activities that violate the rules. Double click the activity to navigate to the corresponding activity in the Flowchart designer area.
Use the  (More Info) option to know about the rule
in details such as the recommendation, failure and expected scenario.
(More Info) option to know about the rule
in details such as the recommendation, failure and expected scenario.
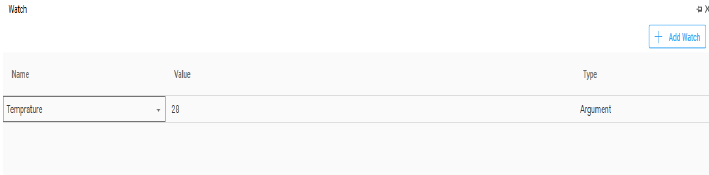
It allows you to add argument or variable to track the changes in the value assigned while debugging the process.
The console of Automaton Studio where you can view the output.

The console where you can view details about unexpected behavior of the process, if any. Warning provides a message related to possible future issue. These warning messages are shown for the applications which use any of the components covered by prerequisite checker even if the application has been imported or recorded by the PbE.
The console shows up when the environment is set or the application is run.

The console where you can view details of the error that might occur during testing. It provides quick issue identification during process configuration and execution.

It provides an overview process execution. After a process is executed in Automation Studio, details of the workflow along with all the nodes involved can be viewed in this pane. Additionally, you can view :
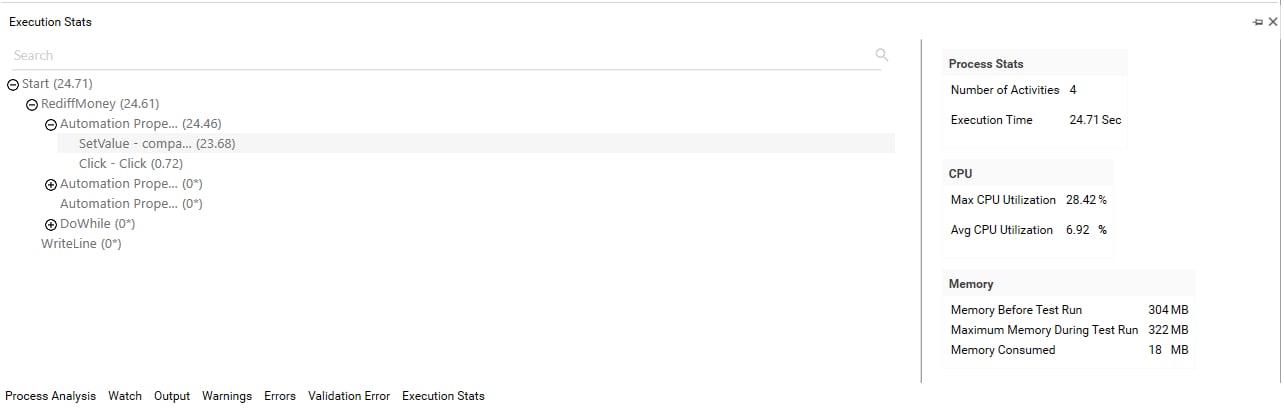
· Process Stats- Displays the total number of activities involved in the process and the total time taken to complete the last execution cycle. In the process outline, available on the left side of the pane provides the break-up of time taken by each activity in the process.
· CPU Utilization- Displays the maximum and average CPU utilization in the last test run.
· Memory- Displays details related to the memory available before and after the test run. It also displays the total memory consumed during execution. The memory consumed is the difference of the before and after stats of the memory occupied.
It provides a window to the error that occurs due to validation.


