Virus Scan
This activity uses the existing antivirus on the system to automate the scan of a file or a folder. The VirusScanProps.xml configuration file must be present in the Automation Studio > bin folder, else this activity does not work. The activity invokes the virus scanner client from the command line.
Using Virus Scan Activity
1. In the Canvas Tools pane, click File to expand the tool and view the associated activities.
2. Drag the Virus Scan activity and drop on to the Flowchart designer on the Canvas. The validation error symbol disappears when required inputs are provided.
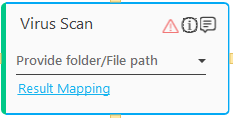
3. In the Provide folder/File path list, select the parameter holding the source path of the file along with the file name or the path of the folder to perform the scan. You must define the parameter in the Parameter bar to store the value and make it available for the selection.
4. Click the Result Mapping link. The Output Mapping list appears. Select the available parameter to map the status of the file operation performed. Both Boolean and String type is supported. You must pre-define the parameter to make it available for the selection. If the operation is successful, it returns true and if the operation fails it returns false. It can be used as an input for the next action that you want to perform in the automation process workflow, depending upon the success or failure of the file operation performed.
The Virus Scan activity with a default name is created.
Virus Scan Properties
The properties of Virus Scan activity are listed in the following table and can be edited in the Properties grid on the right pane.
Property Name |
Usage |
Control Execution |
|
Ignore Error |
When this option is set to Yes, the application ignores any error while executing the activity. If set to NA, it bypasses the exception (if any) to let the automation flow continue; however, it marks the automation status as failure, in case of an exception. By default, this option is set to No. |
Delay |
|
Wait After |
Specify the time delay that must occur after the activity is executed. The value must be in milliseconds. |
Wait Before |
Specify the time delay that must occur before the activity is executed. The value must be in milliseconds. |
Misc |
|
Breakpoint |
Select this option to mark this activity as a pause point while debugging the process. At this point, the process freezes during execution allowing you to examine if the process is functioning as expected. In large or complex processes, breakpoints help in identifying the error, if any. |
Commented |
Select this option to mark this activity as inactive in the entire process. When an activity is commented, it is ignored during the process execution. |
DisplayName |
The display name of the activity in the flowchart designer area. By default, the name is set as Virus Scan. You can change the name as required. |
On This Page Hide
Related Topics