Decision Model
This activity allows you to utilize an existing machine learning (ML) model designed using Albie Machine Learning Workbench that is deployed on the ML server such as Rapidminer server. It helps you to retrieve prediction on the new data provided.
Configuring the ML server and the ML model in automation Studio deploys them as a web service creating the REST API URL. The supported http request methods that uses the web services corresponding to the ML model are:
· GET - predictions are made by passing input fields as the URL query parameters
· POST - predictions are made by passing the JSON file
You can provide the set of data required for the ML model to make the prediction and return the response in the JSON format. The JSON activity can then be used to retrieve the required output fields from the ML model JSON response and decide to either complete the task or involve human inputs by using the Decision Workbench activity that ends the flow of the automated process and creates a task in the Albie Decision Workbench application. See Decision Workbench activity to know how to use the activity.
Prerequisite
Configure the ML server in Automation Studio to utilize the web services of the available ML model. Below are the minimum required properties for configuring the intended ML server. Remaining fields are auto populated with the default values already configured in Automation Studio . If you want to change the default values, refer Contextual Intelligence Apps in Admin Capabilities section.
1. In the Admin menu, add an application of Application Type- Contextual Intelligence Apps. The mandatory fields are highlighted with red box.
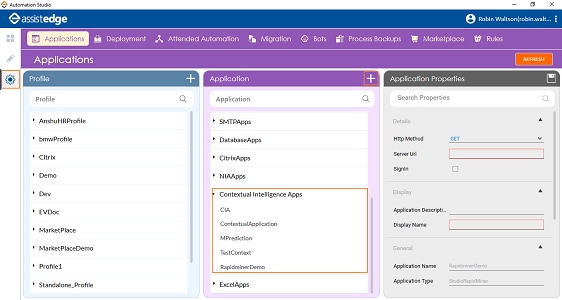
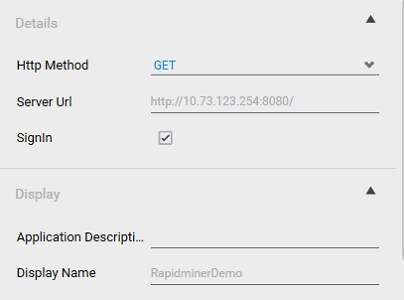
2. In the Application Properties panel:
· In the HTTP Method list, select the request method. Available options are, GET and POST.
· In the Server Url field, enter the URL of the server where the ML models are deployed.
· Select the Signin checkbox if sign in to the server is required.
· In the Display Name, enter a desired name of the server.
3. Click
the  (Save
Properties) icon to save the application details.
(Save
Properties) icon to save the application details.
The ML server is configured in Automation Studio.
Using Decision Model Activity
1. Within the required automation process workflow, click Process Components in the Canvas Tools pane to expand the tool and view the associated activities.
2. Drag the Application activity and drop on to the Flowchart designer on the Canvas.
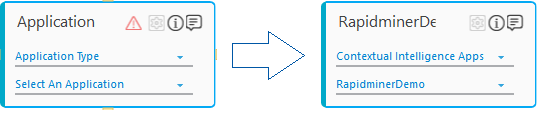
3. In the Application Type list, select Contextual Intelligence Apps.
4. In the Select An Application list, select the configured ML server.
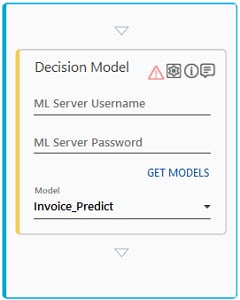
5. Double click the Application activity, drag the Decision Model activity and drop inside the Application activity.
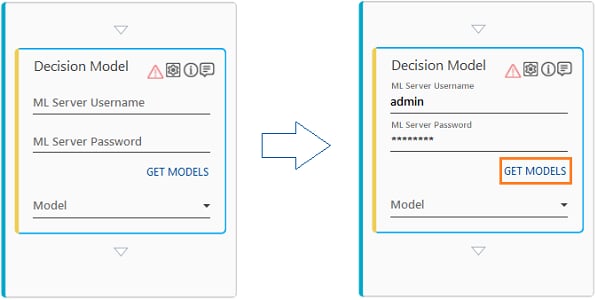
6. In the ML Server Username field, enter the username of the configured ML server .
7. In the ML Server Password field, enter the password of the configured ML server.
8. Click GET MODELS to populate the available ML models in the Model list.
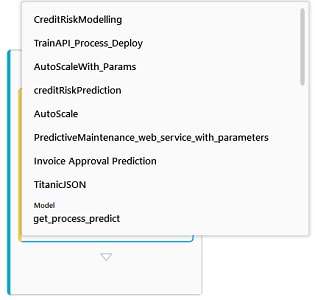
9. In the Model list, select the required ML model as per your business need.
10. Click
the  (Model
Input and Response) icon to configure the ML model inputs
and the output. The ML Model
Inputs and Response (GET) or the ML
Model Inputs and Response (POST) dialog box appears, depending
on the selected request type.
(Model
Input and Response) icon to configure the ML model inputs
and the output. The ML Model
Inputs and Response (GET) or the ML
Model Inputs and Response (POST) dialog box appears, depending
on the selected request type.
The configuration of the ML model inputs and output varies as per the selected request method. Click any of the links below to know the step-by-step process related to the selected request type:
· GET
· POST
Decision Model Activity Properties
The properties of a Decision Model activity are listed in the following table and can be edited in the Properties grid on the right panel.
Property Name |
Usage |
Control Execution |
|
Ignore Error |
When this option is set to Yes, the application ignores any error while executing the activity. If set to NA, it bypasses the exception (if any) to let the automation flow continue; however, it marks the automation status as failure, in case of an exception. By default, this option is set to No. |
Delay |
|
Wait After |
Specify the time delay that must occur after the activity is executed. The value must be in milliseconds. |
Wait Before |
Specify the time delay that must occur before the activity is executed. The value must be in milliseconds. |
Misc |
|
Application ID |
It is internally created and managed by Automation Studio itself. |
Breakpoint |
Select this option to mark this activity as the pause point while debugging the process. At this point, the process freezes during execution allowing you to examine if the process is functioning as expected. In large or complex processes, breakpoints help in identifying the error, if any. |
Commented |
Select this option to mark this activity as inactive in the entire process. When an activity is commented, it is ignored during the process execution. |
DisplayName |
The display name of the activity in the flowchart designer. By default, the name is set as Decision Model. You can change the name as required. |
Related Topics