Configure CustomApps
Custom Applications are coded automations for the applications for which automation cannot be configured using Automation Studio directly.
Automation Studio allows adding these coded automations (DLLs) that are created by implementing the required product interfaces to be configured as a Custom Application.
The DLL must be built using .NET Framework 4.6 and in x86 mode.
To configure a custom application:
1. In
the Admin menu, click
the  (Add
Application) icon to add an application. The Add
Application dialog box appears.
(Add
Application) icon to add an application. The Add
Application dialog box appears.
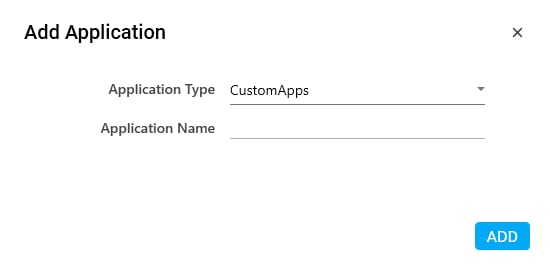
2. In the Application Type list, select CustomApps.
3. In the Application Name field, enter a desired name of the custom application you want to add. The name must not contain any special character or space.
4. Click ADD. A message for successful addition of the application is displayed.
5. Close the displayed message and enter the following details in the Application Properties pane. Mandatory fields are highlighted in a red box.
Property Name |
Usage |
Application Properties |
|
Language |
The programming language used to build the custom application. Supported language is DotNet. |
DllPath |
Path of the DLL file containing the custom code. |
Data Privacy |
|
Enforce Data Privacy |
It is applicable only for AssistEdge Engage. If selected, the data privacy alert popup appears when Engage application is launched. |
Load AssistEdge Engage On Reject |
It is applicable only for AssistEdge Engage. If selected, opens the Engage application even if Decline is clicked on the data privacy popup window. |
Show Reject Option |
It is applicable only for AssistEdge Engage. If selected, the Decline button appears on the data privacy popup window when the Engage application is launched. |
Show Alert for indefinite time |
It is applicable only for AssistEdge Engage. If selected, the displayed message shows until user input is received when the Engage application is launched.. |
Show Data Privacy on Revisit |
It is applicable only for AssistEdge Engage. If selected, the data privacy popup window appears whenever the Engage application is launched. |
Display |
|
Application Description |
A small description of the custom application added. |
Display Name |
The desired name of the custom application, entered by the user. This is a mandatory field. |
General |
|
Application Type |
Type of application selected at the time of adding the application. It auto populates as per the application type selected while configuring the application. |
Misc |
|
Automation |
Signifies the type of automation performed in the configured custom application. |
Is Application Tracked |
It is applicable only for AssistEdge Engage. Signifies if the application is tracked for the time spent by Engage during the process execution. It is used for activity tracking report and tracking time spent on each application in the execution dashboard reports. By default, it is selected and can be edited. |
Reset |
|
Is Reset Required |
Signifies if the application reset needs to be done after each automation is executed. If it is not selected, the application does not reset. |
Is Sequential Reset |
Signifies if the application reset is done one after other in no particular order. If selected, it is mandatory to raise the launch, sign in and reset status event from the custom application code. |
Sequential Launch/SignIn |
|
Is Sequential SignIn |
Signifies if the application is signed in one after the other in no particular order. If selected, it is mandatory to raise the launch, sign in and reset status events from the custom application code. |
Workspace |
|
Is multiInstance allowed |
It has been decommissioned now. It was applicable only for AssistEdge SE which is AssistEdge Engage now. Signifies if multiple instances of SE (now Engage) processes can be initiated on a single user machine. |
6. Click
the  (Save
Properties) icon to save the application.
(Save
Properties) icon to save the application.
The custom application is configured.
Related Topics