Manage Users
User management enables you to assign role-based access control to users and the tasks that they can perform on Admin module and Automation Studio. Each user's login account is uniquely identified with a username, password, and profile.
Managing user allows you to do following:
To access the manage users:
Go to User Management > Manage Users.
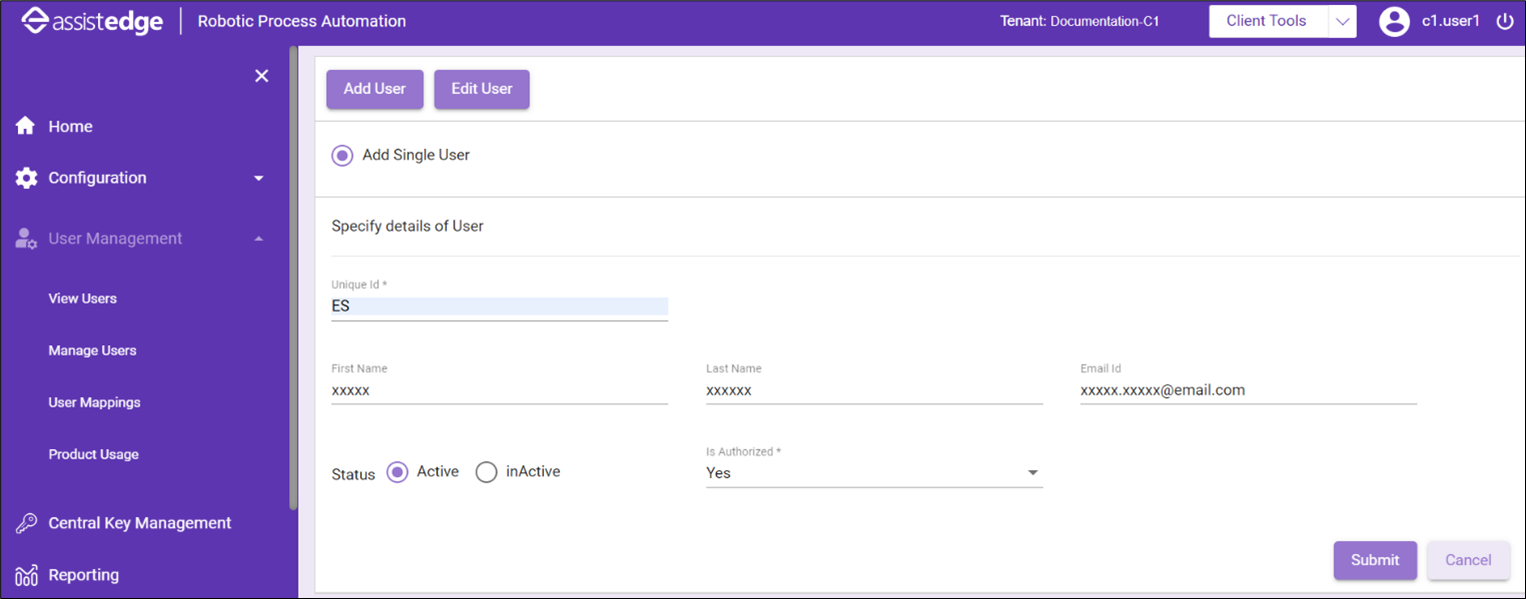
Adding User
You can add single user using below mentioned steps.
To add a single user:
- Click Add User and then select the Add Single User option.
- In the Unique Id field, enter the user details, like first name, last name, email ID and so on and click Submit.
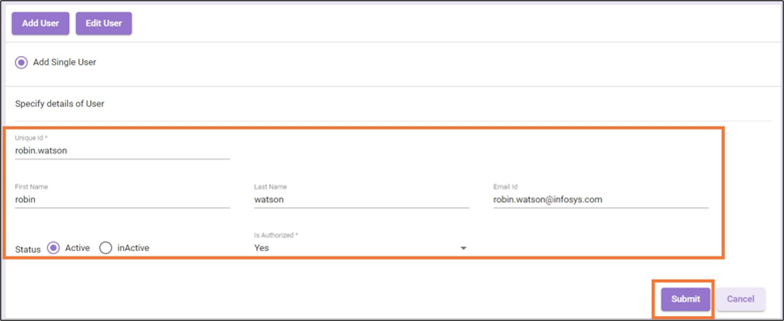
- In the First Name field, specify the new first name for the user.
- In the Last Name field, enter the new last name for the user.
- In the Email Id field, enter the new Email Id for the user.
- Select Active to set the Status field as active. You can set the user as inactive, whenever required.
- In the Is Authorized field, select Yes or No to indicate whether a user is authorized to access control tower or not. This also indicates if the user is eligible to become a manager or not.
- Click Submit to add the user to the database or click Cancel to discard the changes.
On being added to the Admin module, the user will receive an email notification.
Editing User Details
By default, user repository is mapped to local Active Directory; however, you can edit details of the users such as first and last name, email address, and status. This is useful in scenarios where you may want to change the role of a user, when users forget their password, or when their email address has changed.
To edit the user's details:
- Click Edit User.
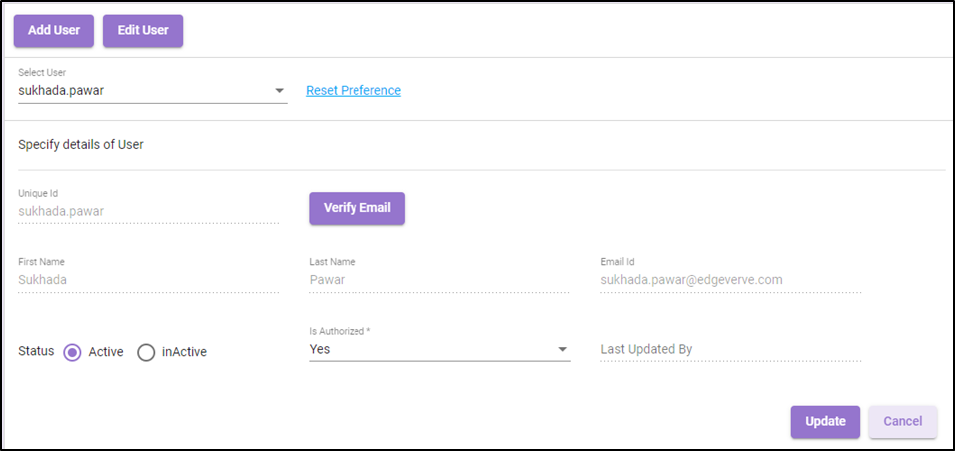
The Edit User page is displayed.
- Select the user from the available list.
Click the Reset Preferences link to delete all the preferences set for the selected user from the database. A message appears as Implementation and Application-Level Preferences Reset on the page.
|
NOTE: |
|
- Select the Status option as per your preference. The Status field is active unless the user is set to inactive.
-
In the Is Authorized field, select Yes or No to indicate whether a user is authorized to access control tower or not. This also indicates if the user is eligible to become a manager or not.
-
Click Update to reflect the changes in the database or click Cancel to discard the changes.