Configuring H2O Application
To configure an H2O application for Contextual Intelligence Apps:
- Click Admin Menu
 and select the Applications tab.
 - Add an application of Application Type- Contextual Intelligence Apps. The mandatory fields are highlighted with red box.
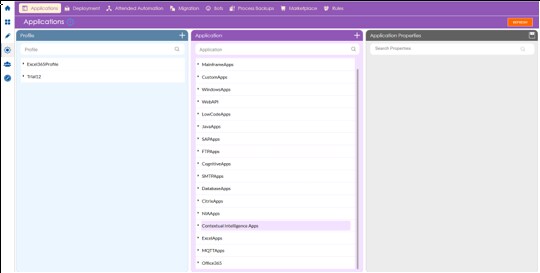
- In the Application Properties panel:
- In the Server Url field, enter the URL of the server where the H2O server is deployed. For example, http://Ip-address:54321.
- Select the Signin checkbox if authentication is required for H2O application.
- In the Display Name, enter a desired name of the server.
- Select Others from the dropdown list for the Application Type.
For information about other fields, see Configure Application section in the AutomationStudio.
- Click the
 (Save Properties) icon to save the application details.
The H2O application is configured in Automation Studio.
Configuring H2O Application without Sign In
Make sure you uncheck the Signin checkbox in the Application properties while creating the H2O application, to use the application without the sign in process.
- In the Canvas Tools pane, click Process Components to expand the tool and view the associated activities.
- Drag the Application activity and drop on to the Flowchart designer on the Canvas.

- In the Application Type list, select Contextual Intelligence Apps.
- In the Select An Application list, select the appropriate H2O application from the configured H2O applications.
- Double click the Application activity, drag the H2O3 activity and drop inside the Application activity.
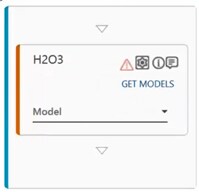
- Click GET MODELS to populate the available H2O models in the Model dropdown list.
- In the Model list, select the required H2O model as per your business need.
- Click the
 (Model Input and Response) icon to configure the H2O model inputs and the output. The Model Inputs and Response dialog box appears. The configuration of the H2O model input and output varies as per the selected request method.
 - Save the process.
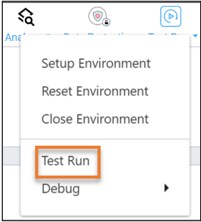
- Click Test Run if you want to test run the process to verify the desired output. For more information regarding test run, setting up environment, debugging a process. For more information, see Process Management section in the Automation Studio.
Post execution, the relevant output is generated. You can use the JSON activity to retrieve the results from the output. For information on JSON activity, refer JSON Activity section in AE-RPA-Engage-AutomationStudio-UserManual.
Configuring H2O Application with Sign In
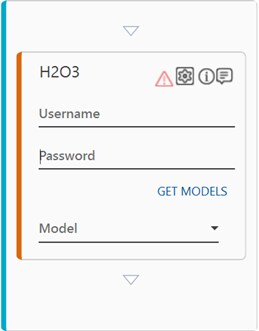
Make sure you check the Signin checkbox in the Application properties while creating the H2O application, to use the application with sign in process.
- Follow to the procedure in Configuring H2O application without sign in, and in the activity for Username and Password fields, enter the username and password of the H2O application.
- Save the process.
- Click Test Run if you want to test run the process to verify the desired output. For more information regarding test run, setting up environment, debugging a process, refer Process Management section in the Automation Studio.
- Post execution, the relevant output is generated. You can use the JSON activity to retrieve the results from the output. The output is displayed in the JSON format shown below.
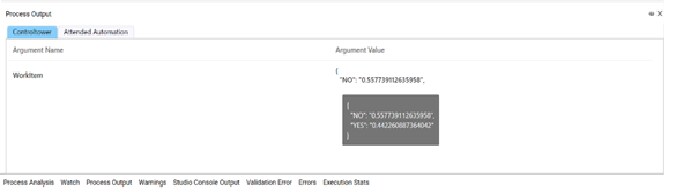
You can use the JSON activity to retrieve the results from the output. For more information on JSON activity, see JSON Activity section in AutomationStudio.