View Users
View users enables you to view the information of users. By default, only the Super_Admin user can perform all the functions. You can view the existing users in the system.
View User displays user information in two structures:
Viewing Application Users
To access the view users:
Go to User Management > View Users
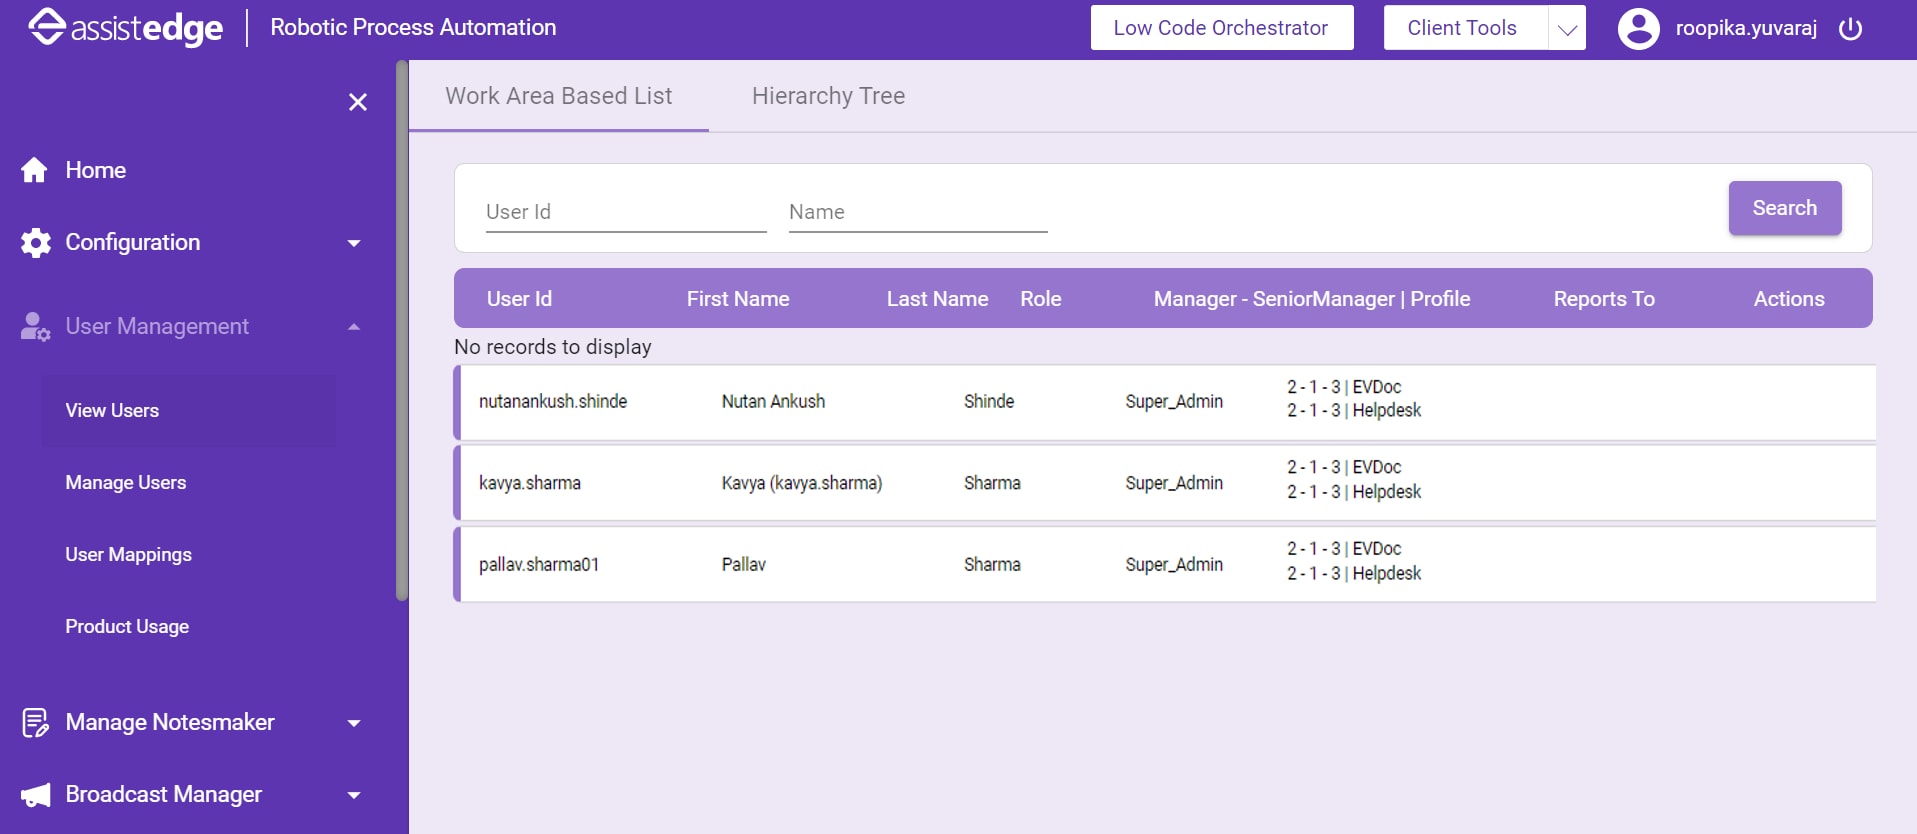
Work Area Based List
To access this tab, click View Users > select the Work Area Based List tab.
In the Work Area Based List, the user list is displayed based on following conditions:
- Users who have one or more profiles as that of the logged-in user
- Users who have roles exactly same as that of the logged-in user for the user. For these users, actions link (View/Edit) is not available.
- Users who have roles which are under the logged-in users’ role, users’ actions link is available.
- User has to be in the role hierarchy of logged in user.
- User has to share at least one profile with logged in user.
- Edit link will appear only when user is in the subordinate list of logged in user.
- For the other users, View link is available and for the logged in user the Action is blank.
Viewing Users
The  (View) icon appears corresponding to the users who are subordinates of the logged in user.
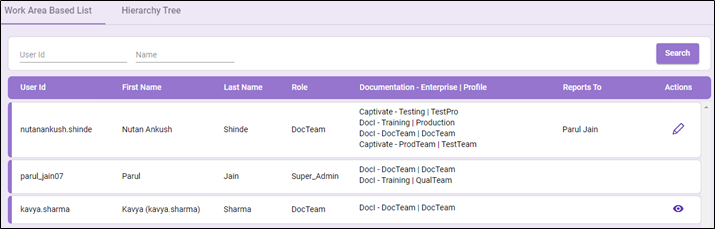
Editing the subordinate user details
If the logged in user (Super_Admin) has assigned any subordinates, the  (Edit) icon appears corresponding to the user role. Additionally, you can enable or disable the user status that is active or inactive.
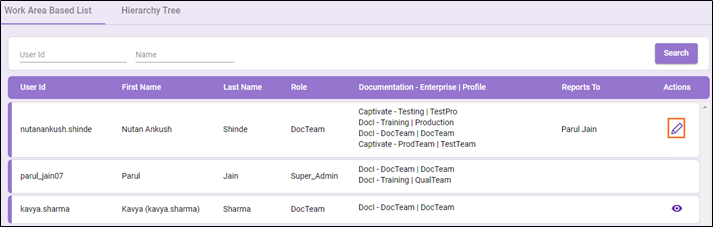
To edit the subordinates user details:
- In the Actions column, click the
 (Edit) icon corresponding to the user whose details you want to edit.
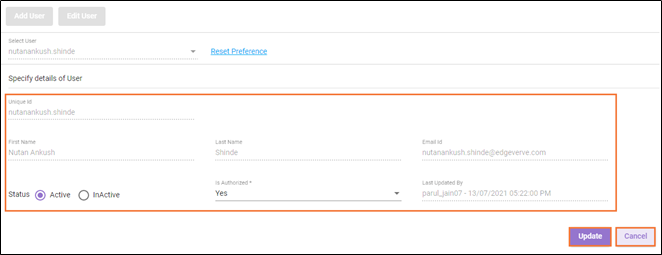
The Specify details of the User page is displayed.
- From the Status, select the appropriate option from the available options.
- From the Is Authorized, select the appropriate option.
- Then, click Update to save changes or else click Cancel to discard the changes.
The details of user are updated accordingly in the system.
Resetting Preference
Reset Preference enables you to set the preference for the selected user. The selected user can be deleted from the database.
To reset the preference:
- From the list, select the user from the available user's list. The details of selected user such as first name, last name, email address, or status is populated on the page.
- Click Reset Preference to delete all the preferences set for the selected user from the database.
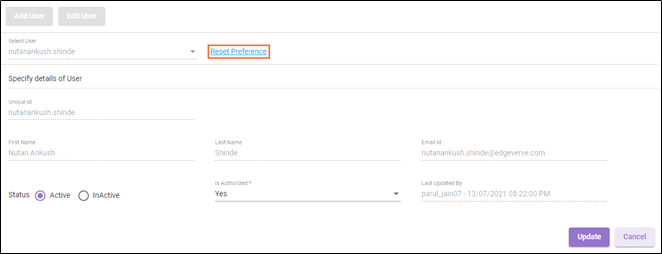
A message appears as Implementation and Application-Level Preferences Reset on the page.
Searching the user using ID
You can search for a user using the unique ID assigned to user.
To search for the user using ID:
- In the User ID field, enter the user ID and then click Search.
- The result is displayed according to the applied filter which includes user ID.
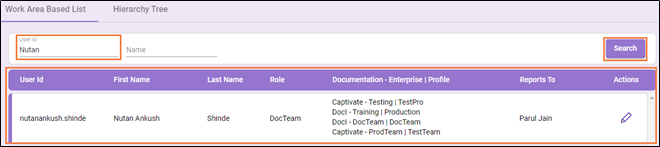
Following table includes the explanation of the column which appears after applying user ID filter.
| Field Name | Description |
| User ID | Displays the User ID of the user |
| First Name | Displays the First name of the filtered user |
| Last Name | Displays the last name of the filtered user |
| Role | Displays the Role of the filtered user |
| <Organisation-Department-Teams|Profile> | Displays the profile related details of the filtered user |
| Reports to | Displays the name of reporter to whom the filtered user report |
| Actions | Following are the actions:
|
 (Edit) icon.
 (View) icon.
Searching users using name
You can search the user using name.
To filter the user using name:
- In the Name field, enter the name which you want to filter.
- Click Search. The result is displayed according to the applied filter such as username.

Hierarchy Tree
Hierarchy Tree shows the subordinates of the logged-in user. For each user, a reporting manager can be set in the User Mapping page and creating a user hierarchy in the system.
Click <Super_Admin > node or subordinate <Admin> to view the entire detailed tree structure of the user.
Left panel displays the tree structure of the subordinate hierarchy. Each node contains full name + [Role]. Right panel of the page shows the complete user information of the selected tree node.
Following page shows the entire tree structure of the logged-in user:
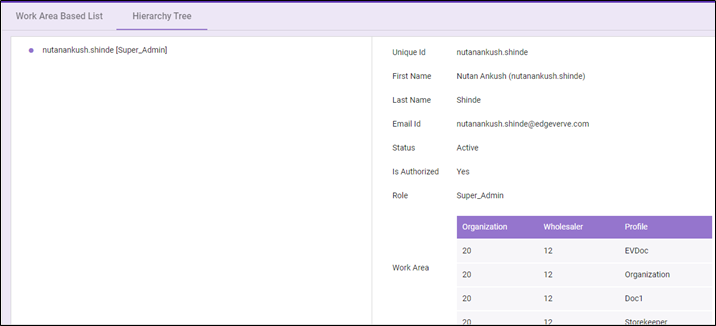
Following user details are displayed in the Hierarchy tree structure:
| Field Name | Description |
| Unique Id | Displays the unique user ID of the user |
| First Name | Displays the first name of the user |
| Last Name | Displays the last name of the user |
| Email Id | Displays the email ID of the user |
| Status | Displays the status of the user |
| Is authorized | Displays whether user is authorized to perform the task |
| Role | Displays the role of logged-in user |
| Work Area |
Displays the details of hierarchy and profile linked to logged-in user. |