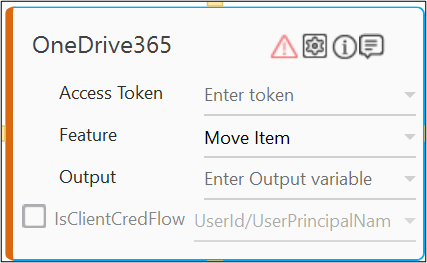
Move Item
Move Item enables you to move a folder or file from one folder to another folder of your OneDrive 365 application.
Using Move Item feature
- In the Feature list, select Move Item.
- Click the
 (Setting) icon to configure the input parameters as defining the source folder path or configuring the advance options. The Input Configuration screen appears.
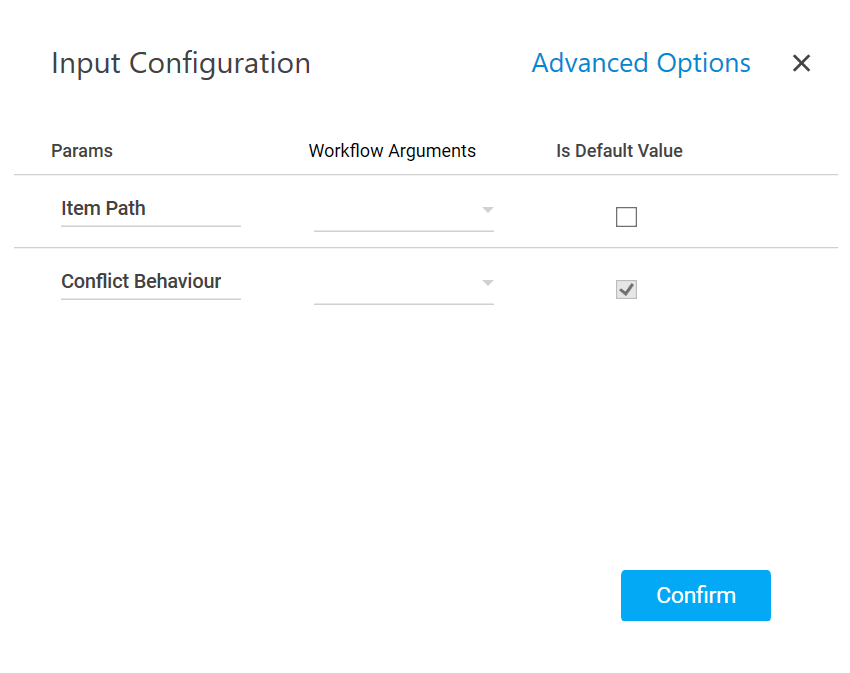
- Define all the input parameters as In arguments and output parameters as Out arguments in the Argument bar to make it available for the selection.
- Mandatory Options:
- In the Item Path list, select the parameter holding the path along with the folder or file name to retrieves its metadata.
- In the Conflict Behavior list, select the action that must be taken if the specified folder name already exits at the location where the folder is getting created. Available options are:
- fail: aborts the operation.
- rename: renames the new folder by adding a numeric suffix to it. For example, if you specify a folder name as dev and a duplicate folder exists with the same name, a new folder dev 1 gets created.
- Advanced Options: These are optional parameters that lets you define additional input options such as destination path or new name for the file you are moving.
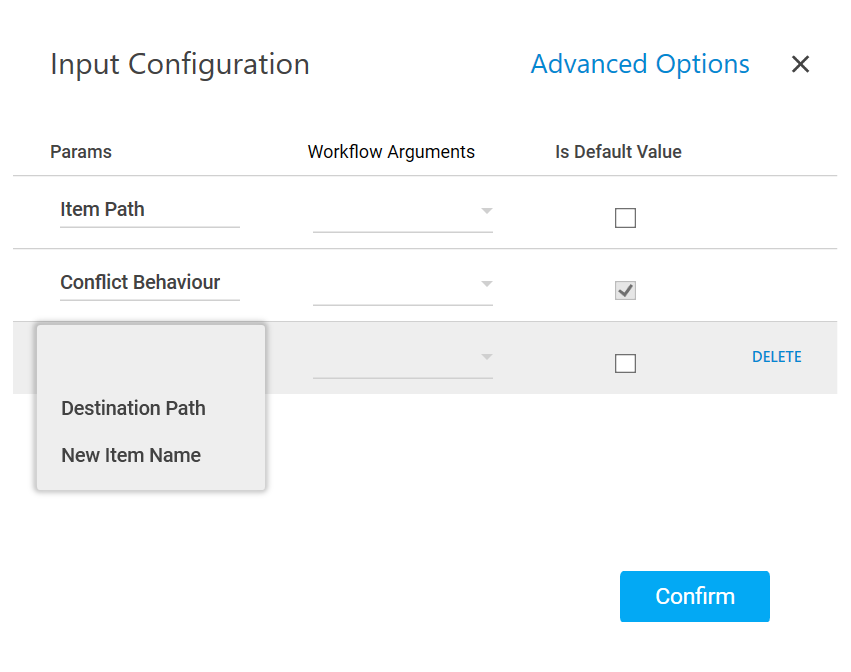
- Click Advanced Options and select Destination Path from the newly created row.
- In the Destination Path list, select the parameter holding the path along with the folder to move the content. If the destination folder is not defined, by default, the copied content is moved inside the root folder of your OneDrive application.
- Click Advanced Options and select New Item Name in the newly created row.
- In the New Item Name list, select the parameter holding a name to rename the folder or the file being moved.
- Click Delete corresponding to a parameter you want to remove from the list of specified input parameters.
- You can select the Is Default Value checkbox to set the selected input parameter as the default value.
- Mandatory Options:
- Click Confirm to save the configuration.