RSVP
RSVP (Repondez s’il vous plait, which means please respond) feature enables you to automatically send a response to the organizer of a specific event. You can accept, decline or tentatively accept the invite depending on your availability without having to keep a track of the events manually.
Using RSVP Feature
- In the Feature list, select RSV P.

NOTE:
Group Calendar is not supported for the RSVP feature. Once RSVP is selected, the IsGroupCalendar option is disabled. However, if IsGroupCalendar checkbox is selected first, and then RSVP is selected, IsGroupCalendar option is disabled again. - Click the
 (Setting) icon to configure the input parameters such as defining the file name that you want to search. The Input Configuration screen appears.
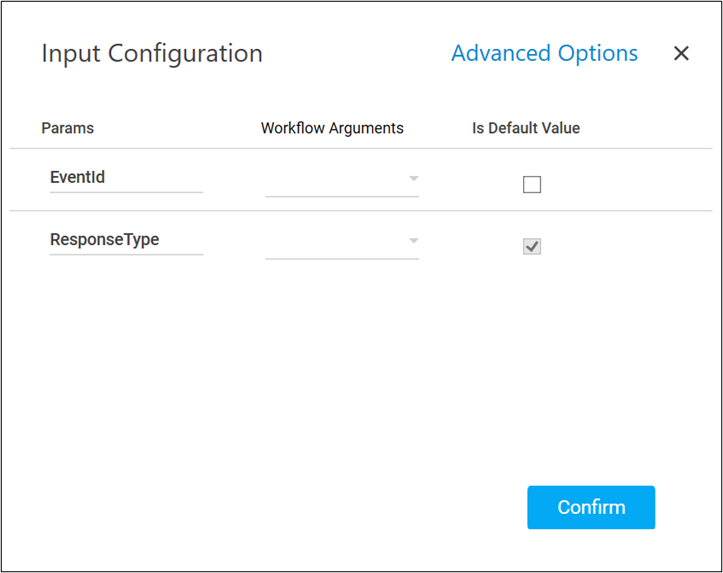
- Define all the input parameters as In arguments and output parameters as Out arguments in the Argument bar to make it available for the selection.
- You can select the Is Default Value checkbox to set the selected input parameter as the default value.
- Mandatory Options:
- Corresponding to the EventId parameter, select the String type argument from the Workflow Arguments dropdown list holding the unique identifier of the event for which you want to send the RSVP.
NOTE:
You can use the Search Event feature to obtain the required event Id - Corresponding to the ResponseType parameter, select the required option from the Workflow Arguments dropdown list. Available options are – accept, tentativelyAccept and decline.
- Corresponding to the EventId parameter, select the String type argument from the Workflow Arguments dropdown list holding the unique identifier of the event for which you want to send the RSVP.
- Advanced Options: These are optional parameters that lets you define additional input details such as the search path.
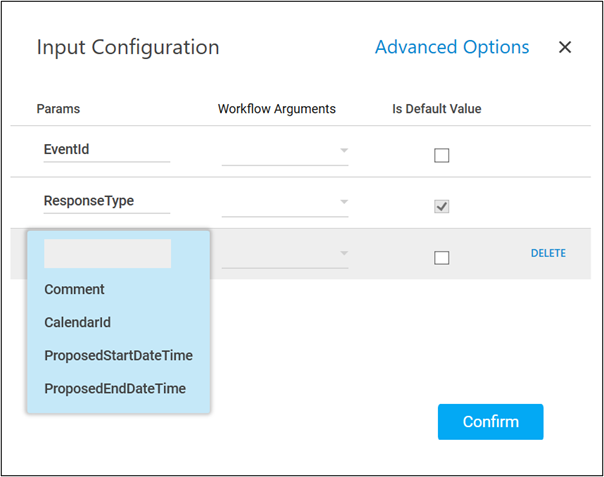
- Click Advanced Options and select Comment. Corresponding to the Comment parameter, select the String type argument holding the message that you want to send as the body with the response.
- Click Advanced Options and select CalendarId. Corresponding to the CalendarId parameter, select the String type argument holding the unique identifier of the calendar to which you want to send the RSVP.
The Calendar Id does not appear if Group calendar is used to configure the RSPV feature. - Click Advanced Options and select ProposedStartDateTime. Corresponding to the ProposedStartDateTime parameter, select the DateTime type argument holding the proposed start date and time for the event or meeting. It must be combined date and time representation in the UTC format (24 hrs.), <date>T<time>. For example, 2022-08-29T04:00:00.0000000.
- Click Advanced Options and select ProposedEndDateTime. Corresponding to the ProposedEndDateTime parameter, select the DateTime type argument holding the proposed end date and time for the event or meeting. It must be combined date and time representation in the UTC format (24 hrs.), <date>T<time>. For example, 2022-08-29T05:00:00.0000000.
- Mandatory Options:
- You can select the Is Default Value checkbox to set the selected input parameter as the default value.
- Click Confirm to save the configuration.
-
From the Output dropdown list, select the argument to map the status of the operation performed. You must pre-define the parameter as an Out argument to make it available for selection. You can use the JSON activity to utilize the retrieved data as per your need.
The RSVP feature is configured.
Below is the sample output:
