Modify Event
Modify Event feature enables you to automatically modify an existing event detail such as list of attendees, start date , end date of the event and so on. Only the events available in the primary calendar of the Calendar 365 application can be modified.
Using Modify Event Feature
- From the Feature dropdown list, select Modify Event .
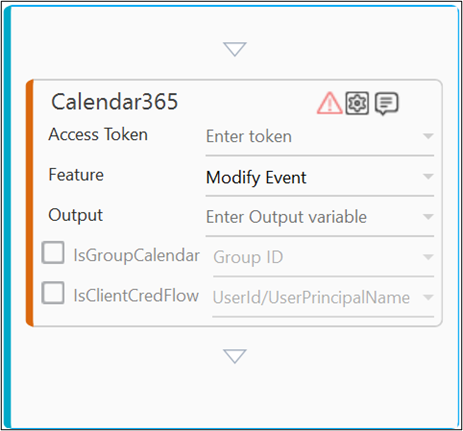
- Click the
 (Setting) icon to configure the input parameters such as defining the defining the attendees, start and end date, and so on. The Input Configuration screen appears.
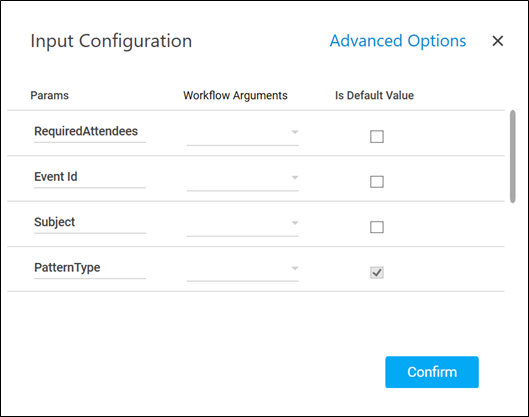
- Define all the input parameters as In arguments and output parameters as Out arguments in the Argument bar to make it available for the selection.
- You can select the Is Default Value checkbox to set the selected input parameter as the default value.
- Mandatory Options:
- Corresponding to the RequiredAttendees parameter, select the String type argument from the Workflow Arguments dropdown list holding the Email Id of the user to check the availability. You can specify semicolon separated multiple Email Ids to find the time for multiple users. For example, “john.miller@xyz.com; robin.waltson@xyz.com”.
- Corresponding to the Event Id parameter, select the String type argument from the Workflow Arguments dropdown list holding the unique identifier of the event you want to modify.
NOTE:
You can use the Search Event feature to obtain the event Id.
- Corresponding to the Subject parameter, select the String type argument from the Workflow Arguments dropdown list holding the subject line of the event.
- Corresponding to the PatternType parameter, select an option from the Workflow Arguments dropdown list to specify the how often the event must repeat. Available options are – daily, weekly, absoluteMonthly and absoluteYearly. For more details, refer the PatternType table.
- Corresponding to the RangeType parameter, select an option from the Workflow Arguments dropdown list to specify how long the specified PatternType must repeat. Available options are – endDate, noEnd, and numbered. For more details, refer the Rangetype table.
- Corresponding to the StartTime parameter, select the String type argument from the Workflow Arguments dropdown list holding the start time of the event you want to modify. You must define the value in the UTC format (24 hrs., HH:MM:SS). For example, 04:00:00.
- Corresponding to the EndTime parameter, select the String type argument from the Workflow Arguments dropdown list holding the end time of the event you want to modify. You must define the value in the UTC format (24 hrs., HH:MM:SS). For example, 05:00:00.
- Corresponding to the Interval parameter, select the Int32 type argument from the Workflow Arguments dropdown list specifying the number of units between each occurrence of the modifyd event. The units can be days, weeks, months, or years depending on the PatternType selected below.
Depending on the selected PatternType the below fields appear. Select the required option as per your business requirement:
Pattern Type Description daily Repeats an event daily based on the number of days between each occurrence. For example, if the Interval is 1, the event repeats daily. If the Interval is 2, the event repeats after every two days. weekly Repeats an event on the specified day of the week based on the number of weeks between each occurrence. If weekly is selected, the following fields appear:

- DaysOfWeek – Select a String type argument holding the day of the week on which you want the event to recur. For example, Wednesday.
You can specify coma separated multiple days. This is not a mandatory field. For example, if Interval is set to 2, DaysOfWeek as sunday, the event repeats every other Sunday.
absoluteMonthly Repeats an event on the specified date of the month based on the number of months between each occurrence. If absoluteMonthly is selected, the following field appears:
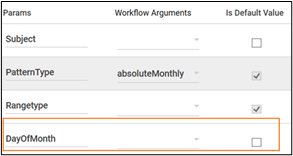
- DayOfMonth - Select an Int32 type argument holding the date of the month on which you want the event to recur. For example, 10.
adsoluteYearly Repeats an event on the same month of the year based on the number of years between each occurrence. If absoluteYearly is selected, the following field appears:
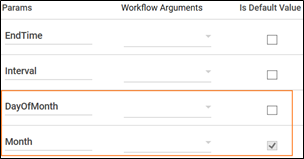
- DayOfMonth – Select an Int32 type argument holding the date of the month on which you want the event to recur. For example, 10.
- Month - From the dropdown list, select in which month of the year the event must recur. Available options are the numeric month in a year.
NOTE: Ensure a valid DayOfMonth is provided as per the specified Month. For example, select from among 1-30 as the DayOfMonth when Month selected is 6, as only 30 days are available in the June month.
Depending on the selected RangeType the below fields appear. Select from the below options as per your business requirement:
Range Type Description end Date Indicates that the event occurs between a specified PatternType, start and end date. If endDate is selected, the following field appears:
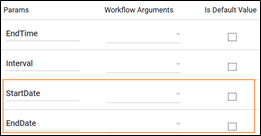
- Corresponding to the StartDate and EndDate parameters, select String type arguments holding the start date and end date of the event you want to modify. Define the date in the UTC format (24 hrs.), YYYY-MM-DD. For example, 2022-11-17. It depicts 17th November 2022.
NOTE: When PatternType selected is absoluteYearly ensure the specified Month falls between the range of StartDate and EndDate, else, the process workflow does not execute as expected.
noEnd Indicates that the event occurs on all days as per the specified PatternType and the start date.

- Corresponding to the StartDate parameter, select the Date type argument holding the start date of the event.
numbered Indicates that the event occurs as per the specified PatternType and fixed number of times.
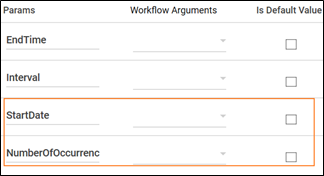
- Corresponding to the StartDate parameter, select the String type argument holding the start date of the event.
- Corresponding to the NumberOfOccurrences parameter, select the positive Integer type argument holding the number of times the event must recur.
- DaysOfWeek – Select a String type argument holding the day of the week on which you want the event to recur. For example, Wednesday.
- Advanced Options: These are optional parameters that lets you define additional input options.
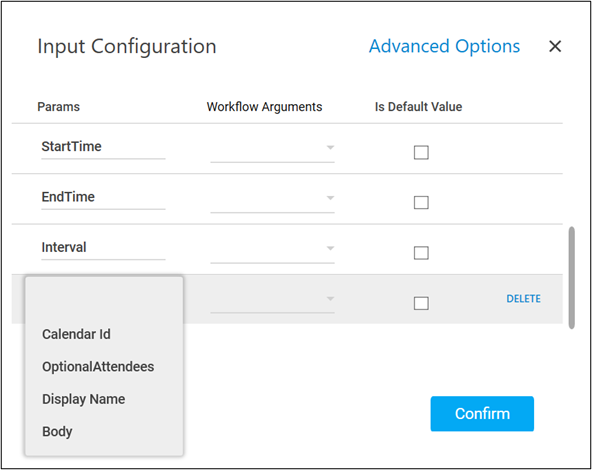
- Click Advanced Options and select Calendar Id. Corresponding to the Calendar Id parameter, select the String type argument holding the unique identifier of the calendar where you want to modify the event.
The Calendar Id field does not appear if the Group calendar is used to configure the Modify Event feature.
NOTE:
You can use the Get Calendar feature to retrieve the required Calendar Id.
- Click Advanced Options and select OptionalAttendees. Corresponding to the OptionalAttendees parameter, select the String type argument holding the Email Ids of the optional attendees. You can specify semicolon separated multiple Email Ids. For example, “john.miller@xyz.com; robin.waltson@xyz.com”.
- Click Advanced Options and select Display Name. Corresponding to the Display Name parameter, select the String type argument holding a name of your choice that you want to display for the event.
- Click Advanced Options and select Body. Corresponding to the Body parameter, select the String type argument holding the message that you want to send with the event invite.
- Click Advanced Options and select Calendar Id. Corresponding to the Calendar Id parameter, select the String type argument holding the unique identifier of the calendar where you want to modify the event.
- Mandatory Options:
-
Click Confirm to save the configuration.
-
From the Output dropdown list, select the argument to map the status of the operation performed. You must pre-define the parameter as an Out argument to make it available for selection. You can use the JSON activity to utilize the retrieved data as per your need.
The Modify Event feature is configured.
Below is the sample output:
