Mainframe Application
This activity allows you to automate the actions performed on the mainframe application such as processing bulk data, financial transactions, inventory control and other critical services utilized mainly by large organizations.
In Automation Studio, field configuration of the mainframe application is done with the help of the coordinates of the selected field. The Multimodal Interface uses the coordinates of the row and the column to identify the field.
Prerequisite: Configuring Mainframe Application
Configure the mainframe application in Automation Studio where you want to perform the automation. Below are the minimum required properties for configuring the intended mainframe application. If you want to define remaining properties, refer MainframeApps in the Admin Menu.
- In the Admin menu, add an application of Application Type- MainframeApps.
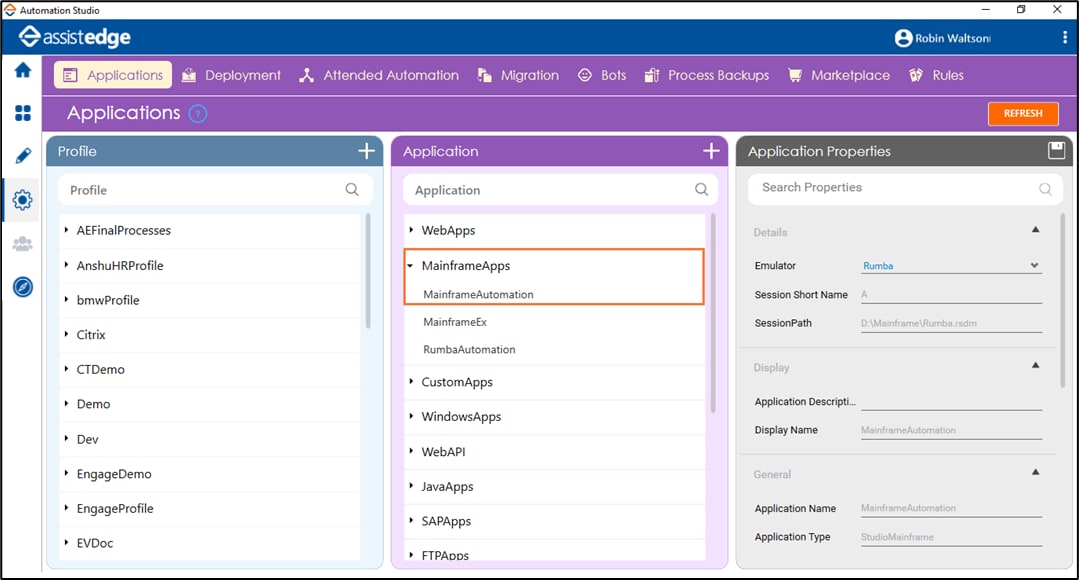
- In the Applications Properties panel:
- Select the required emulator in the Emulator list.
- Enter the short name of the session as set in the selected emulator in the Session Short Name field. This field appears only if Emulator selected is Rumba or EHLLAPI.
- Enter the path of the session file in the SessionPath field, that contains all the necessary details required to connect to the mainframe terminal.
- In the Display Name field, enter a desired name of the Mainframe application.
- Click the
 (Save Properties) icon to save the application.
The Mainframe application is configured.
Using Mainframe Application Activity
- In the Canvas Tools pane, click Process Components to expand the tool and view the associated activities.
- Drag the Application activity and drop on to the Flowchart designer on the Canvas area.
The validation error symbol disappears when required inputs are provided in the correct format.
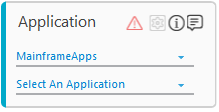
- From the Application Type list, select Mainframeapps. You must have at least one application added for it to appears in the list.
- In the Select An Application list, select the configured mainframe application that you want to automate. Alternatively, you can add a new mainframe application at this point of time. To add a mainframe application:
- In the Select An Application list, click Add New Application. The Add New Application dialog box appears.
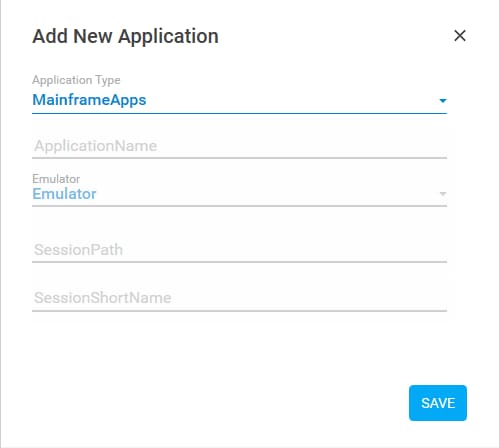
- In the Application Name field, enter a desired name of the mainframe application.
- In the Emulator list, select the emulator you want to configure. The available options are:
- AttachmateExtra
- Passport
- ReflectionUnixVMS
- AttachmateReflectionIBM
- ReflectionOpenSystem
- Rumba
- EHLLAPI
- In the Session Path field, enter the path of the session file that contains all the necessary details required to connect to the mainframe terminal.
- In the SessionShortName field, short name of the session, as set in the emulator. This field appears only if Emulator selected is Rumba or EHLLAPI.
- Click SAVE. The mainframe application is added.
- In the Select An Application list, click Add New Application. The Add New Application dialog box appears.
- Click the
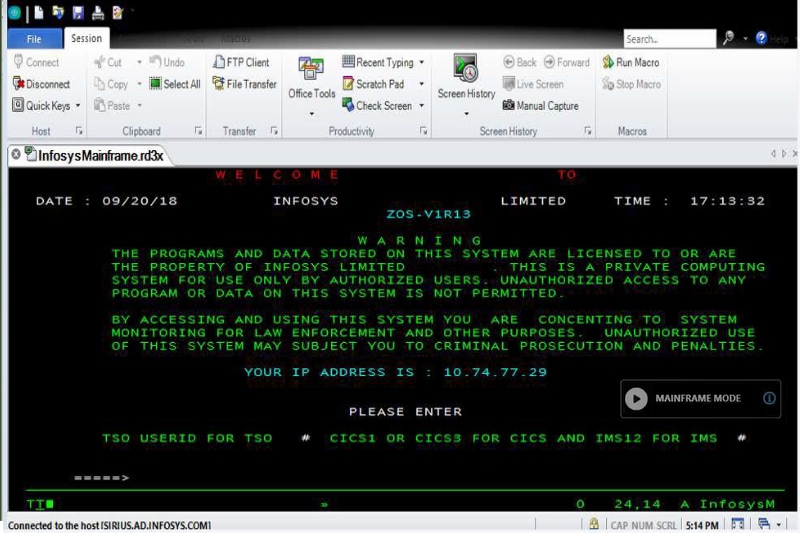
 (Settings) icon to launch the MAINFRAME MODE interface. The configured emulator of the mainframe application appears along with MAINFRAME MODE interface.
- Place the cursor or select the area to perform the action and then click the
 (Play) icon, to start capturing the automation steps that you want to perform within the mainframe application. The Play icon changes to the
  (Recording) icon. The Field Properties panel of the Mainframe Field Properties appears. The fields that are mandatory are highlighted with red box.

- In Action list, select the action that you want to perform on the captured area. Other mandatory fields change depending on your selection from the drop down list. Enter the required details. Refer Field Properties table to know more about the available fields and their respective properties.
- Click the
 (Save) icon to configure the fields.
 - Repeat steps 6 through 8 to capture all the steps involved in the process. The configured field is saved and starts appearing in the Saved pane of the Field Properties panel. You can edit or delete these steps in the Saved pane, if required.
- Click the
 (Save configured field and return to studio) icon to save the field that you configured and return to the Studio menu.
The fields configuration of the mainframe application is done.
Mainframe Mode Control Behavior and Field Descriptions
The properties of Mainframe Mode are listed in the following table:
|
Property Name |
Usage |
|
Control Behavior |
|
|
Action |
It is the action or the interaction that can be performed on a mainframe application. Available options are:
|
|
Interaction |
The corresponding interaction set against the selected action. |
|
Appears if Action selected is Fire Event. |
|
|
Event Name |
The trigger that executes an action on the mainframe application. Available options are:
|
|
Field Properties |
|
|
Column |
The column coordinate of the selected field on the mainframe application. |
|
Display Name |
User specified display name of the action configured. |
|
Row |
The row coordinate of the selected field on the mainframe application. |