Windows Applications Automation
This activity allows you to automate Windows thick client (.exe files, the executable file for Microsoft Windows) such as Notepad, Command Prompt and others in a codeless manner through out of box adapter, WindowsApps.
Configuring Windows Application
You must configure the windows application in Automation Studio before you start configuring the steps of automation process workflow. This establishes the connection between the windows application and Automation Studio to perform the automation.
Below are the minimum required properties for configuring the intended windows application. If you want to define remaining properties, refer WindowsApp in the Admin Menu.
1. In the Admin menu, add an application of Application Type- WindowsApps. The Add Application dialog box opens.
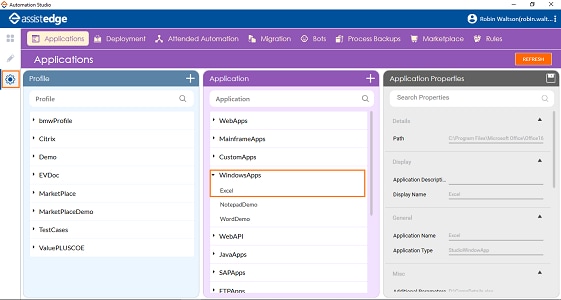
2. In the Application Name field, enter a desired name of the EXE application you want to add. The name must not contain any special character or space.
3. Click ADD and browse for the windows application you want to configure. Click Open.
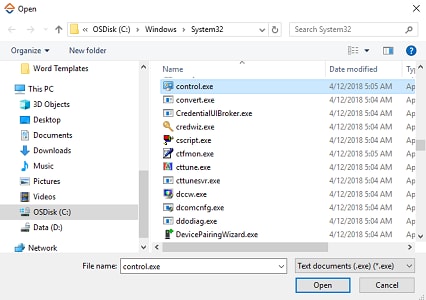
The windows application is configured.
Using Windows Application Activity
1. In the Canvas Tools pane, click Process Components to expand the tool and view the associated activities.
2. Drag the Application activity and drop on to the Flowchart designer on the Canvas area.
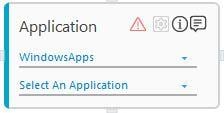
3. In the Application Type list, select WindowsApps. You must have at least one application added for it to appears in the list.
4. In the Select An Application list, select the configured excel file that you want to automate. Alternatively, you can add Windows application (EXE file) at this point of time. To add the windows application:
a. In the Select An Application list, click Add New Application. The Add New Application dialog box appears.
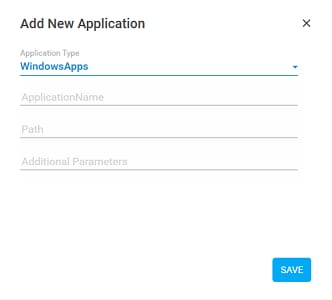
b. In the Application Name field, enter a desired name of the application.
c. In the Path field, enter the path of the EXE file of the windows application available on the system.
d. In the Additional Parameters field, enter the path of the file (along with its name) that you want to open within the application. Specify the file name in double quotes, if there are spaces in the file name.
e. Click SAVE. The windows application is added.
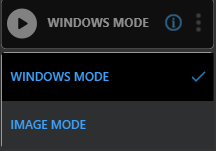
5. Click
the  (Settings) icon to launch
the WINDOWS MODE panel.
(Settings) icon to launch
the WINDOWS MODE panel.
6. Click
the  (Play)
icon. The Windows application appears and the Play
icon changes to the
(Play)
icon. The Windows application appears and the Play
icon changes to the  (Recording)
icon.
(Recording)
icon.
7. Press the Ctrl key and hover over the windows application to start capturing the automation steps that you want to perform in the Windows application. The area that you can capture gets highlighted with a red box.
8. While pressing the Ctrl button, click the intended area. The Field Properties panel of the Windows Mode appears. The fields that are mandatory are highlighted with red box.
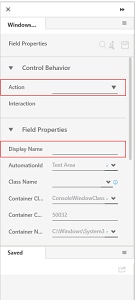
9. In the Action list, select the action that you want to perform on the captured area. Other mandatory fields changes depending on the selection from the list. Enter details of all the mandatory fields and other relevant fields as per your requirement. Refer Field Properties table to know more about the available fields and their respective properties.
10. Click
the  (Save) icon to configure
the fields.
(Save) icon to configure
the fields.
11. Repeat steps 6 through 10 to capture all the steps involved in the automation process workflow. The field that you configured and saved appears in the Saved pane of the Field Properties panel. You can edit or delete these steps in the Saved pane.
12. Click
the  (Save
configured field and return to studio)
icon to save the field that you configured and return to the Studio
menu.
(Save
configured field and return to studio)
icon to save the field that you configured and return to the Studio
menu.
The fields are configured and the Application activity for Application Type-WindowsApps is created.
Windows Mode Control Properties
The properties of Windows Mode fields are listed in the following table:
Property Name |
Usage |
Control Behavior |
|
Action |
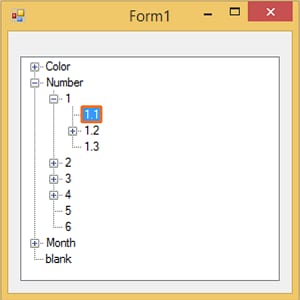
The applicable action or interaction that can be performed on the selected UI element. The available options change as per the window application being automated: · Click- Allows to left click the selected UI element. · Expand/Collapse- Allows to expand or collapse the selected UI element. · Legacy Interaction- Allows to configure UI element of the Windows application which supports a legacy pattern. · Get Text- Retrieves text from the selected UI element. · Set Text- Sets user provided text input to the selected UI element and stores it into a parameter. You must define the parameter in the Parameter bar before you start capturing the UI element. · Mouse Click- Allows mouse simulation. It requires the application to be in focus. You can choose to perform Left Click, Right Click or Double Click available from the drop down list. · Keyboard Input-Captures UI element input from the keyboard in the selected UI element. This interaction allows performing different keyboard input combinations with the help of Single Key, Double Keys, Triple Keys and TextEntry options. · Set Focus- brings the UI element in focus before performing any action on it. · If Control Exists- Checks availability of the UI element on the windows application. It is used while working with dynamic controls. · Get Radio Button Status- Retrieves status of the selected radio button status. It returns true or false. · Toggle Checkbox Action- Toggles the current state of a checkbox. · Get Checkbox Status- Returns the current selection status of a checkbox. · Perform ComboBox Select Value- Selects the specified value from the drop-down list. · Get ComboBox Value- Retrieves value of the selected combo box. · Perform ComboBox Set Text- Sets a user-specified value on the selected ComboBox. All ComboBox controls do not support this interaction. · Scroll Horizontal- Performs horizontal scroll based on the input provided on the percentage scale from 0 to 100. · Scroll Vertical- Performs vertical scroll based on the input provided on the percentage scale from 0 to 100. · Select Tree Node- Selects a node of a tree control using this interaction. Specify the input in a specific format. For example. for selecting node 1.1, enter the input value as Number/1/1.1.
· Expand Tree Node- Expands a node of the tree UI element. · Select- Selects a particular UI element. · Get DataGrid Value by Index- Retrieves data grid value by its index. Specify the cell index from which the input is needed. · Focus Data Grid Cell by Index- Brings a data grid cell in focus based on the input cell index. · Set DataGrid Value by Index- Sets the value to a DataGrid cell based on its index. · Get Data from Table- Retrieves complete data of a table control to a DataTable. If required, the data from the DataTable can then be saved in an excel/CSV file. Following are the steps involved to retrieve the data. a. Create an argument of type System.Data.DataTable, before extracting the UI element. b. Click WINDOWS MODE to extract the Data Grid Table control. c. Select Get Data from the Table. d. Set the Variable Name as the argument created in the first step. e. Save the configuration. f. Use Export Data Table activity to write data to excel. · Set Focus- This interaction is used to bring any control to focus before performing an action on it. |
Interaction |
The corresponding interaction class name auto populated against the selected action. |
Interaction |
The interaction or the action type corresponding to the selected interaction. |
Appears if Action selected is Legacy Interaction. |
|
Action Type |
The interaction or the action type corresponding to the legacy interaction. |
Key |
Appears if Action selected is Keyboard Input. The single key set as input from the keyboard. |
Key |
Appears if Action selected is Keyboard Input and Interaction selected is DoubleKeys. The second key which is set as input from the keyboard along with the first key. |
Key |
Appears if Action selected is Keyboard Input and Interaction selected is TripleKeys. The third key which is set as input from the keyboard along with the first and the second key. |
Text |
Appears if Action selected is Keyboard Input and Interaction selected is TextEntry. Allows user input as a text. |
Mouse Action |
Appears if Action selected is Mouse Click. Allows user input using the mouse. Available options are: · LeftClick- Performs a left click at the specified offset point. · DoubleClick- Performs a double click at the specified offset point. · RightClick- Performs a right click at the specified offset point. |
Field Properties |
|
Display Name |
User specified display name of the windows element selected. |
AutomationId |
Unique identifier for the automation element in the automation tree. See Handling Dynamic Controls section to know more about the usage of this field. |
Class Name |
Class name of the UI element as defined by the UI element developer. See Handling Dynamic Controls section to know more about the usage of this field. |
Container Class Name |
Container class name of the UI element as defined by the developer. See Handling Dynamic Controls section to know more about the usage of this field. |
Container Control Type |
Control type of the container of the UI element as defined by the UI element developer. |
Container Name |
Container name of the UI element as defined by the developer. See Handling Dynamic Controls section to know more about the usage of this field. |
Control Index |
Index of the current UI element within the entire set of elements with the same values of automation Id, class name and UI element name as that of the current element. |
Control Name |
Control name of the UI element as defined by the UI element developer. See Handling Dynamic Controls section to know more about the usage of this field. |
Control Type |
Control type of the UI element as defined by the developer. |
Appears if Action selected is Mouse Click. |
|
Offset From Control |
It is the distance between the UI element and the anchor. |
Is applicable only for AssistEdge Engage. Appears if Action selected is If Control Exist. |
|
Is C-View |
If selected, the field configuration captured in Automation Studio is visible in the C-View tab of Engage application. |
Search By Control Order No. |
Signifies if the UI element needs to be searched based on the UI element order number. Control order number is the index of the current element within the entire set of elements with the same value of UI element Id as that of the current element. |
Appears if Action selected is Get Text. |
|
Variable Name |
User defined name of the variable that stores the captured value. |
Variable Type |
Type of the variable defined. Available options are: · Text · Numeric · Decimal · Boolean · Data Table |
Misc Properties |
|
Max wait for input idle |
The maximum time interval in milliseconds for which the windows plugin waits on launch before it starts executing the configured interactions. |
Retry Count |
Number of times, the plugin retries to find a UI element, if not found. |
Retry Interval (ms) |
The time interval in milliseconds for which the plugin waits before it attempts for a retry. |
Windows Application Properties
The properties of a windows application are listed in the following table and can be edited in the Property grid on the right pane.
Property Name |
Usage |
Control Execution |
|
Ignore Error |
When this option is set to Yes, the application ignores any error while executing the activity. If set to NA, it bypasses the exception (if any) to let the automation flow continue; however, it marks the automation status as failure, in case of an exception. By default, this option is set to No. |
Delay |
|
Wait After |
Specify the time delay that must occur after the activity is executed. The value must be in milliseconds. |
Wait Before |
Specify the time delay that must occur before the activity is executed. The value must be in milliseconds. |
Misc |
|
Breakpoint |
Select this option to mark this activity as the pause point while debugging the process. At this point, the process freezes during execution allowing you to examine if the process is functioning as expected. In large or complex processes, breakpoints help in identifying the error, if any. |
Commented |
Select this option to mark this activity as inactive in the entire process. When an activity is commented, it is ignored during the process execution. |
DisplayName |
The display name of the activity in the flowchart designer. By default, the name is set as the name of the selected application. You can change the name as required. |
Handling Dynamic Controls
Automation Studio provides different identification criteria and Parametrization of the value of the dynamic field properties of the UI elements. You can reconfigure some of the auto captured field properties of such UI elements to create a more effective way of identifying the indented UI element. For such controls, remove the dynamic part of the string and use an appropriate option for UI element identification. For example, if a Class Name field is recognized as AssistEdge_Studio_20180205083009, the later part of the string, that is a timestamp,is dynamic and can be removed. Retain only the static part and reconfigure the field properties using the suitable option.
Following are the different field properties that can be reconfigured against their respective values:
· AutomationId
· Class Name
· Container Class Name
· Container Name
· Control Name
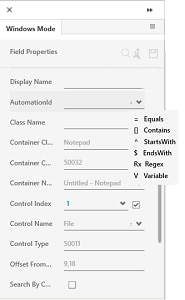
Use the  (drop
down arrow) icon to reconfigure the identification criteria. Available
options are:
(drop
down arrow) icon to reconfigure the identification criteria. Available
options are:
· Equals- Identifies the UI element based on the exact match with the value of the selected field property.
· Contains- Identifies the UI element based on the string present in the value of the selected field property.
· StartsWith- Identifies the UI element based on the starting string of the value of the selected field property.
· EndsWith- Identifies the UI element based on the ending string of the value of the selected field property.
· Regex- Identifies the UI element with the string matching the value of the selected field property as per the identification pattern defined through the provided regular expression such as a.b, *txt and others.
· Variable- Identifies the UI element as per the parametrization of the value of the selected field property. Parametrization allows to run the identification process over and over again using different values. With parameterization, windows controls with looping and assignment activities, are used.
On This Page Hide
Related Topics