Using Image Mode
It is helpful when any of the control available on the web page or the window application does not get captured using the WEB MODE or the WINDOWS MODE. Following are the instructions to perform field configuration using the IMAGE MODE:
1. Use
the  (Settings)
icon of the required Application
activity to launch Multimodal Interface and the configured application.
See Application activity to
know how to use the activity.
(Settings)
icon of the required Application
activity to launch Multimodal Interface and the configured application.
See Application activity to
know how to use the activity.
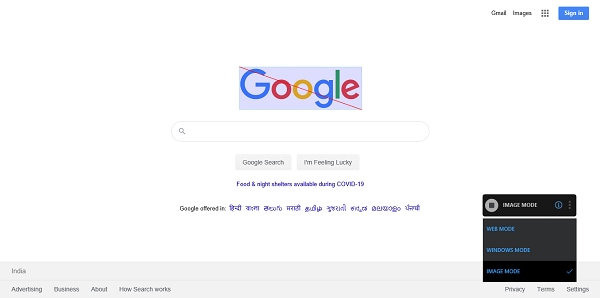
2. Select IMAGE MODE.
3. Click
the  (Play) button to capture
the image within the intended application. The application opens.
(Play) button to capture
the image within the intended application. The application opens.
4. Mark the image boundaries you want to capture in a rectangular area and then click the marked area. The cursor turns into a + (Plus) symbol and the diagonals of the rectangular area (from left to right diagonal) is marked with a red line, indicating the area that gets captured. The Field Properties pane of the Image Mode appears. The fields that are mandatory are highlighted with red box.
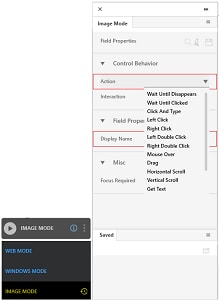
5. In the Action list, select the action that you want to perform on the captured area. Other mandatory fields change depending on your selection from the drop down list.
6. Enter the other required details. Refer Field Properties table to know more about the available fields and their respective properties.
7. Click
the (Save) icon to configure
the actions and other related fields.
(Save) icon to configure
the actions and other related fields.
8. Repeat step 3 through 7 to capture all the steps involved in the process. The fields configured and saved appears in the Saved pane of the Field Properties panel. You can edit or delete these steps in the Saved pane.
9. Click
the (Save configured field and return to
studio) icon to save the field that you configured
and return to the Studio menu.
(Save configured field and return to
studio) icon to save the field that you configured
and return to the Studio menu.
The fields related to IMAGE MODE are configured.
Double click the Application activity to configure the properties related to image automation.
Based on the type of action configured two different interactions gets triggered via IMAGE MODE- Control Image or OCR. Refer Image Control and Text Extractor activities to know details and steps related to capturing an image to perform certain action on it and extract texts from a text-based image respectively.
Image Mode Control Behavior and Field Descriptions
The properties of Image Control fields are listed in the following table:
Property Name |
Usage |
Control Behavior |
|
Action |
Actions that can be performed on a web based application. Available options are: · Wait Until Exists- Waits till the image is found on the web page and is in focus. You can use this to avoid any delay that might occur for the image to appear. This interaction returns a Boolean value of true if the image is found and false if the image is not found. The Boolean value can be set to a variable and checked in a conditional statement to perform an appropriate action after finding the image. · Wait Until Disappears- Waits until the image disappears from the web page. You can use this to avoid delay that might occur for the image to disappear. This interaction returns a Boolean value of true if the image is not found and false if it is found. The Boolean value can be set to a variable and checked in a conditional statement to perform an appropriate action after finding the image. · Wait Until Clicked- Waits until the image is clicked. This interaction returns a Boolean value of true if the image is clicked and false if the image is not clicked. The Boolean value can be set to a variable and checked in a conditional statement to perform an appropriate action after finding the image. · Click And Type- Allows to left click at the required area and provide the input value. Set a default value or pass the value using parameter defined in the Parameter bar. · Left Click- Performs a left click specified at the offset point. · Right Click- Performs a right click at the specified offset point. · Left Double Click- Performs a left double click at the specified offset point. · Right Double Click- Performs a right double click at the specified offset point. · Mouse Over- Moves mouse pointer over the area at the specified offset point. · Drag- Moves the draggable image based upon the mentioned vertical and horizontal coordinates. · Horizontal Scroll- Searches for the image towards either right or left direction based on the speed of the scroll as per the option selected in the Scroll Direction and Scroll Action fields respectively. · Vertical Scroll- Searches for the image in the upward or downward direction based on the speed of the scroll as per the option selected in the Scroll Direction and Scroll Action fields respectively. · Get Text- Extracts text from the selected image. · Type Text- Allows entering the text where the cursor is present on the page. Set a default value or pass the value using parameter defined in the Parameter bar. · Press Keys- Performs press action for the specified key. Apply modifiers like Control, Shift, Alt before the key press as specified in the fields Modifier One and Modifier Two. · Key Down- Performs press of a single key specified on the keyboard. · Key Up- Brings the pressed key back to normal position. It must be performed after the Key Down action to release the pressed key. |
Interaction |
The corresponding interaction set against the selected action. |
Appears if Action selected is Wait Until Exists or Wait Until Disappears. |
|
Timeout (ms) |
The wait time for the plugin until image is found or identified that it does not exists. |
Poll Frequency (ms) |
The frequency of checking the availability of the image and if the system is ready for the next action. |
Appears if Action selected is Click And Type or Type Text. |
|
Input Source |
The input value that must be entered. You must define a parameter in the Parameter bar to use this option. Select the check box beside Input Source and enter the value, if you want to set a default value. |
Appears if Action selected is Type Text. |
|
Delay In Characters (ms) |
Triggers the delay when there is typing lag from the keyboard. |
Appears if Action selected is Drag. |
|
Drag X |
The vertical drag performed on the application window to drag the draggable image. The value must be entered in pixels. |
Drag Y |
The horizontal drag performed on the application window to drag the draggable image. The value must be entered in pixels. |
Appears if Action selected is Horizontal Scroll or Vertical Scroll. |
|
Scroll Amount |
The scroll speed (set in pixels) for each movement while searching for the image in the specified scrollable area. |
Scroll Direction |
The direction of scroll for searching the image. Available options for Horizontal Scroll are Left and Right and for Vertical Scrolls are Up and Down. |
Appears if Action selected is Press Keys, Key Down or Key up. |
|
Key |
The single key set as input from the keyboard. |
Appears if Action selected is Press Keys. |
|
Modifier One |
Select the first modifier to create the key combination. Available options are - Control, Shift, Alt and Win (Windows) keys of the keyboard. |
Modifier Two |
Select the second modifier to create the key combination .Available options are- Control, Shift, Alt and Win (Windows) keys of the keyboard. |
Field Properties |
|
Variable Name |
User defined name of the variable that stores the captured value. This field appears only for some of the selected actions. |
Display Name |
User specified display name of the action configured. |
Variable Type |
Type of the variable defined. This field appears only for some of the selected actions. |
Appears if Action selected is Get Text. This field is applicable only for AssistEdge Engage application. |
|
Is C-View |
If selected, the field configuration captured in Automation Studio is visible in the Engage C-View tab. |
Misc |
|
Focus Required |
Signifies if the Focus Window activity needs to be added before the interaction that gets created in Automation Studio from the multimodal interface. It is typically used if the configurations are done on multiple windows and the intended window needs to be in focus for image automation to work. By default, this field is cleared. |
OCR Properties This section appears only when Action selected is Get Text. This section is applicable only for text extracting functionality. |
|
Modes |
The mode to capture the image for text extraction. Available options are: · Fixed- When the image is captured in this mode, the coordinates of the selected area are stored to extract the text and not the image. · Reference- When the image is captured in this mode, two different areas are captured. The first image captured is stored as a reference or a template, while the second image captured stores the coordinates from where the text is extracted. By default, Fixed mode is set. You can change the mode as per the requirement.
Note:
Once you change the mode, you need to capture the image
again using the |
Engine |
The OCR engine used for text extraction. By default, the in built OCR engine is Tesseract. You can change the value in the Application activity. Refer Text Extractor activity to know more. |
 (
(On This Page Hide
Related Topics