Step-By-Step Guide to Use PDF Template Creator to Extract Tabular Data From the PDF File
Let's see an example of creating a PDF template which is then used to extract tabular data from the PDF file. The example demonstrates tabular data extraction using the Fixed Rectangle, One Corner, Two Corner and Three Corner Area Selection Type.
Using Area Selection Type as Fixed Rectangle
1. In the Canvas Tools panel, click PDF Template Creator.
2. Browse for the required PDF file and click Open. The AssistEdge PDF Viewer along with the selected PDF file appears.
3. In the menu bar of the AssistEdge Pdf Viewer screen of the PDf Template Creator canvas tool, click Template Configuration. Select Create New Template to create a new template. A configuration pane appears on the right side of the AssistEdge PDF Viewer screen.

4. In the Configuration Type group, select Field Configuration to configure the fields in the PDF template for tabular data extraction.
5. In the Selected Area tab, enter ItemNames as the name of the field of the tabular data to be marked.
6. Select the Is Tabular Field check box to indicate marking of tabular data for extraction.
7. In the Area Selection Type list, select Fixed Rectangle.
8. Click Draw Area and mark the tabular data. The area gets highlighted within a box. The values of the X (horizontal) and Y (vertical) axis of the Bottom Left Corner and Top Right Corner groups along with the Page Number field get auto filled as per the area selected.
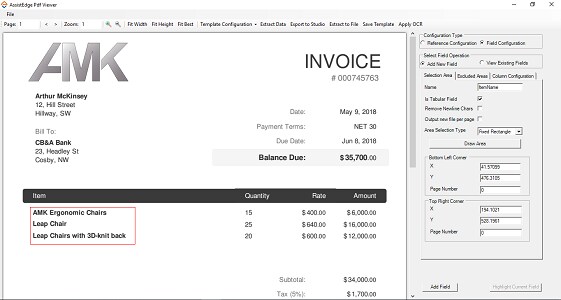
9. Click the Excluded Area tab.
10. Click Add Excluded Area button, and then select the second entry of the tabular data to exclude from extraction. The Left Top X, Left Top Y, Right Top X, and Right Top Y coordinates of the marked area get auto-filled.
11. Click Done.
12. Click Add Field. The marked area is added as a field.
13. Click Save Template. The Save As dialog box appears.
14. Provide the desired file name and click Save.
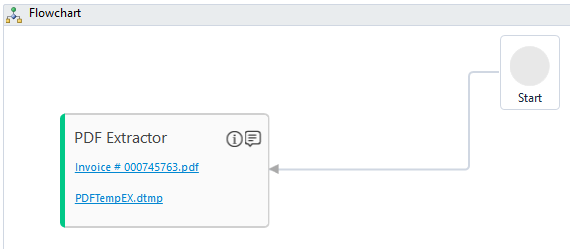
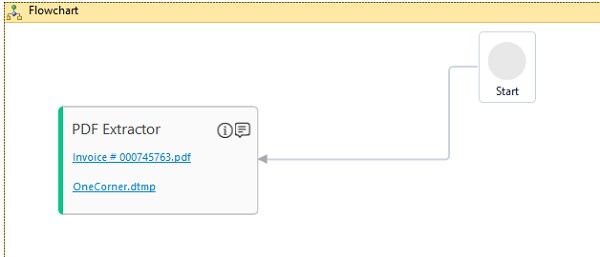
15. Click Export to Studio. This creates a PDF Extractor activity with the saved configurations. The specified PDF file name and the saved PDF template name is displayed in the PDF Extractor activity. If you click the displayed names, you are taken to the file location of respective files.
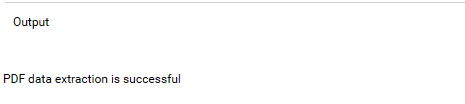
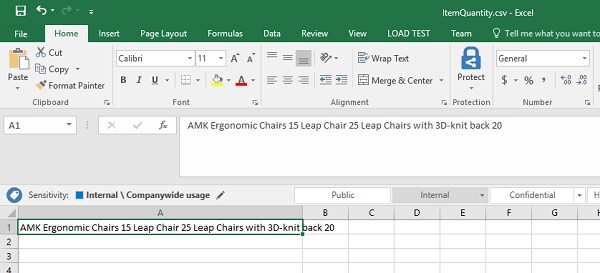
16. Save the process. To view the output in Automation Studio, set up the environment and perform test run. You can assign this process to a robot if you want to execute this process outside Automation Studio. A message for successful data extraction is displayed in the Output console of Automation Studio.
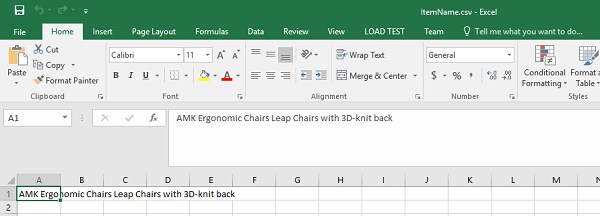
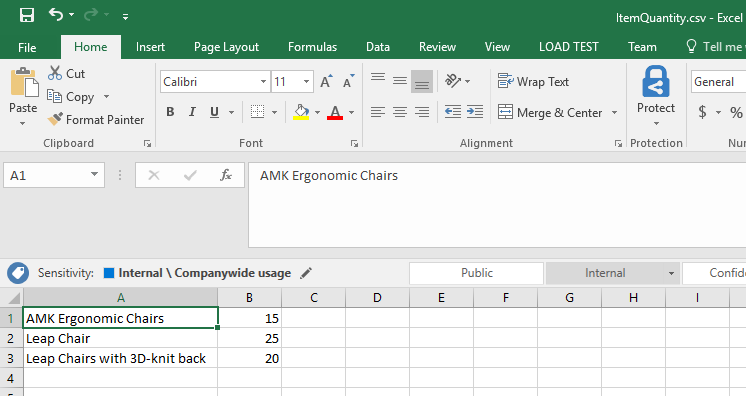
The .CSV file with the extracted data gets created at %localappdata% > EdgeVerve> AutomationStudio folder.
Using Area Selection Type as One Corner
1. In the Canvas Tools panel, click PDF Template Creator.
2. Browse for the required PDF file and click Open. The AssistEdge PDF Viewer along with the selected PDF file appears.
3. In the menu bar of the AssistEdge Pdf Viewer screen of the PDf Template Creator canvas tool, click Template Configuration. Select Create New Template to create a new template. A configuration pane appears on the right side of the AssistEdge PDF Viewer screen.
4. In the Configuration Type group, select Reference Configuration to configure references in the PDF template for tabular data extraction.
5. In the Select Reference Operation group, select the Add New Reference option.
6. In the Search String text box, enter Item to mark this string for adding as a reference and then click Search in document. This highlights the relevant strings with a blue box across the PDF file.
7. In the Search Index text box, enter 0 as the index of the string, and then click Highlight Selected. This keeps the blue box highlight at the specified occurrence of the string.
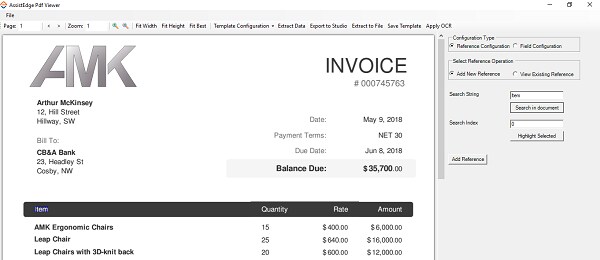
8. Click Add Reference to add the marked string as reference.
9. In the Configuration Type group, select Field Configuration to configure the fields in the PDF template for tabular data extraction.
10. In the Selected Area tab, enter ItemQuantity as the name of the field of the tabular data to be marked.
11. Select the Is Tabular Field check box to indicate marking of tabular data for extraction.
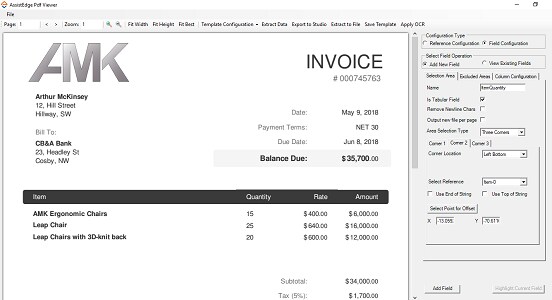
12. In the Area Selection Type list, select One Corner.
13. In the Corner Location list, select Left Top option.
14. Click Draw Area for Height/Width, and then manually draw the height and width of the boundary from the top left corner of the tabular data. The area gets highlighted with a red box. The Width and Height fields are auto-filled.
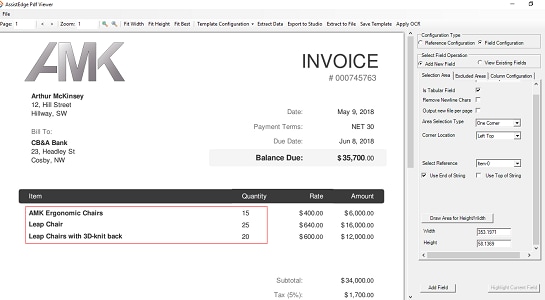
15. Click Add Field to confirm and add the field.
16. Click Save Template. The Save As dialog box appears.
17. Provide the desired file name and click Save.
18. Click Export to Studio. This creates a PDF Extractor activity with the saved configurations. The specified PDF file name and the saved PDF template name is displayed in the PDF Extractor activity. If you click the displayed names, you are taken to the file location of respective files.
19. Save the process. To view the output in Automation Studio, set up the environment and perform test run. You can assign this process to a robot if you want to execute this process outside Automation Studio. A message for successful data extraction is displayed in the Output console of Automation Studio.
The .CSV file with the extracted data gets created at %localappdata% > EdgeVerve> AutomationStudio folder.
Using Area Selection Type as Two Corner
1. In the Canvas Tools panel, click PDF Template Creator.
2. Browse for the required PDF file and click Open. The AssistEdge PDF Viewer along with the selected PDF file appears.
3. In the menu bar of the AssistEdge Pdf Viewer screen of the PDf Template Creator canvas tool, click Template Configuration. Select Create New Template to create a new template. A configuration pane appears on the right side of the AssistEdge PDF Viewer screen.
4. In the Configuration Type group, select Reference Configuration to configure references in the PDF template for tabular data extraction.
5. In the Select Reference Operation group, select the Add New Reference option.
6. In the Search String text box, enter Item to mark this string for adding as a reference and then click Search in document. This highlights the relevant strings with a blue box across the PDF file.
7. In the Search Index text box, enter 0 as the index of the string, and then click Highlight Selected. This keeps the blue box highlight at the specified occurrence of the string.
8. Click Add Reference to add the marked string as reference.
9. In the Configuration Type group, select Field Configuration to configure the fields in the PDF template for tabular data extraction.
10. In the Selected Area tab, enter ItemQuantity as the name of the field of the tabular data to be marked.
11. Select the Is Tabular Field check box to indicate marking of tabular data for extraction.
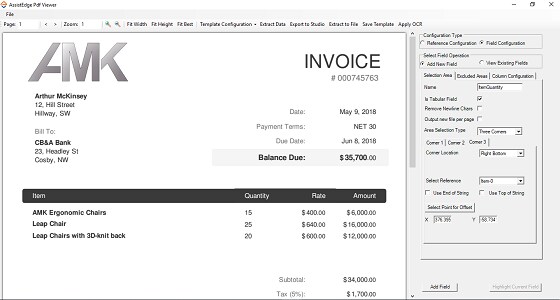
12. In the Area Selection Type list, select Three Corner.
13. In the Corner 1 tab, select Left Top option to define the location of field boundary of the first corner.
14. In the Select Reference list, select Item-0 reference string defined above.
15. Click Select Point for Offset and then choose a point from where the boundary of the first corner can be drawn. This auto-fills the values of the offset of the selected corner.
16. In the Corner 2 tab, select Left Bottom option to define the location of field boundary of the second corner.
17. In the Corner Location list, select Left Top option.
18. Click Draw Area for Height/Width, and then manually draw the height and width of the boundary from the top left corner of the tabular data. The area gets highlighted with a red box. The Width and Height fields are auto-filled.

19. Click the Column Configuration tab.
20. Click Add Column to manually mark the columns. Draw vertical lines between the tabular fields that you want to mark for column configuration.
21. Click Done to save the defined column configuration.
22. Click Add Field to confirm and add the field.
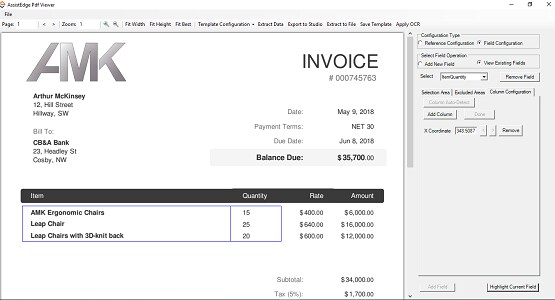
23. In the Select Field Operation group, select View Existing Fields option to view and verify the area marked for extraction.
24. In the Select drop-down list, select ItemQuantity.
25. Click Highlight Current Field button. This highlights the marked or updated area for data extraction.
26. Click Save Template. The Save As dialog box appears.
27. Provide the desired file name and click Save.
28. Click Export to Studio. This creates a PDF Extractor activity with the saved configurations. The specified PDF file name and the saved PDF template name is displayed in the PDF Extractor activity. If you click the displayed names, you are taken to the file location of respective files.
29. Save the process.
To view the output in Automation Studio, set up the environment and perform test run. You can assign this process to a robot if you want to execute this process outside Automation Studio.
A message for successful data extraction is displayed in the Output console of Automation Studio.
The .CSV file with the extracted data gets created at %localappdata% > EdgeVerve> AutomationStudio folder.
Using Area Selection Type as Three Corner
1. In the Canvas Tools panel, click PDF Template Creator.
2. Browse for the required PDF file and click Open. The AssistEdge PDF Viewer along with the selected PDF file appears.
3. In the menu bar of the AssistEdge Pdf Viewer screen of the PDf Template Creator canvas tool, click Template Configuration. Select Create New Template to create a new template. A configuration pane appears on the right side of the AssistEdge PDF Viewer screen.
4. In the Configuration Type group, select Reference Configuration to configure references in the PDF template for tabular data extraction.
5. In the Select Reference Operation group, select the Add New Reference option.
6. In the Search String text box, enter Item to mark this string for adding as a reference and then click Search in document. This highlights the relevant strings with a blue box across the PDF file.
7. In the Search Index text box, enter 0 as the index of the string, and then click Highlight Selected. This keeps the blue box highlight at the specified occurrence of the string.
8. Click Add Reference to add the marked string as reference.
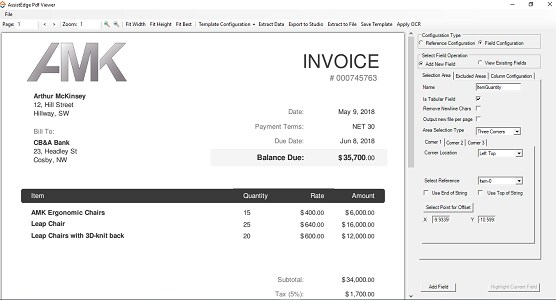
9. In the Configuration Type group, select Field Configuration to configure the fields in the PDF template for tabular data extraction.
10. In the Selected Area tab, enter ItemQuantity as the name of the field of the tabular data to be marked.
11. Select the Is Tabular Field check box to indicate marking of tabular data for extraction.
12. In the Area Selection Type list, select Three Corner.
13. In the Corner 1 tab, select Left Top option to define the location of field boundary of the first corner.
14. In the Select Reference list, select Item-0 reference string defined above..
15. Click Select Point for Offset and then choose a point at the top left area around the required table from where the boundary of the first corner can be drawn. This auto-fills the values of the offset of the selected corner.
16. In the Corner 2 tab, select Left Bottom option to define the location of field boundary of the first corner.
17. Click Select Point for Offset and then choose a point at the bottom left area around the required table from where the boundary of the second corner can be drawn. This auto-fills the values of the offset of the selected corner.
18. In the Corner 3 tab, select Right Bottom option to define the location of field boundary of the first corner.
19. Click Select Point for Offset and then choose a point at the bottom right area around the required table from where the boundary of the third corner can be drawn. This auto-fills the values of the offset of the selected corner.
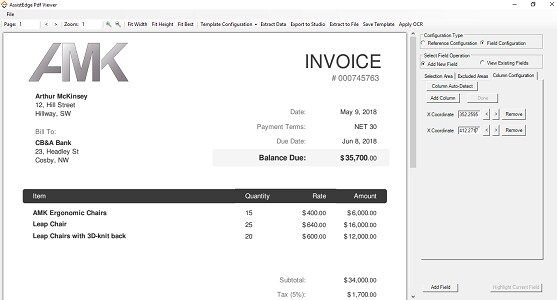
20. Click the Column Configuration tab.
21. Click Add Column to manually mark the columns. Draw vertical lines between the tabular fields that you want to mark for column configuration.

22. Click Done to save the defined column configuration.
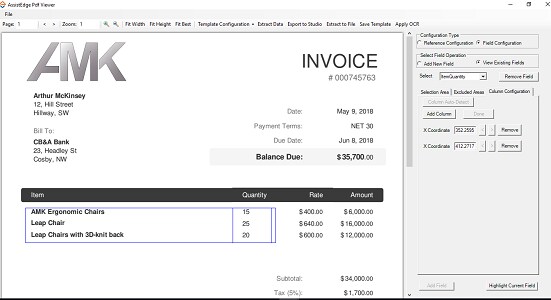
23. Click Add Field to confirm and add the field.
24. In the Select Field Operation group, select View Existing Fields option to view and verify the area marked for extraction.
25. In the Select drop-down list, select ItemQuantity.
26. Click Highlight Current Field button. This highlights the marked or updated area for data extraction.
27. Click Save Template. The Save As dialog box appears.
28. Provide the desired file name and click Save.
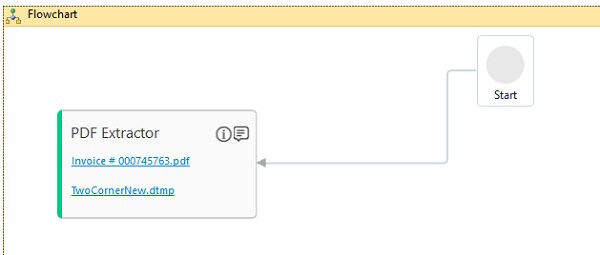
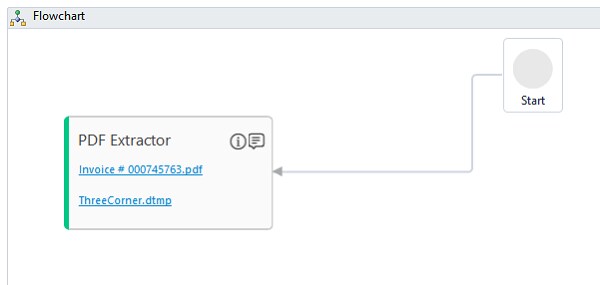
29. Click Export to Studio. This creates a PDF Extractor activity with the saved configurations. The specified PDF file name and the saved PDF template name is displayed in the PDF Extractor activity. If you click the displayed names, you are taken to the file location of respective files.
30. Save the process.
To view the output in Automation Studio, set up the environment and perform test run. You can assign this process to a robot if you want to execute this process outside Automation Studio.
A message for successful data extraction is displayed in the Output console of Automation Studio.
The .CSV file with the extracted data gets created at %localappdata% > EdgeVerve> AutomationStudio folder.
On This Page Hide
Related Topics