Create Group
The Create Group feature enables you to automatically create Microsoft 365 groups in Azure Active Directory (ADD), Outlook, and Calendar applications of the same licensed account.
Using Create Group Feature
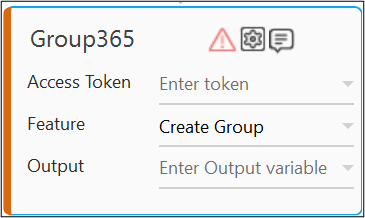
- From the Feature dropdown list, select Create Group.
- Click the
 (Setting) icon to configure the input parameters such as defining the group type, membership type, owner of the group and so on. The Input Configuration screen appears.
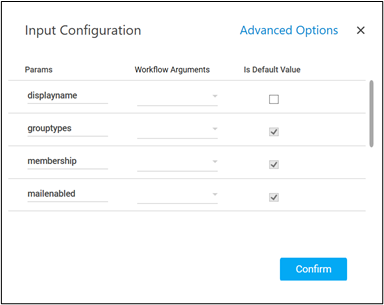
- Define all the input parameters as In arguments and output parameters as Out arguments in the Argument bar to make it available for the selection.
- You can select the Is Default Value checkbox to set the selected input parameter as the default value.
- Mandatory Options:
- Corresponding to the displayname parameter, select the argument holding the group name. The required group gets created with the specified name in the Azure portal. You can assign any group name to the parameter as per your business requirement.
- Corresponding to the grouptypes parameter, select the type of group you want to create. Available options are:
- Security- are used for granting access to resources such as SharePoint sites.
- Office365- are used for collaboration between users, both inside and outside your company. They include collaboration services such as SharePoint and Planner.
- Corresponding to the membership dropdown list, select the unified option.
Unified membership signifies that the properties of the group such as adding or removing a group member must be done at the time of group creation. It does not allow to update the properties of the group after the group gets created.
NOTE:
Currently dynamic membership is not supported - Corresponding to the mailenabled dropdown list, select true if you want to enable shared Exchange and Outlook mailboxes for the group members; else, select false.
- Corresponding to the mailnickname dropdown list, select the parameter holding the username with which you want to create the email Id for the group. You must pre-define the parameter as an In argument or variable to make it available for selection.
The domain name of the Azure portal where you are creating the required group gets automatically added to the username forming the complete email Id.
NOTE:
Ensure to enter a unique username each time you want to create a new group. - Corresponding to the securityenabled dropdown list, select true if you want to enable group security for access control and to manage access to an application; else, select false. It is recommended to set securityenabled option to true for a secured access to the spplication.
- Corresponding to the OwnersName dropdown list, do of the following:
-
If the grouptypes selected is Office365, select the parameter holding the group owner email Id. You can provide coma separated values to enter multiple group member names.
-
If the grouptypes selected is Security and in the OAuth activity the Oauth Flow Types selected is Authorization Code, you can provide coma separated values to enter multiple group member names. Manually enter None if you do not want to create any other group owner apart from the user domain account used to create the group.
-
If the grouptypes selected is Security and in the Oauth activity the Oauth Flow Types selected is other than Authorization Code, you can provide coma separated values to enter multiple group member names. However, provide the email Id of the user domain account used to create the group if you do not want to create any other user the group owner.
A group owner can add or remove members and manage the group settings such as change the group name.
-
- Advanced Options: These are optional parameters that lets you define additional input options.

- Click Advanced Options and select description from the newly created row.
- From the description dropdown list, select the parameter holding a description of the group that you want to create.
- Click Advanced Options and select MembersName from the newly created row.
- From the MembersName dropdown list, select the parameter holding group member email Id. You can provide coma separated values to enter multiple group member names.
- You can click DELETE if you want to remove the specified Advanced Options input parameter.
- Mandatory Options:
- Click Confirm to save the specified configurations.
- From the Output dropdown list, select the argument to map the status of the operation performed. The argument should be of Out Direction.
The Create Group feature is configured.
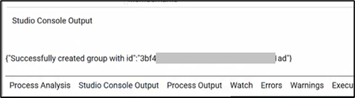
The output received is in the JSON array format displaying Object Id of the group. You can use the JSON activity to utilize the Object Id as per your need.
Following is a sample output received: