Step-By-Step Guide to Use Excel 365 Activity to Replicate Existing Excel Table and Append Data
Let’s see an example to replicate an existing table available within an Excel file saved on the local and then append data into it. Here we are appending the same data that is available in the Excel file to easily identify the rows from where the data gets appended.
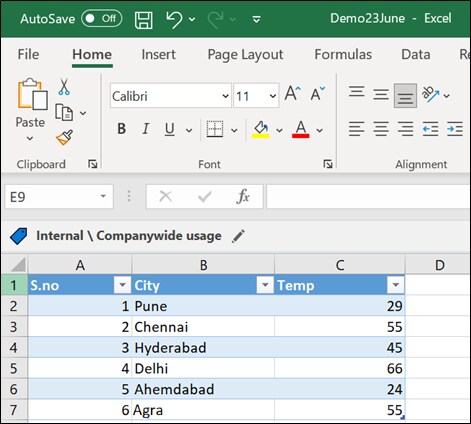
Below is the sample Excel file saved on the local machine. It contains serial number, name of the city and respective city temperature:
Prerequisites:
- Register the required Excel 365 application in Azure Active Directory.
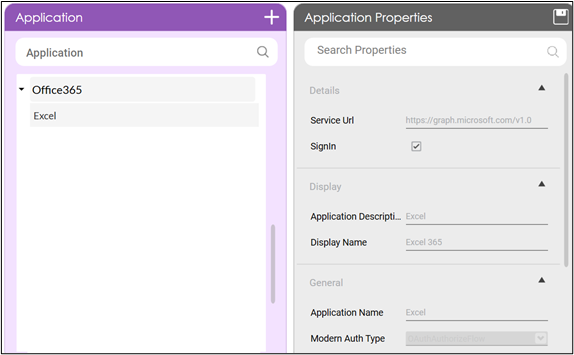
- Configure the Office 365 application in Automation Studio. You must add the Microsoft Service URL with an option to create a sign-in process. This lets you establish a connection between Office 365 application and Automation Studio to automatically sign in and perform the automation. Here we have configured Office 365 with the name, Excel.
- Access token to authorize and login to Excel 365 application. The access token can be fetched using the Oauth activity. Here, we have fetched the access token into an Out argument, Token.
To automate the process of replicating an existing table and appending data to it:
- Continue with the same automation process workflow where you have used Oauth activity to fetch the access token.
Or
Create a new process and use the Reuse Process activity to use the existing Oauth process workflow. Ensure that the Oauth process is published if you want to reuse the workflow.
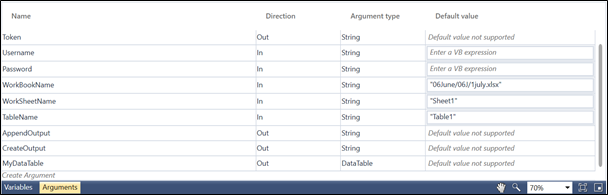
Here we have continued with the Oauth process workflow itself. - Create the following arguments:
- WorkbookName- an In argument to pass the Excel 365 file name along with its path where you want to create the table.
- WorkSheetName- an In argument to pass the worksheet name where you want to create the table.
- TableName- an In argument to pass the table name that you want to create in the specified Excel 365 file.
- CreateOutput- an out argument to store the result of the Create Table feature.
- AppendOutput- an Out argument to store the result of the Append Range feature.
|
NOTE: |
In the Oauth activity, ensure to set the Scope to User.Read Files.ReadWrite.All permission to enable Automation Studio with the required permission to use Excel 365 application. |
- Drag the Import DataTable activity and drop below the Oauth Activity. This lets you save the values in the data table format as Automation Studio supports passing the values only in the data table format.
- Provide the Excel file path to import the required table.
- Select the sheet to import the required table.
- Enter a name of the Data Table to hold the imported table values. Here, we have entered MyDataTable.
- Indicate if the Excel file has a header.
- Using the
 (Settings) icon, configure the Readers and Header.
For more information, see Import DataTable.
- From the Canvas Tools panel, add Application activity to the Flowchart designer.
- In the Application Type list, select Office365.
- In the Select an Application list, select the configured Office 365 application, Excel.
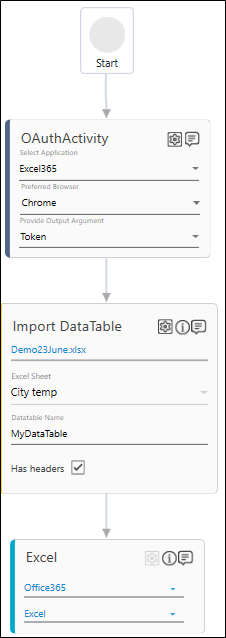
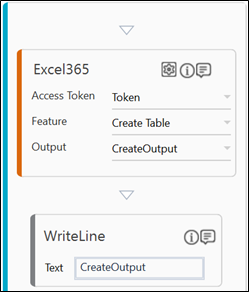
- Drag the Excel 365 activity and drop inside the Office365 Application block.
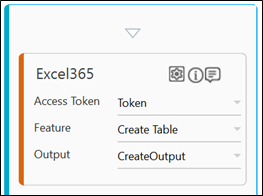
- In the Access Token list, select Token argument.
- In the Feature list, select Create Table.
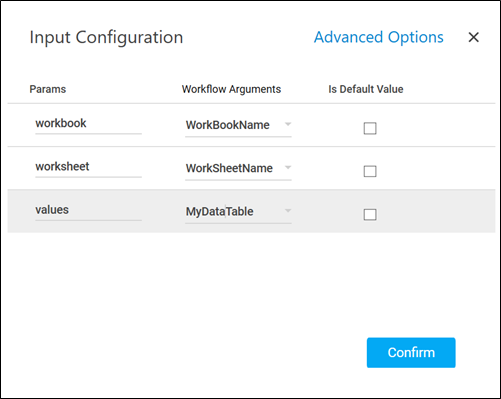
- Click the (Setting) icon to configure the input configuration. The Input Configuration screen appears.
- Define the mandatory options:
- Corresponding to the workbook parameter, select WorkBookName argument in the Workflow Arguments list to pass the required Excel file.
- Corresponding to the worksheet parameter, select WorksheetName argument in the Workflow Arguments list to pass the required sheet name of the specified Excel file.
- Corresponding to the name parameter, select TableName argument in the Workflow Arguments list to pass the required table.
- In the address parameter, enter a1:c6 in the Workflow Arguments list and select the corresponding checkbox to make it as the default value. This indicates the column and row range for creating the table in the specified Excel file. You can provide the range as per your requirement. Here, we want to create a table with 3 columns ranging from A to C with 6 rows having first row as the header.
- Corresponding to the hasHeaders parameter, select true argument in the Workflow Arguments list to indicate that the specified Excel file has headers.
- Define the advanced options:
- Click Advanced Options and select values from the newly created row.
- In the values list, select MyDataTable argument.
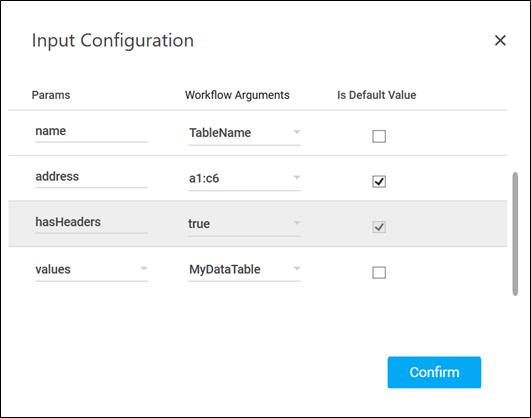
- Click Confirm.
- Click the
- In the Output list, select CreateOutput to store the result of the Create Table operation.
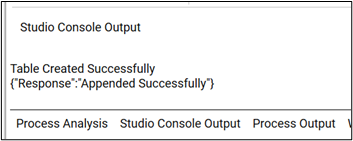
To view the Create Table result in Automation Studio, you can add WriteLine activity. This prints the result in the Studio Console Output tab after you test run the process.
- Drag the Excel 365 activity and drop below the Create Table activity block.
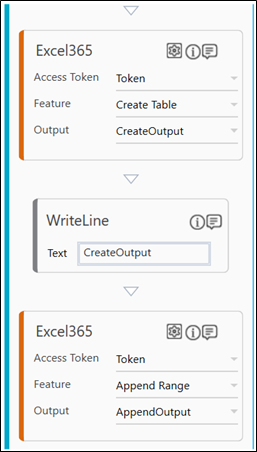
- In the Access Token list, select Token argument.
- In the Feature list, select Append Range.
- Click the (Setting) icon to configure the input configuration. The Input Configuration screen appears.
- Define the mandatory options:
- Corresponding to the workbook parameter, select WorkBookName argument in the Workflow Arguments list to pass the required Excel file.
- Corresponding to the worksheet parameter, select WorksheetName argument in the Workflow Arguments list to pass the required sheet name of the specified Excel file.
- Corresponding to the values parameter, select MyDataTable argument in the Workflow Arguments list to pass the values stored in the imported Data Table that must be written in the created table in the Excel 365 file.
By configuring the address parameter using the Advanced Options, you can define a range to append the data at a required location. Here, we wanted to append data after the last used row; hence the Advanced Options is not used.
- Click Confirm.
- Click the
- In the Output list, select AppendOutput to store the result of the Append Range operation.
To view the Append Range result in Automation Studio, you can add WriteLine activity. It prints the result in the Studio Console Output tab after you test run the process.
You can assign this process to a robot if you want to execute this process outside Automation Studio. - Save the process.
- Setup the environment and enter the required login details.
- Perform test run.
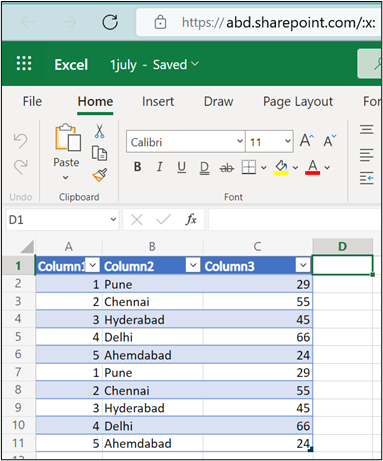
Below is the sample screen shot of the Studio Output Console and the Excel 365 file after the Create Table and Append Range operations are successfully done: