Automation Button Plugin
This page provide a better understanding of the Button Plugin.
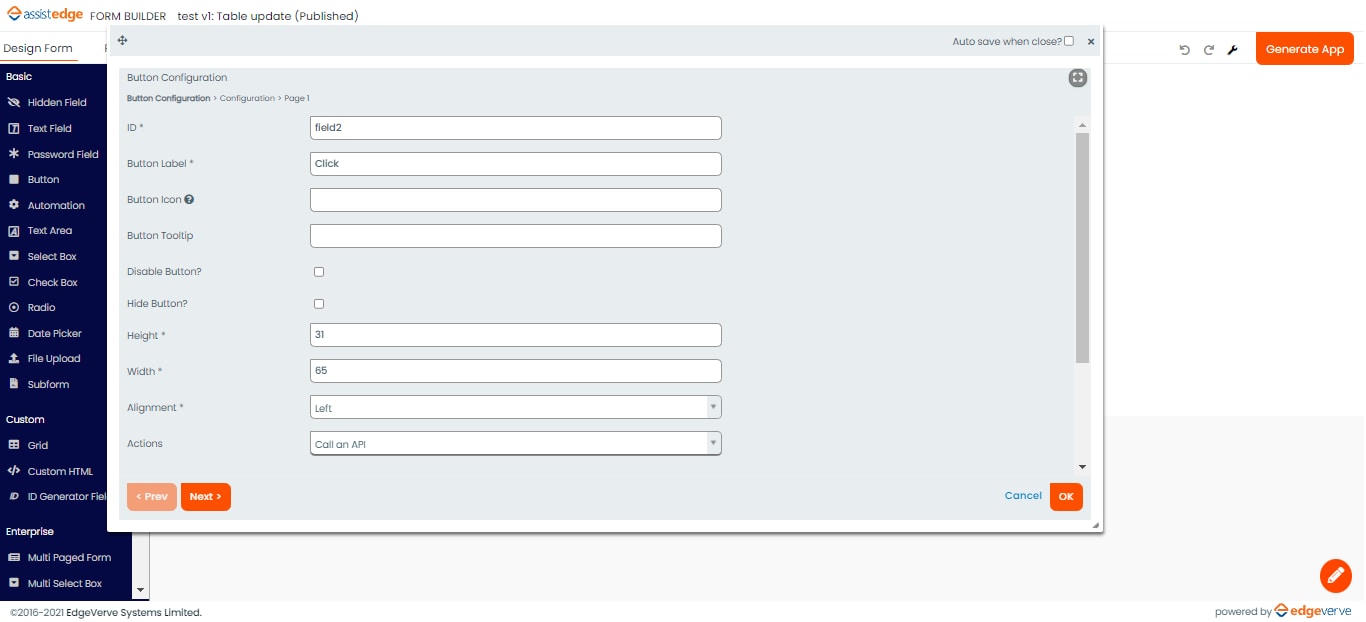
This is the initial configuration screen of Button Plugin.
- ID - Here you need to give its proper id, it should be in snake case.
- Button Label - Enter a label of the button which you want on the button.
- Button Icon - You have to give only value of class for Icon, like - fas fa-bullseye
- Button Tooltip - Provide a text for the button which you want as a tooltip.
- Disable Button? - It's a checkbox for disabling the button.
- Hide Button? - It's a check box for hiding the button.
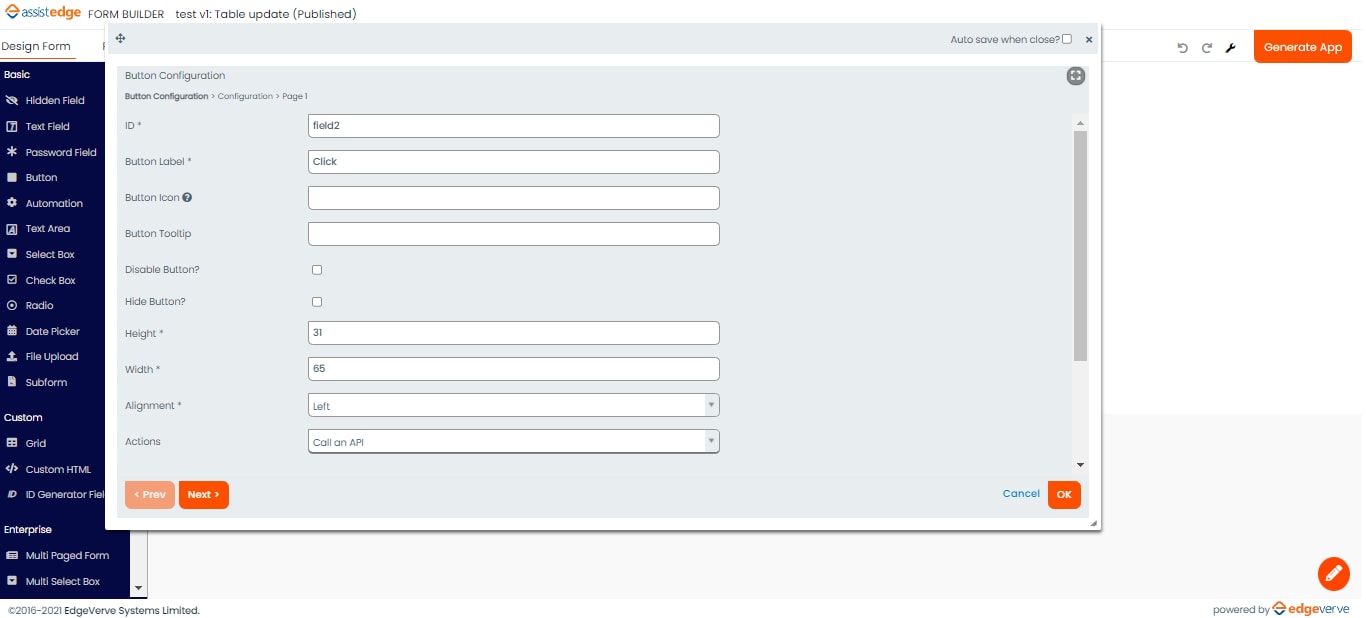
- Height - It is having by default value 31 for matching the standard size of Joget button. You can change it according to your requirements.
- Width - It is having by default value 65 for matching the standard size of Joget button. You can change it according to your requirements.
- Alignment - You can select the alignment for Button (Right, Left, Center)
- Actions - You can select the action which you want to perform on clicking of the Button
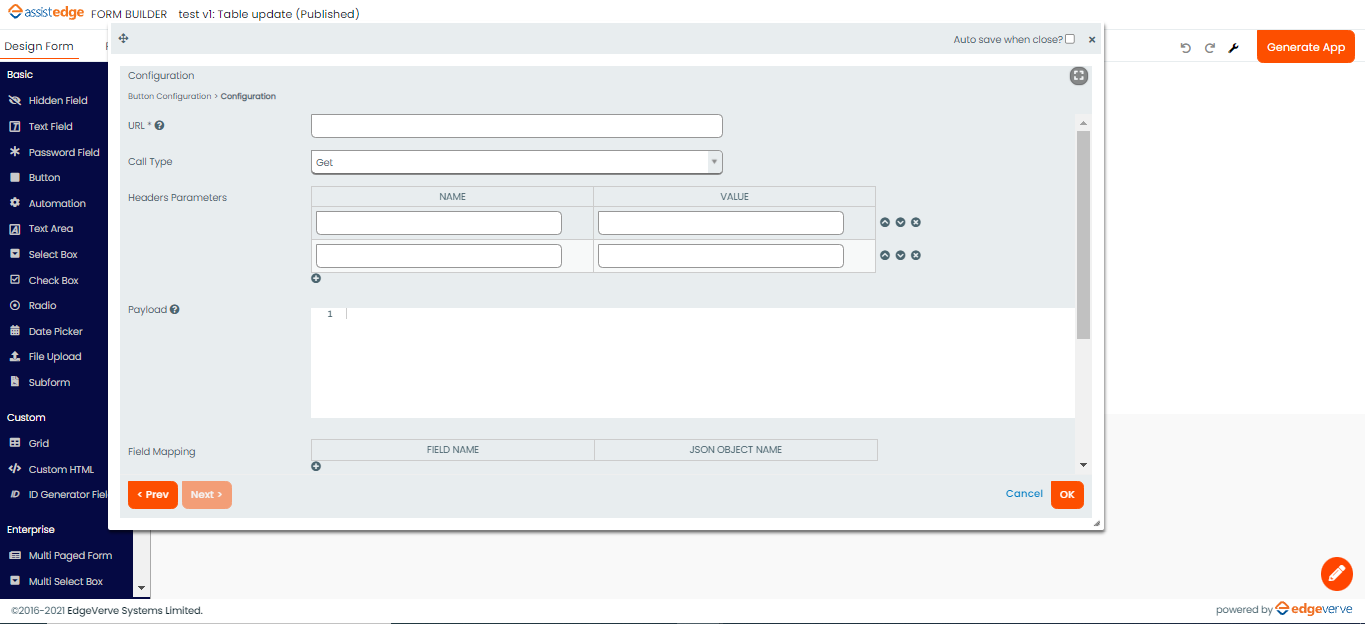
API Configuration(for Get type)
- URL - Give URL for API call
- Call Type - Select call type (Get, Post)
- Header Parameters - You can give header parameters in this grid
- Field Mapping - You can map your form field with response from here
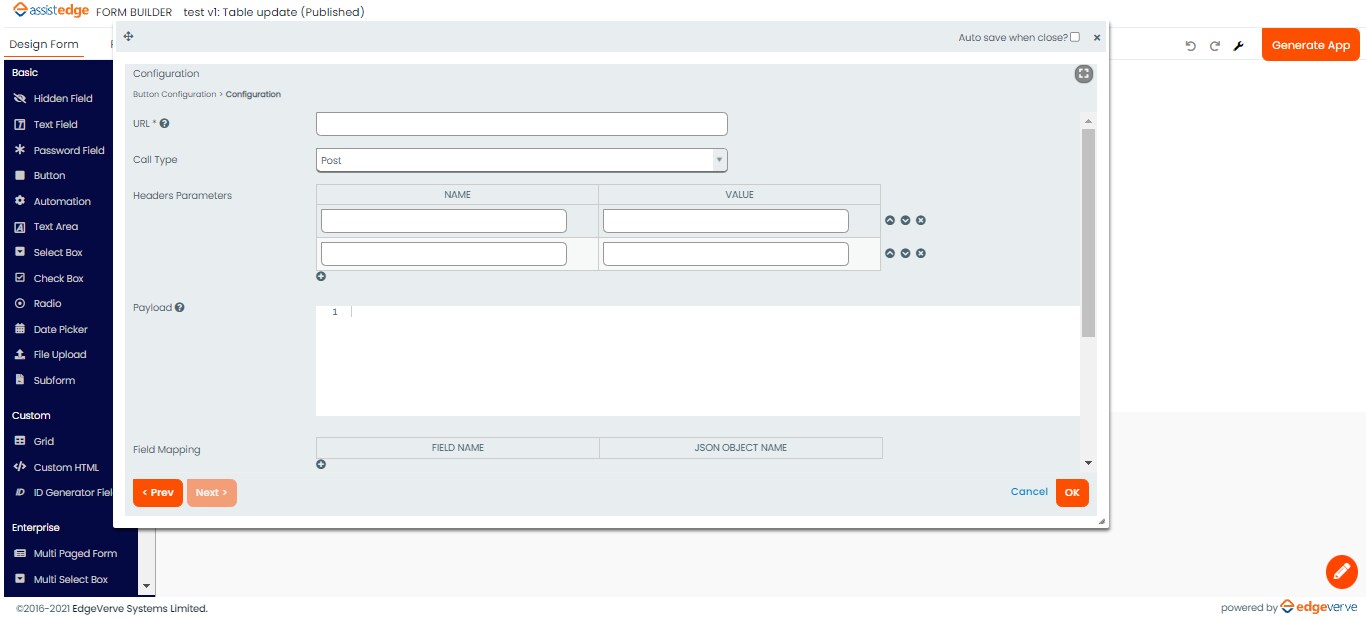
API Configuration(for post type)
- URL - Give URL for API call
- Header Parameters - You can give header parameters in this grid
- Payload - Provide your payload for API here in {"name":"<formFieldId>"} format. Here formFieldId will be your form element’s id from which you want to pass the value
- Field Mapping - You can map your form field with response from here
Pop-up Configuration
URL - Provide the URL for Pop-up.
URL Configuration
URL - Provide the URL for redirection.