Step-By-Step Guide to Use Guided Scripting to Automate Loan Promotion Process
Let’s create an example to configure a step by step guidance of a Loan Promotion process, consisting of options, Home Loan and Vehicle Loan. In this example we are going to create only the first level options of guided help for the configured options.
To configure Guided Scripting workflow:
- Create a process.
- In the Parameter bar, create two Out arguments, Options and Actions. This stores the selected option and populates the action as per the configuration done.
- Add the Guided Scripting activity to configure the options that can be performed in the Loan Promotion process. We are configuring Home Loan and Vehicle Loan options.
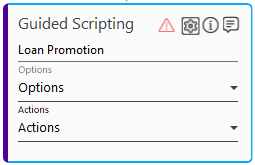
- In the Title field, enter Loan Promotion.
- Click the
 (Settings) icon. The Configuration dialog box opens.
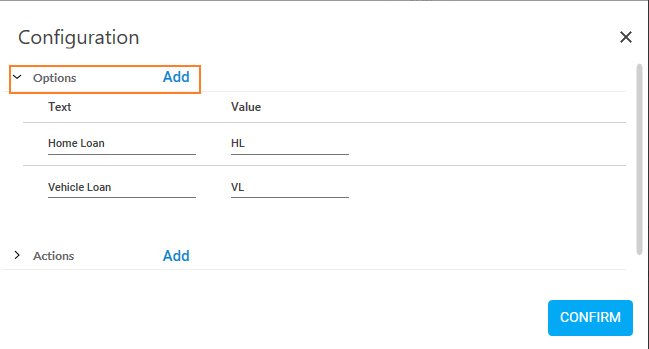
- Expand Options and then click Add to configure the different options that needs to be performed for a Loan Promotion process.
- In the Text field, enter Home Loan. This text reflects in the Engage application.
- In the Value field, enter HL. This text is used for designing the navigation.
- Click Add and repeat steps a and b for configuring Vehicle Loan options. All the values of the corresponding options must be unique as shown in the above screen shot.
- Expand Actions, and then click Add to configure the next step to be performed after selecting particular options. By default, Next is available. In this example, we are going ahead with the default Actions only.
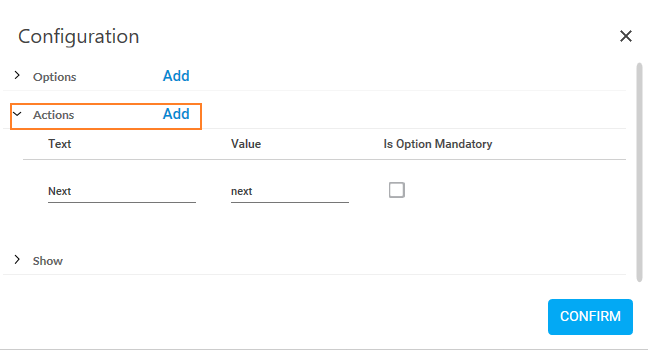
- Click CONFIRM to save the configurations.
- Add another Guided Scripting activity to configure the first level option for the Home Loan operation. We are configuring, SSN, Driving License and Passport Number options to select the document required for identity proof for the home loan.
- In the Title field, enter Loan Promotion.
- In the Options list, select Option argument created in the Parameter bar.
- In the Actions list, select Action argument created in the Parameter bar.
- Click the (Settings) icon. The Configuration dialog box opens.
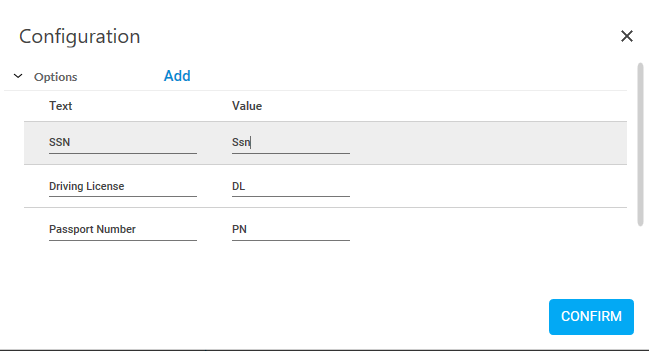
- Expand Options, and then click Add to configure the different options that needs to be performed for a Home Loan process.
- In the Text field, enter SSN. This text reflects in the Engage application.
- In the Value field, enter Ssn. This text is used for designing the navigation.
- Click Add and repeat steps a and b for configuring Driving License and Passport Number options. All the values of the corresponding options must be unique as shown in the above screen shot.
- Expand Actions, and then click Add to configure the next step to be performed after selecting a particular option. By default, Next is available. In this example, we are going ahead with the default Actions only.
- Click CONFIRM to save the configurations.
- Add one more Guided Scripting activity to configure the first level option for the Vehicle Loan operation. We are configuring, Loan Amount <= 50,000 $ and Loan Amount > 50,000 $ options to go to next step depending on the vehicle loan amount.
- In the Title field, enter Loan Promotion.
- In the Options list, select Option argument created in the Parameter bar.
- In the Actions list, select Action argument created in the Parameter bar.
- Click the (Settings) icon. The Configuration dialog box opens.
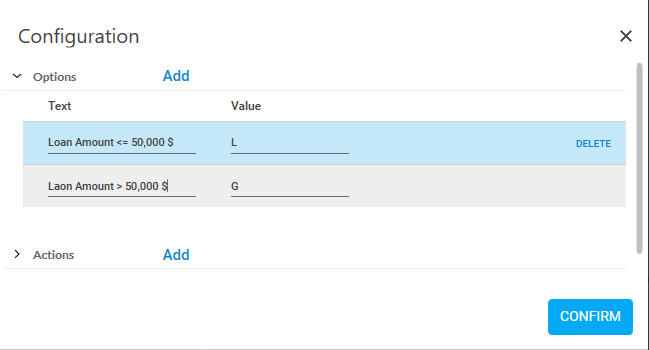
- Expand Options, and then click Add to configure the different options that needs to be performed for a Home Loan process.
- In the Text field, enter Loan Amount <= 50,000 $. This text reflects in the Engage application.
- In the Value field, enter L. This text is used for designing the navigation.
- Click Add, and repeat steps a and b for configuring Loan Amount > 50,000 $ option. All the values of the corresponding options must be unique as shown in the above screen shot.
- Expand Actions, and then click Add to configure the next step to be performed after selecting a particular option. By default, Next is available. In this example, we are going ahead with the default Actions only.
- Click CONFIRM to save the configurations.
- In the Options list, select Options argument created in the Parameter bar.
- In the Actions list, select Actions argument created in the Parameter bar.
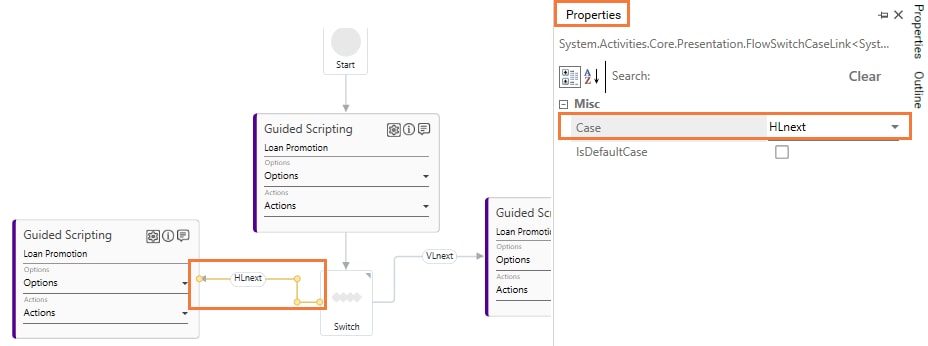
- Add the Switch on Text activity connecting all three Guided Scripting activities to define the navigation.

- In the Properties grid of the Switch on Text activity, define the logic of navigation as Options+Actions in the Expression field.
- In the Properties grid of both the branches of the Switch on Text activity, define the logic, HLnext and VLnext for Home Loan and Vehicle Loan respectively, in the Case field. This lets you navigate to the required guidance based on the Options and Actions selected.
To view the output in Automation Studio, save the process, setup environment and perform test run. You can publish and deploy the process to see the workflow in Engage application. Below are the different screens that appear based on the option and action selected:

If we select Home Loan and click Next, the Guidance Scripting takes us to the screen to choose the identity proof, as per the configuration.
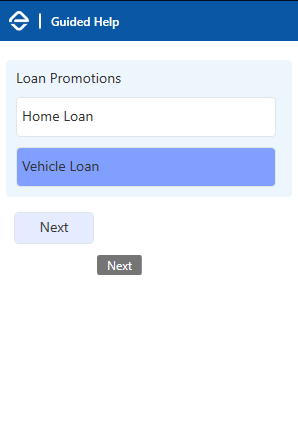
If we select Vehicle Loan and click Next, the Guidance Scripting takes us to the screen to choose the loan amount range, as per the configuration.