ROPC
Resource Owner Password Credentials (ROPC) Auth type flow allows an application to sign in the user by directly handling the password.
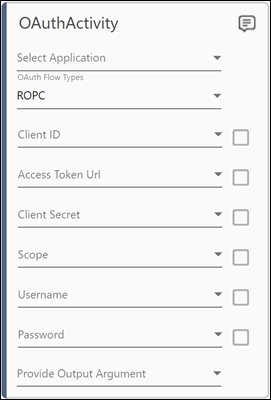
To create ROPC Flow type in OAuthActivity
- Make sure the prerequisites for using OAuth activities are met.
- In the OAuth Flow Types list, select ROPC as the OAuth Flow types.
- In the Client ID field, specify the Client ID of the application. Additionally, select the checkbox if it is a default value.
- In the Access Token URL field, specify the access token URL. Additionally, select the checkbox if it is a default value.
- In the Client Secret field, specify the client secret generated during the Application Registration. Additionally, select the checkbox if it is a default value.
- In the Scope field, specify the scope of the OAuth activity. For example, User.Read. Additionally, select the checkbox if it is a default value.
NOTE:
In case multiple scopes are provided, separate them using a space.
- In the Username field, specify the user’s email using which authentication will be performed. Additionally, select the checkbox if it is a default value.
- In the Password field, specify the user’s password using which authentication will be performed. Additionally, select the checkbox if it is a default value.
- In the Provide Output Argument field, select the output argument. The output argument should have Direction as Out. It stores the access token value returned by the OAuth activity on successful authentication.
- Save the process.
- Test run the process to receive the Access Token.
NOTE:
- ROPC OAuth flow cannot be used for personal account. Also, for the work account, where MFA is enabled the ROPC Flow will not work.
- As the user should give consent to use the application, you should ensure that using an interactive login window, the consent is provided. If the consent is not provided, user will get error as - {"error":"invalid_grant","error_description":"AADSTS65001: The user or administrator has not consented to use the application with ID … }
Step-By-Step Guide to use ROPC Flow type in OAuth Activity
Let’s create an example to fetch token using the ROPC Flow type in OAuth Activity.
- Make sure the prerequisites for using OAuth activities are met.
- In the Canvas Tools pane, click Auth Types to expand the tool and view the associated activities.
- Drag the OAuth activity and drop the activity on the Canvas.
- In the OAuth Flow Types list, select ROPC as OAuth Flow type.
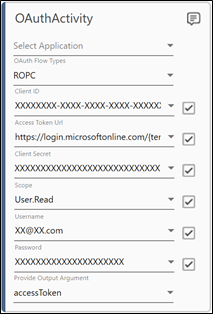
- In the Client ID field, specify the Client ID. Additionally, select the checkbox if it is a default value. Sample Format: XXXXXXXX-XXXX-XXXX-XXXX-XXXXXXXXXXXX. For more information, see Prerequisites.
- In the Access Token URL field, specify the access token URL. Additionally, select the checkbox if it is a default value. For example: https://login.microsoftonline.com/{tenant-id}/oauth2/v2.0/token.
- In the Client Secret field, specify the client secret generated during the registration of the application. Additionally, select the checkbox if it is a default value.
- In the Scope field, specify the scope of the OAuth activity. For example, User.Read. Additionally, select the checkbox if it is a default value.
- In the Username field, specify the user’s email using which authentication will be performed. Additionally, select the checkbox if it is a default value.
- In the Password field, specify the user’s password using which authentication will be performed. Additionally, select the checkbox if it is a default value.
- In the Parameter bar, create an Out argument as accessToken to store the extracted token returned from the OAuth activity.

- In Provide Output Argument list of the OAuth activity, select the accessToken argument.
- Drag and Drop the WriteLine activity on to the Flowchart designer on the Canvas. In the Text field, enter the text to be written in the Output panel. For Example – accessToken.

- Test Run the process.
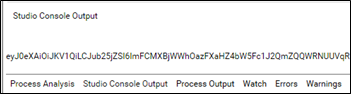
- Once the test run is successful, the accessToken value gets printed in the Studio Console Output.