Migration Process – With Migration Workbench - SQL Server
This section covers the steps for migrating the SQL database from existing AssistEdge RPA version to AssistEdge RPA 19.0.
|
NOTE: |
While migrating from 18.2 Database, the version displayed on UI is 18.1. |
Pre-Migration Steps
|
Caution: |
Database migration is done on the existing AssistEdge database. If you wish to preserve existing AssistEdge setup, backup and restore the database with different name and perform database migration on the restored database. |
Ensure that the below mentioned information is available with you:
- You can connect to the SQL database server where AE RPA is deployed.
- You have sysadmin role on database. For more details on role assignment and credentials, contact your database administrator.
- Logged in user should have db_owner role for existing database.
- The database backup is taken. Contact your database administrator for more details on creating backup of the database.
- Take backup of data and restore to a new DB copy, as the admin of previous setup needs to be running for TxnStore migration. Database migration performs an in-place upgrade of DB schema/tables. In absence of database backup, it is not be possible to perform rollback operation.
|
Note: |
|
|
Caution: |
|
Migration Steps
To start database migration, you need to access the folder on your system where RPA_19.0 migration build is placed, <<AssistEdge Build Folder>>\AssistEdgeAutomation\migration\Workbench.
- Run MigrationWorkbench.exe.
- Click the Pre-Requisite Checklist link available in the Database Migration panel, as shown in the image below. The checklist is displayed.
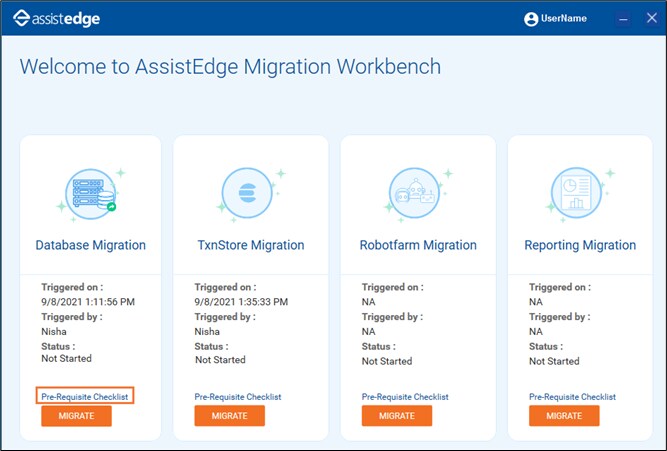
- Ensure that the prerequisites are verified as per the checklist.

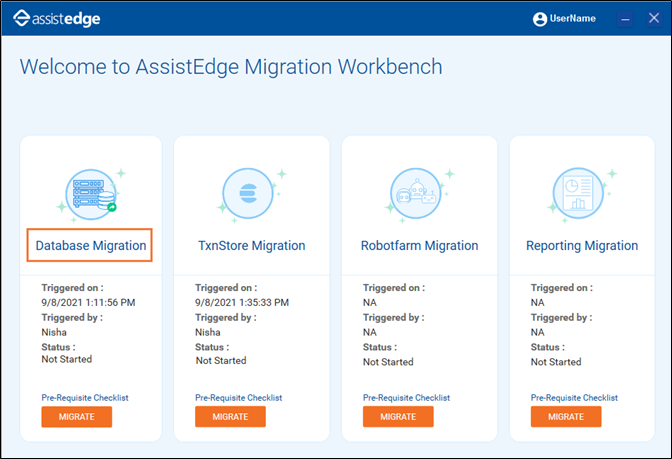
- After verifying the checklist, click Migrate in the Database Migration pane. The Database Migration window appears.
- In the Database Providers field, select SQL.
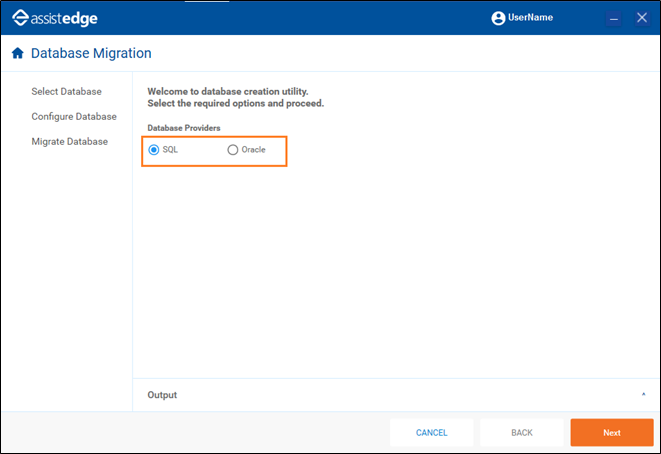
- Click Next. The Database Migration window appears.

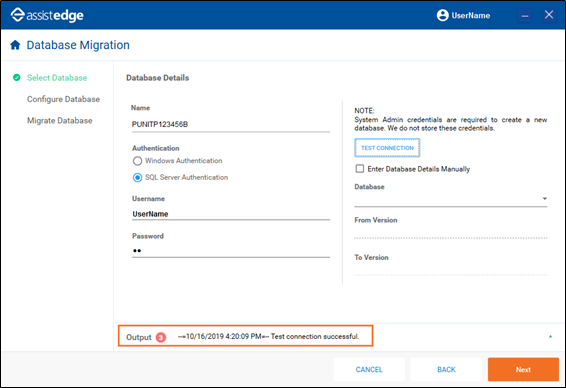
- In the Name field, enter the SQL server instance name.
- In the Authentication section, select the required authentication option to work on the database. Available options are:
- Windows Authentication: In Windows authentication, the account resides in Active Directory for the domain. It signifies the Windows based authentication process and uses Windows credentials of the logged in user.
- In the Username field, the authentication process retrieves the domain/account name of your system and populates it.
- In the Password field, enter the password for the logged in user.
- Give Full Control permission of <<AssistEdge Build Folder>>\AssistEdgeAutomation\migration folder to the user whose account is used for windows authentication.
- SQL Server Authentication: In SQL Server authentication, SQL server’s user credentials is used for authentication. It signifies the SQL server-based authentication process.
- In the Username field, enter the name of db_owner (or username having database creation privileges).
- In the Password, enter the password for the entered username.
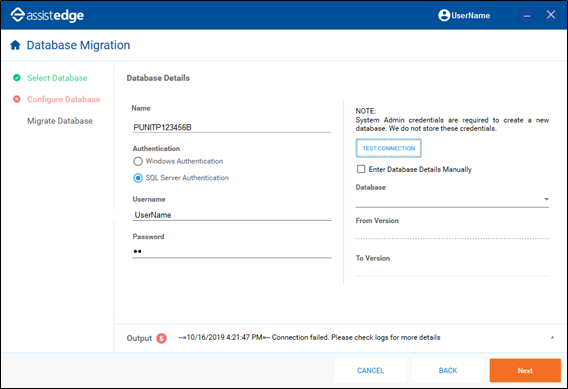
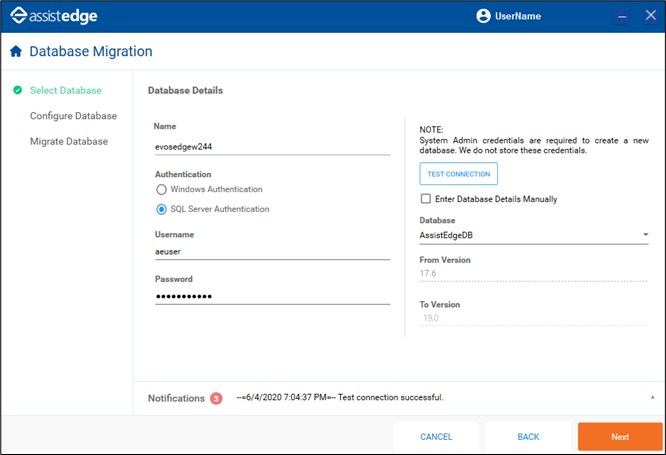
- Click Test Connection.
- If the connection is established, a notification message appears as Test connection successful.
- If the connection fails, ensure that the credentials and server instance name are correct, and try again.
- Once the test connection is successful, select the database from the drop-down list. The From Version and To Version fields are automatically populated based on the selected database.
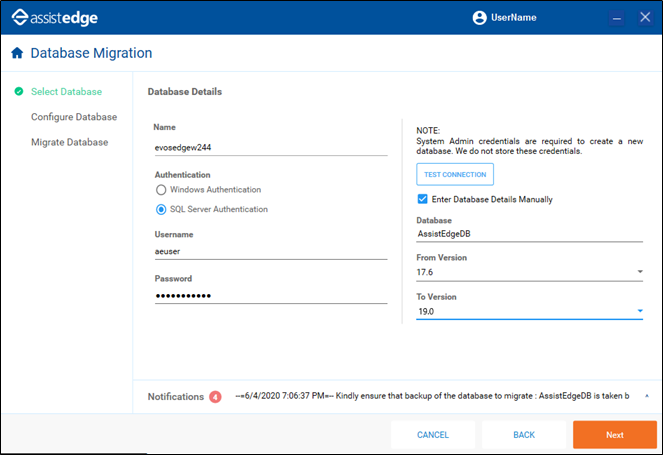
- If database list is not populated, select the Enter Database Details Manually check box and enter the database name. In the From Version and To Version list, select the required version.
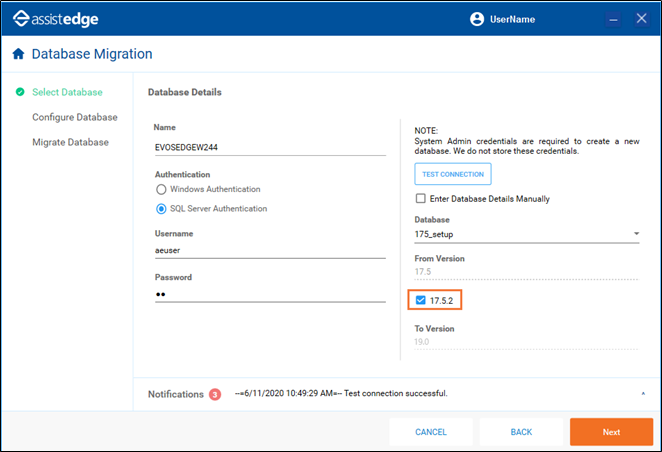
Note:
If you are migrating from 17.5.2, select the 17.5.2 check box below the From Version field to enable backward compatibility of the automation processes for exception handling.
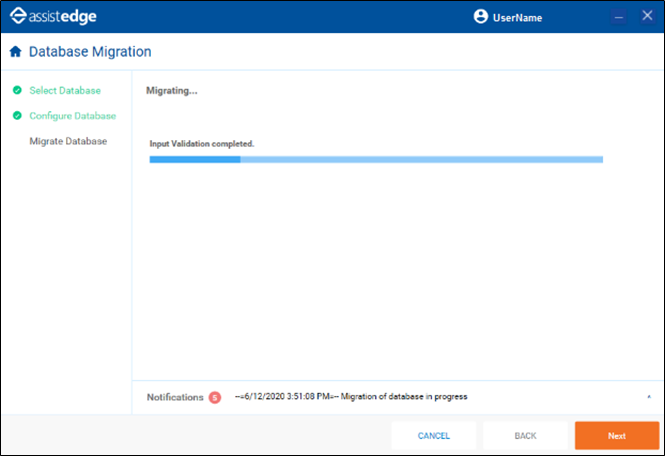
- Click Next. The migration process starts.
- Once database migration is completed, click the Home icon to navigate back to the Home page.
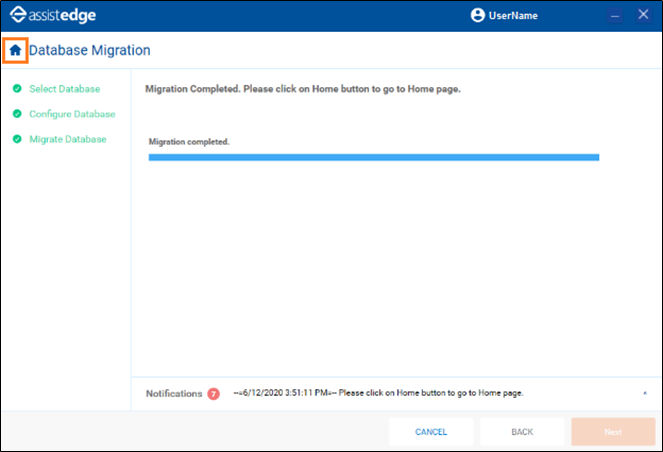
The Status in Database Migration pane indicates Successful migration.
|
Note: |
After database migration is completed, install AE RPA 19.0. For more details on installation steps, see Installation Guide. |