MQTT Activity
It acts as the publisher and helps to broadcast or raise the event to the subscriber.
|
NOTE: |
This activity must be used inside an Application activity or the system displays an error. This lets you establish a connection between Automation Studio and the configured IoT server. |
Prerequisite
|
Requirement |
Description |
|
IoT Server Details |
Server details of the IoT such as IP address of the server, port number must be available. |
|
Status of the IoT Server |
The IoT server must be up and running. |
|
Configure IoT server in Automation Studio |
|

Using MQTT Activity
- Create a new process.
- In the Canvas Tools pane, click Process Components to expand the tool and view the associated activities.
- Drag the Application activity and drop on to the Flowchart designer on the Canvas area. The validation error symbol disappears when required inputs are provided in the correct format.
- From the Application Type list, select MQTTApps. You must have at least one application added for it to appears in the list.
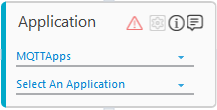
- In the Select An Application list, select the configured IoT server to which you want to broadcast the event. Alternatively, you can add a new IoT server at this point of time. To add a IoT server:
- In the Select An Application list, click Add New Application. The Add New Application dialog box appears.
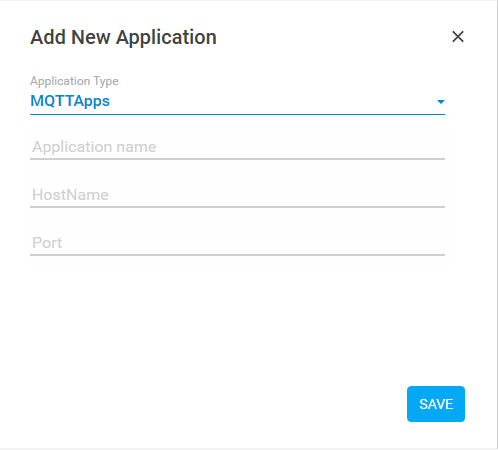
- In the ApplicationName field, enter a desired name for the IoT server.
- In the HostName field, enter the hostname of the server where the IoT is installed.
- In the Port field, enter the port number of the IoT server.
- Click SAVE. The IoT server is added.
- In the Select An Application list, click Add New Application. The Add New Application dialog box appears.
- Double click the Application activity, drag the MQTT Activity and drop inside the Application activity.
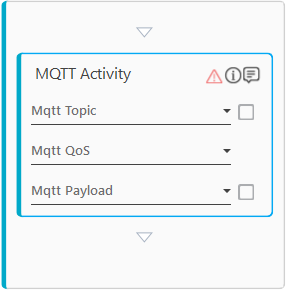
- In the Mqtt Topic list, select the parameter containing the name of the topic subscribed by the subscriber. You must pre-define the parameter holding the required value to make it appear for the selection. Alternatively, select the Is Default Value check-box and enter the required value in the hard coded format.
- In the Mqtt QoS list, select the level of the Quality of Service of the MQTT messaging protocol. 0,1 and 2 are the available options. You must select the level of MQTT QoS defined as per the IoT you are using.
- In the Mqtt Payload list, select the parameter containing the actual message that must be broadcasted. You must pre-define the parameter holding the required value to make it appear for the selection. Alternatively, select the Is Default Value check-box and enter the required value in the hard coded format.
The MQTT Activity is created.
|
NOTE: |
Sign-in credentials of the IoT server are required if the server is installed using Id and password. |
MQTT Activity Properties
The properties of a MQTT Activity are listed in the following table and can be edited in the Property grid on the right panel.
|
Property Name |
Usage |
|
Control Execution |
|
|
Ignore Error |
When this option is set to Yes, the application ignores any error while executing the activity. If set to NA, it bypasses the exception (if any) to let the automation flow continue; however, it marks the automation status as failure, in case of an exception. By default, this option is set to No. |
|
Delay |
|
|
Wait After |
Specify the time delay that must occur after the activity is executed. The value must be in milliseconds. |
|
Wait Before |
Specify the time delay that must occur before the activity is executed. The value must be in milliseconds. |
|
Misc |
|
|
Breakpoint |
Select this option to mark this activity as the pause point while debugging the process. At this point, the process freezes during execution allowing you to examine if the process is functioning as expected. In large or complex processes, breakpoints help in identifying the error, if any. |
|
Commented |
Select this option to mark this activity as inactive in the entire process. When an activity is commented, it is ignored during the process execution. |
|
DisplayName |
The display name of the activity in the flowchart designer. By default, the name is set as the name of the selected process. You can change the name as required. |