Step-By-Step Guide to Use File Splitter to Split an Excel File Row-wise
Let's see an example of splitting an Excel file row wise.
To split an Excel file row wise:
- In the Canvas Tools pane, click File to expand the tool and view the associated activities.
- Drag the File Splitter activity and drop on to the Flowchart designer on the Canvas.
- In the Parameter bar, create In arguments of type String and define the input values:
- FielPath - to pass the file path of the file along with the file name and file extension as input.
- SheetName - to pass the sheet name of the excel file that needs to split.
- In the Parameter bar, create an In argument, RowCount of type Int32 and define the input to indicate from the row from where the specified sheet must split.

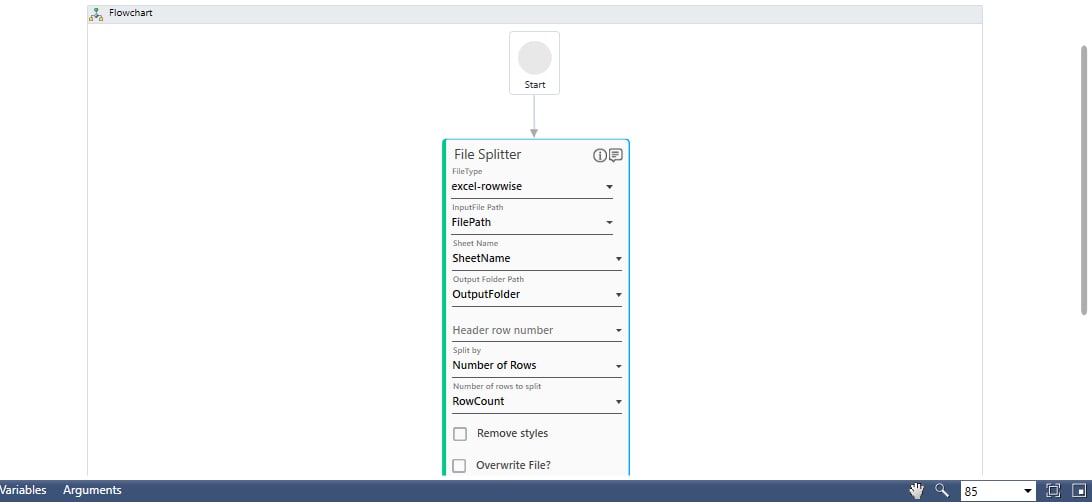
- In the FileType list, select excel-rowwise.
- In the InputFile Path list, select the FilePath argument created above.
- In the Sheet Name list, select the SheetName argument created above.
- In the Output Folder Path list, select the OutputFolder argument created above.
- You can leave the Header row number list empty as the default value is set as 1 and the header of the file that we have considered for this example is at the first row of the file. You can define this filed as per your file.
- In the Split By list, select Number of Rows as we intend to split the Excel file row wise.
- In the Number of files to split into/Number of rows to split into list, select the RowCount argument created above. Below is the sample automation process workflow created:
- Save the process.
- Setup the environment and then perform test run. You can publish, deploy and assign this process to a robot if you want to execute the process outside Automation Studio.
Observe the sheet 1 of the specified Excel file splits into two from the specified row count,3:
