The User Interface
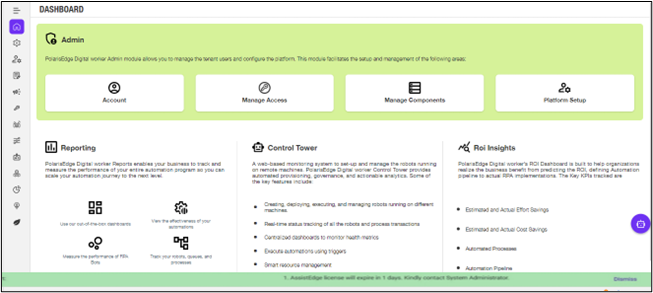
Engage Admin module contains multiple tabs and panel for easier access to specific functionalities. Once you log in to the Admin module, the home page is displayed.
Along with the various functional features and tools, which are further described in the guide, the Admin module home page also consists of the:
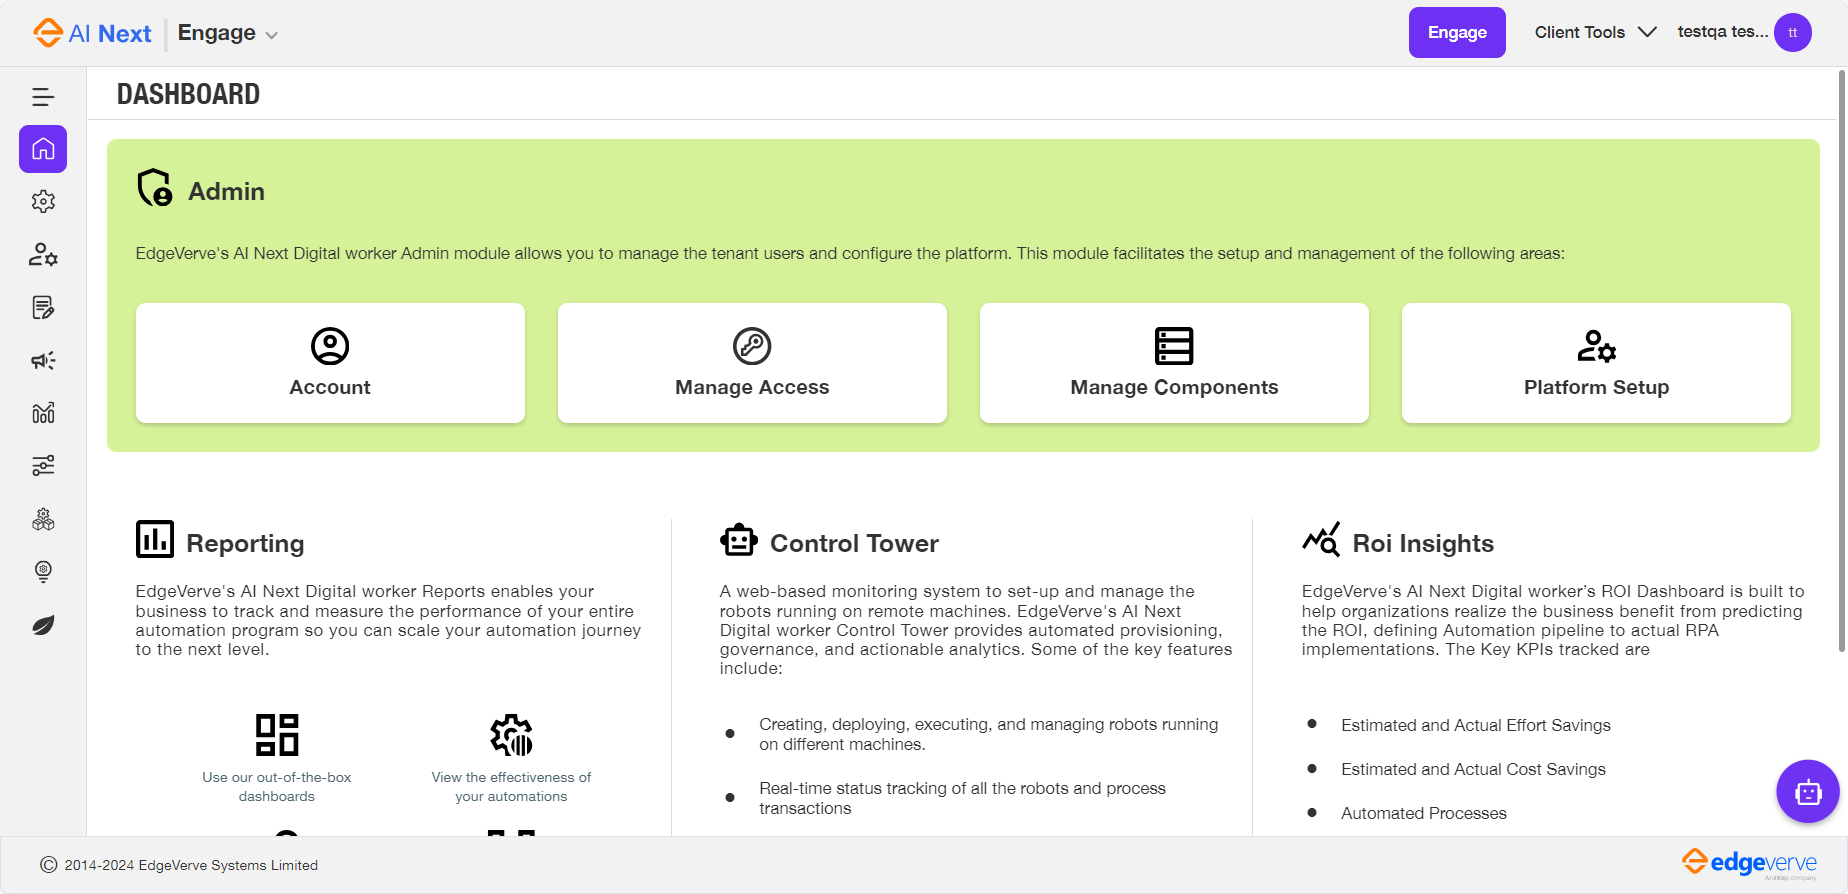
Top Bar
Top bar displays the company logo, welcome text for the authorized user, user setting and logout icons at the top right corner.
When you click on the Company Logo or Engage text, you are directed to the company website.
Top bar comprises of the following:
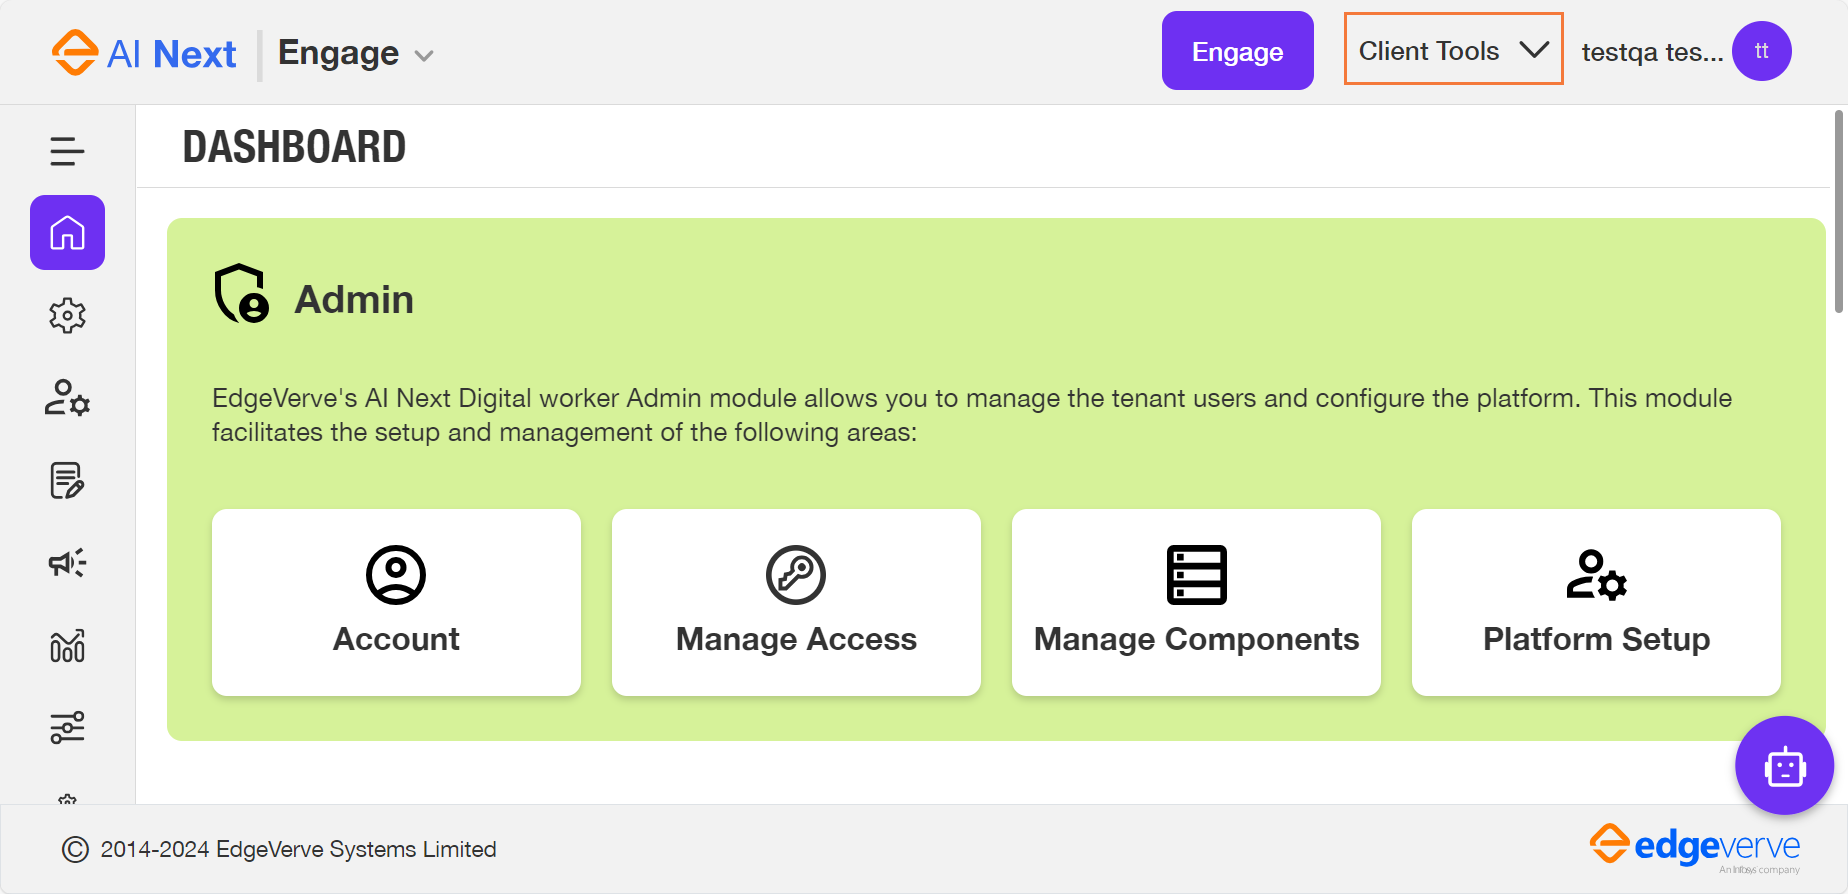
Client Tools
The Client Tools menu provides a list of all the executable tool files that you can download and install to your system. The following client tools are displayed in the Client Tools menu:
Launch Studio
Use the Launch Studio link to download or launch the Automation Studio application on your system. Launch Studio link enables you to install a compressed automation studio file from the web server directly.
- To launch Automation Studio on existing machine, click the Client Tools option, and select Launch Studio > Existing Machine option from the drop-down list. For more information about launching automation studio on existing machine. For more information about launching automation studio on existing machine, see Existing_Machine.
- To launch Automation Studio on new machine, click the Client Tools option and select Launch Studio > New Machine option from the drop-down list. For more information about launching automation studio on new machine, see New_Machine.
Existing Machine - Launch Studio
You can use the Existing Machine option to launch the Automation Studio on your system. If Automation Studio is already downloaded on your system, then you can select the Existing Machine option to use these tools directly from the Admin Module.
To launch automation studio on the existing machine:
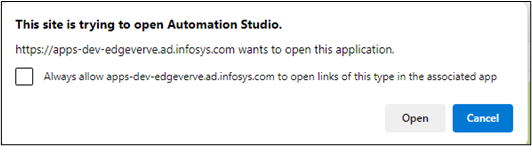
- Click the
 (Client Tools ) and select Launch Studio and then select Existing Machine.
The Open Automation Studio? window appears. - Click Open Automation Studio.
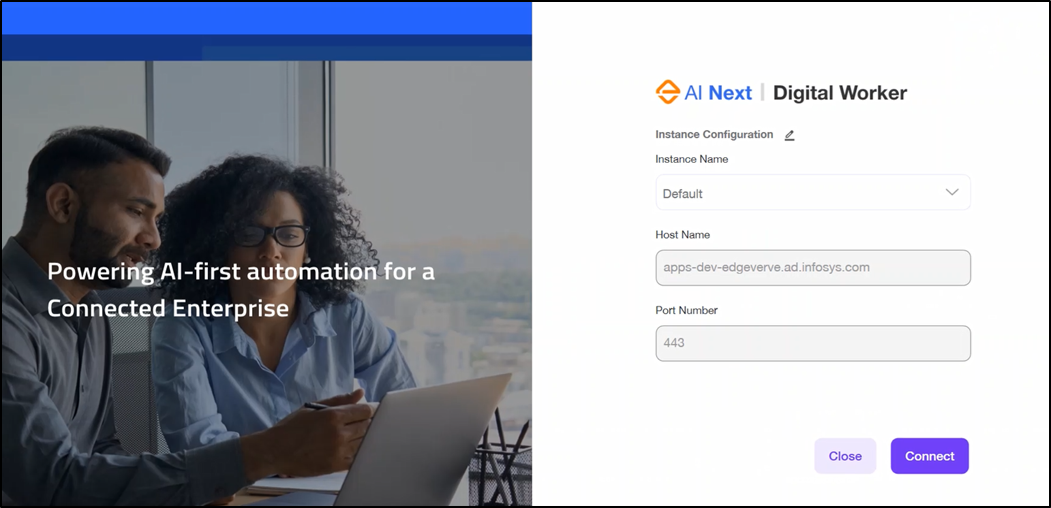
The Instance configuration window is displayed. The Instance Name, Host Name and Port Number fields are pre-configured. If you need to make change to the instance configuration, contact your administrator.
- Click Connect.
The Automation Studio version is initialized.
|
NOTE: |
In case the custom authorization is enabled then the User Name and Password fields appears, else the system uses the windows credentials to automatically connect to the Automation Studio. |
The Automation Studio page is displayed.
New Machine
When you are using the Automation Studio for the first time on your system, you must download the required client tool. To download the Studio directly to your system from the Admin Module, you can use the New Machine option.
The following example shows how to use the New Machine option to download the Automation Studio directly from the Admin Module.
To download Automation Studio on new machine:
- Click the (Client Tools) icon and select Launch Studio and then select New Machine.
The <studiolink>....exe is downloaded on your system. - Click exe file.
NOTE:
In case the custom authorization is enabled then the Username and Password fields appears, else the system uses the windows credentials to automatically connect to the Automation Studio. - Select the Studio download path.
The download progress details window appears.
|
NOTE: |
If you click CANCEL while downloading the studio for the first time, you can download the studio later by following the same process. |
The Instance configuration window is displayed. The Instance Name, Host Name and Port Number fields are pre-configured. If you need to make change to the instance configuration, contact your administrator.
- Click Connect.
In the Instance Configuration window, the User Name and Password fields appears.
Automation Studio version is initialized.
NOTE:
In case the custom authorization is enabled then the User Name and Password fields appears, else the system uses the windows credentials to automatically connect to the Automation Studio.
The Automation Studio page is displayed.
For more information about working with Automation Studio, see Automation Studio.
Download Robot
Use the Download Robot link to download the Robot application on your system. Download Robot link enables you to download Robot along with APMClient and Proctor from the Admin Module.
- To download Robot on new machine, click the Client Tools option, and select Download Robot > New Machine option from the drop-down list. For more information about downloading Robot on new machine, see New Machine.
New Machine
When you are using the Robot for the first time on your system, you must download the Robot. To download Robot and the related components directly to your system from the Admin module, you can use the New Machine option.
The following example shows how to use the New Machine option to download the Robot directly from the Admin module.
To download Robot on new machine:
- Click the (Client Tools) icon and select Download Robot and then select New Machine.
The .exe is downloaded on your system. - Click exe file, the Robot - Download window appears.
- Click DOWNLOAD to download Robot Agent on your system.
NOTE:
If you click CANCEL while downloading the Robot for the first time, you can download the tool later by following the same process
The Robot Agent is downloaded to the system along with APMClient and Proctor.
For more information about working of the Robot Agent, see Installation Guide.
Engage
Engage enables the Low Code designers to create or edit Web applications. On the main user
interface, click the Engage button to access the design view. To access a specific app created on the Engage App center you can use the Business Apps. For more information about Business Apps, see Engage.
Tools
You can view their profile and update the settings by clicking the User Profile option available at the top right corner.
Depending on the assigned role, users can change the following settings:
Languages
Currently, Admin module supports two languages - English and French.
To apply language:
From the user profile dropdown list, point to Language and then select the desired language.
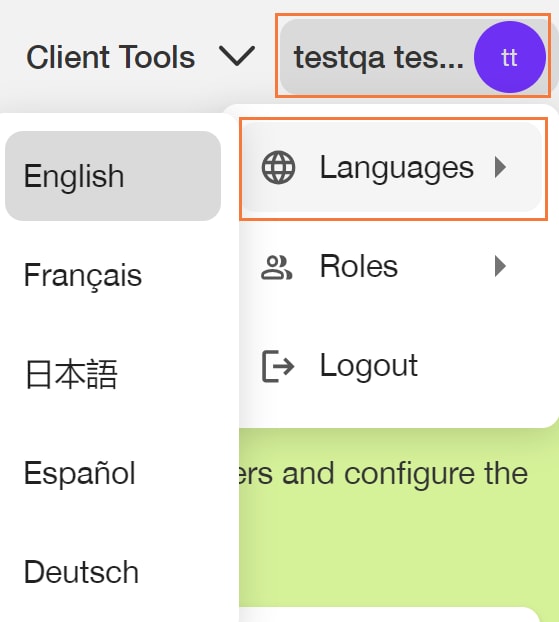
Roles
Under Roles option, all the available roles in the system are displayed for users with Super_Admin role. These roles grant users control of the specific module(s) or features described by the permission title. If you log into Admin module as Super_Admin , below roles are displayed by default:
- Super_Admin
- Admin
- RPAITAdmin
- RPAProcowner
- VirtualUser
- Business_Analyst
- Business_Leader
-
CoE_Cockpit_Approver
For more information about the roles and its access, see Specify Roles sections in the Managing Roles.
A Engage user assigned a specific role Super_Admin, has access and privileges to assign/revoke any role for Digital Worker/Engage User(s).
-
For the users with Super_Admin role, all the roles available in the system are displayed.
-
For the other role users, only their role is displayed.
When you login to the Adminmodule, the menus displayed on the top banner are role based. It means that access to the available options in the Admin module is dependent on the role.
When you (super admin) change your role, the options available for you in the admin module changes as well. Users with Super Admin role can change to a lower role temporarily to see a glimpse of the pages as seen by the users in selected lower role.
To change role temporarily:
From the user profile dropdown list, point to Roles and then select the desired roles.
Notification
Users get notifications for the following:
- Server License: The user can see the License Expiry Alert on the Admin screen, 14 days before the expiry till it gets expired anytime on the screen. The user can get the trigger alert message before the expiration of the server license. You can see this alert message at the bottom window of the Admin module. Any time the user can check the expiry of the Server License in the License Manager/Server License tab.
If the license has expired the user will be notified with mail.
Logout
To log out of the application:
- From the user profile dropdown list, click the Logout icon.
A confirmation pop-up window appears. - Click Yes.
Copilot
The Copilot functionality enables you to acquire information about various functionalities, processes or issues pertaining to the Admin module. For example, instructions on how to add user to the Digital Worker instance or information on license expiry and so on.
To access the Copilot:
- Click the
 (Copilot) icon on the Admin module home page, on the right side of the screen. The Copilot chat window appears.
 - Enter your query in the Ask your question box and click the
 (Send) icon.
The responses to the query are listed in the chat window.