Baked in ML
ML Component do not Start
- Validate if ML component is enabled or not in values.yaml of your environment.

Also check global section. If key is not present, then add it.

- Execute below commands to check logs:
- Command to get ML pod name:
kubectl get pod | grep ml
Example output:

- Command to get all ML logs using ML pod name
kubectl logs <ML_POD_NAME> - Command to get ML – modelgenerator logs
kubectl logs <ML_POD_NAME> | grep modelgenerator - Command to get ML – queueforecast logs
kubectl logs <ML_POD_NAME> | grep queueforecast - Command to get ML – predictor logs
kubectl logs <ML_POD_NAME> | grep predictor - Command to get all ML logs using ML pod name with log level ERROR
kubectl logs <ML_POD_NAME> | grep ERROR - Steps to update log level to DEBUG
- Open values.yaml file for your environment and look for section ‘ml’. Below is the sample:

- Update value to 10 to enable DEBUG logs.
- Helm upgrade is required to update the changes
helm upgrade <DW_Chart_Name> <Path_To_Values_File> - Post upgrade ML pod restart may be required. To restart execute below command to delete current pod:
kubectl delete pod <ML_POD_NAME> - Now DEBUG logs can be checked with the same command mentioned above with new pod name
- Open values.yaml file for your environment and look for section ‘ml’. Below is the sample:
- Command to get ML pod name:
ML Training Data csv File not Generated
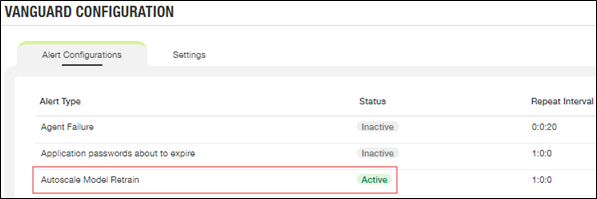
- Turn AutoscaleModelRetrain job Mode to Active. This is to start collecting training data for ML model generation/retrain.

NOTE:
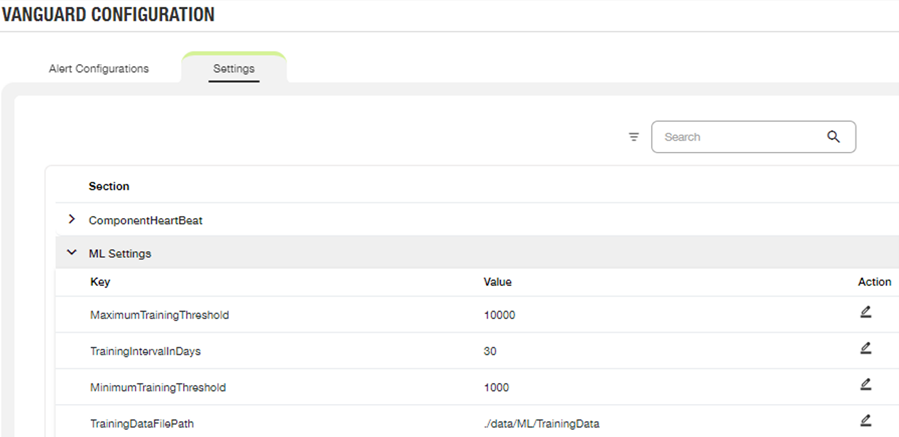
ML training data will not be collected for retraining/creation of ML models unless this job is turned to “Active”. - Below are the additional settings which can be modified from Admin module.

ML Model is not get Generated
- Check the modelgenerator logs for any errors. Refer ‘ML component does not start’ section for more details.
Email Reports for SLAViolation and RequestExpiry does not get Generated
- Make sure to turn on "SLAViolation", "RequestExpiry", and "MLPredictionDailyReport” mode "Active.

- Make sure the SMTP server is configured correctly. For more information, see ‘Server Properties’ section in Installation.